


Push-ups are a simple and effective exercise for strengthening your upper body and core. However, they can sometimes lead to wrist pain, especially if done incorrectly or with excessive strain. How To Heal Wrist Pain From Push-Ups is essential for those experiencing discomfort, helping you modify your technique and find relief.
Using suspension equipment makes the exercise harder and works more muscles, while regular push-ups on the floor are better for focusing on your chest and shoulders. This shows that push-ups can be adjusted to fit different fitness levels or recovery needs, including ways to prevent and heal wrist pain.
Push-ups put a lot of stress on our wrist joints, which can lead to pain or discomfort, especially during intense workouts. Chronic wrist pain is common and can impact our ability to exercise.
Luckily, there are simple ways to alleviate wrist pain. This guide will share tips to strengthen wrists, ease discomfort, and keep you exercising pain-free. Let’s take care of our wrists!
Understanding Wrist Pain During Push-Ups

When you perform push-ups [2] with your wrist bent backward (hyperextended), the forces during the movement are distributed differently across the wrist, putting extra pressure on the ligaments and wrist joints that are not designed to handle such force.
This strain can overstretch the wrist ligaments, leading to pain and discomfort and potentially causing injuries like carpal tunnel syndrome or wrist fractures over time. How to heal wrist pain from push-ups is essential, as doing push-ups regularly in this hyperextended position can lead to repeated stress on the wrists, resulting in long-term chronic pain, particularly for individuals with previous wrist injuries.
Causes Of Wrist Pain

Wrist pain can stem from multiple causes, including injuries, repetitive movements, or poor ergonomics. Recognizing these issues can make it easier to figure out how to heal wrist pain from push-ups while also addressing other contributing factors.
- Injuries or Trauma: Falls, fractures, ligament tears, or direct impact.
- Repetitive Movements: Typing, sports, or lifting causing tendonitis or overuse injuries.
- Nerve Problems: Carpal tunnel syndrome, nerve compression, or neuropathy.
- Joint Issues: Arthritis, gout, or other conditions affecting wrist joints.
- Blood Supply Problems: Conditions like Kienböck’s disease causing bone damage.
- Infections: Serious infections like septic arthritis or osteomyelitis.
- Systemic Conditions: Diseases like lupus, diabetes, or thyroid issues.
- Poor Ergonomics: Repeated stress from bad posture or awkward hand positions.
- Psychological Factors: Stress or workers’ compensation claims affecting pain perception.
Checking And Correcting Your Form
- Poor form can cause wrist pain during push-ups, so it’s essential to check and correct your form.
- Make sure to plant your hands firmly on the ground with your weight evenly distributed between your palms and all ten fingers.
- Focus on your shoulders, making sure they’re screwed in toward your body instead of flared out.
- Keep your wrists in a neutral position, avoiding excessive extension or flexion.
Easy Tips To Relieve Wrist Pain After Push-Ups
- Strengthen wrists with wrist curls or grip exercises.
- Apply ice for 10–15 minutes to reduce swelling.
- Use heat therapy to relax tight muscles and improve blood flow.
- Try incline push-ups on a wall to reduce wrist pressure.
- Wear a wrist brace for support during push-ups.
- Massage your forearms and wrists to relieve tension.
- Spread your fingers wide to distribute weight evenly.
- Take rest days to let your wrists recover.
- Strengthen your core and shoulders to take stress off your wrists.
- If pain continues, reduce workouts or see a doctor.
How to Keep Training Safely with a Wrist Injury
1. Incline Push-up

- Begin by placing your hands on a sturdy elevated surface, like a bench, step, or table, ensuring your body forms a straight line from your head to your heels.
- Engage your core to maintain a solid, stable position. Lower your chest towards the surface while keeping your elbows at a 45-degree angle, making sure your wrists stay neutral to reduce strain.
- Press back up to the starting position, fully extending your arms without locking your elbows.
- Hold this position for several deep breaths, keeping your body aligned and focused.
- Repeat the movement for several repetitions.
2. Knee Push-ups
- Begin in a 4-point position with your arms beneath your shoulders and your knees under your hips, maintaining good alignment with your head, shoulders, and hips.
- Move your hands forward to increase the angle of your body.
- Tighten your abdominal muscles and bend your elbows to lower your upper body towards the floor.
- Raise back up to return to the starting position and repeat the movement with 10 repetitions.
- This modification reduces the load on your wrists while still engaging your upper body muscles.
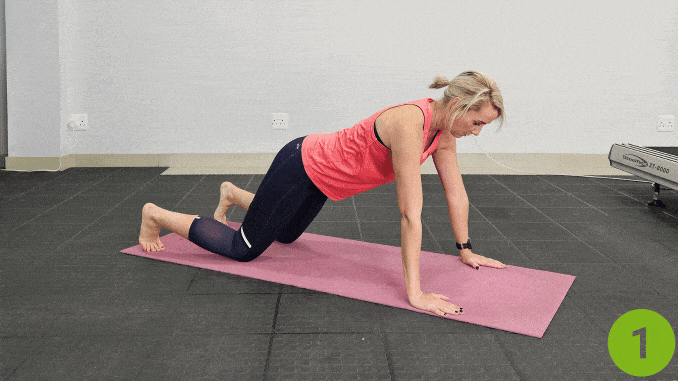
3. Knuckle Push ups

- Begin this process in a high plank position with your fists closed, resting on your knuckles, and your wrists in a neutral position.
- Ensure your knuckles are aligned directly beneath your shoulders to maintain good upper body alignment.
- Engage your core and maintain a straight line from your head to your heels.
- Lower your chest towards the floor by bending your elbows while keeping your fists firmly planted on the ground.
- Push through your knuckles to return to the starting position.
- Repeat the movement for the desired number of repetitions, focusing on controlled motion and steady breathing.
Tips For Reducing Wrist Strain
- Reducing wrist strain is key to preventing wrist pain during push-ups.
- Keep your wrists in a neutral position, avoiding excessive extension or flexion.
- Use proper form and technique when exercising, and avoid overloading your body beyond its current capacity.
- Take regular breaks to rest and recover, and stretch afterwards to reduce muscle tension.
Wrist Exercises After Push-ups
According to Doctor Jo, a Physical Therapist and Doctor of Physical Therapy, there are three effective wrist stretches that can help relieve discomfort and improve flexibility:
1. Wrist Flexor Stretch

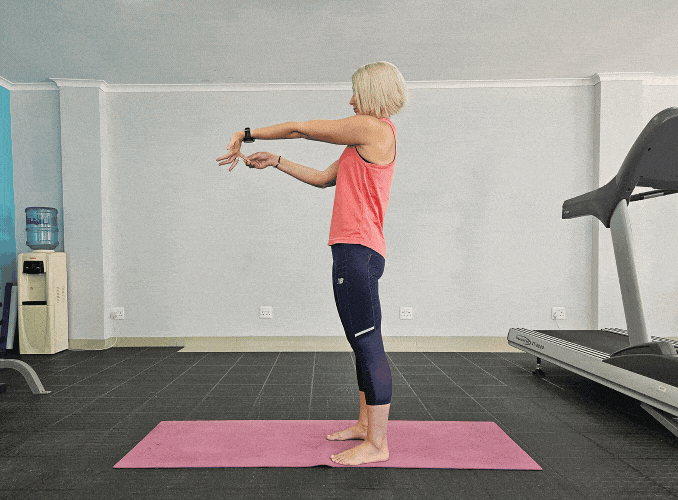
- Begin in an upright standing or sitting position with your arms extended straight in front of you at shoulder height.
- Ensure proper alignment with your head, shoulders, and hips.
- Turn your palm upward, and use your opposite hand to gently pull your fingers back toward your body, feeling a stretch in the underside of your forearm.
- Hold this position for several deep belly breaths, in through your nose and out through your mouth.
- Relax and return to the starting position. Repeat the stretch on the opposite hand.
2. Elbow Flexion And Wrist Extensor Stretch
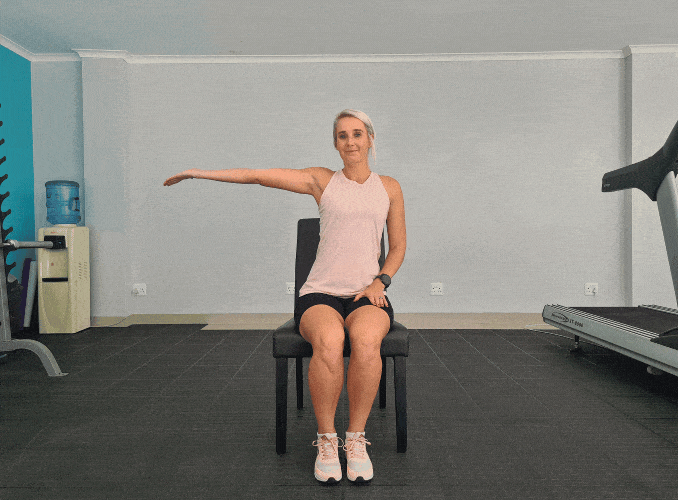
- Begin this in an upright sitting position, maintaining good alignment with your head, shoulders, and hips. Extend one arm out to the side at shoulder height, keeping your palm facing downward.
- Bend your elbow, bringing your hand toward your shoulder to stretch your wrist extensors and forearm.
- Hold this position for several deep belly breaths, in through your nose and out through your mouth.
- Relax and return to the starting position.
- Repeat the stretch on the opposite arm.
3. Wrist Rotations

- Begin in an upright standing or sitting position, maintaining good alignment with your head, shoulders, and hips.
- Extend both arms in front of you at shoulder height, forming fists with your hands.
- Rotate your wrists in slow, controlled circles in one direction, then reverse the direction.
- Perform 10–12 rotations in each direction. Relax and return to the starting position.
4. Prayer Stretch

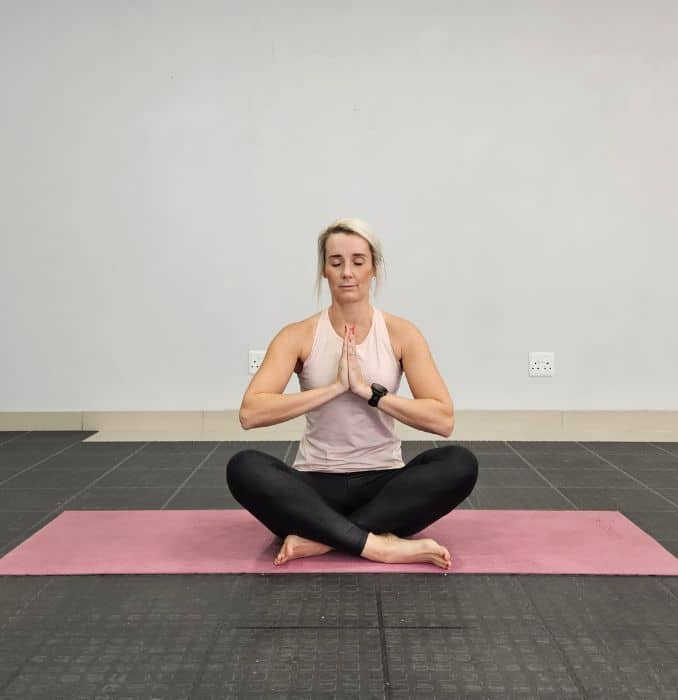
- Begin in an upright sitting or standing position, maintaining good alignment with your head, shoulders, and hips.
- Place your palms together in front of your chest in a prayer position, with your fingers pointing upward.
- Press your hands together and gently lower them toward your abdomen, keeping your palms connected, until you feel a stretch in your wrists and forearms.
- Hold this position for several deep belly breaths, in through your nose and out through your mouth.
- Relax and return to the starting position.
5. Wrist Flexion And Extension
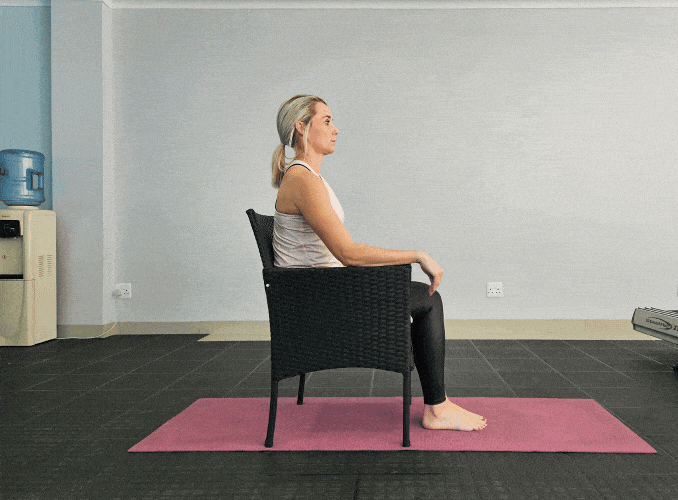
- Begin in an upright sitting position on a chair, maintaining good alignment with your head, shoulders, and hips.
- Rest your arms comfortably on your thighs, with your hands relaxed at the edge.
- Start with your wrists in a neutral position.
- Slowly move one hand upward, bending at the wrist (wrist extension), and then downward (wrist flexion) in a controlled motion.
- Perform 10–12 repetitions on one wrist, keeping your movements steady and fluid.
- Return to the starting position and repeat the movement on the opposite wrist.
Preventing Wrist Strain
- Preventing wrist strain is key to avoiding wrist pain during push-ups.
- Make sure to warm up before exercising and stretch afterwards to reduce muscle tension.
- Avoid overloading your body beyond its current capacity, and gradually increase the intensity and volume of your workouts.
- Listen to your body and take regular breaks to rest and recover.
When To Seek Medical Attention
- If you’re experiencing persistent or severe wrist pain, it’s essential to seek medical attention.
- A physical therapist or healthcare professional can help diagnose the underlying cause of your wrist pain and develop a treatment plan.
- Don’t ignore wrist pain, as it can lead to further injury and prolonged recovery.
- Seek medical attention if you experience numbness, tingling, or weakness in your hands or wrists.
Conclusion
Wrist pain during push-ups is a common issue that can be addressed with proper form, exercises, and modifications. How to heal wrist pain from push-ups involves understanding the causes of causes of wrist pain [3] and taking steps to alleviate it. By addressing these issues, you can prevent future injuries and promote overall wrist health. Remember to listen to your body and seek medical attention if the pain persists or worsens.
To decrease joint and muscle pain, check out The Top 10 Morning Movements to Loosen Up Your Joints here!


FAQ
What Are The Causes Of Wrist And Hand Pain?
According to Dr. Himamshu Vats, there are several possible causes of wrist and hand pain, including repetitive strain injury (RSI). This condition happens when movements like push-ups are repeated excessively, leading to strain on the muscles, tendons, and nerves in the wrist and hand.
How Can I Quickly Fix My Wrist Pain?
Rest your wrist, apply ice, and avoid activities that worsen the pain. You may also try over-the-counter pain relief or wear a wrist brace for support. If the pain persists, see a healthcare provider for a proper diagnosis.
Can Too Many Push-Ups Cause Wrist Pain?
Yes, doing too many push-ups or improper form can strain your wrists, leading to pain. This can happen if your wrists are not properly aligned or if they bear too much weight during the exercise.
Will Strengthening The Wrist Make The Pain Go Away?
Strengthening the wrist may help prevent future pain by improving muscle support around the joint. However, it’s important to address any current injury first and avoid activities that could worsen it.
How Do You Fix Push-Up Wrist Pain?
To fix wrist pain from push-ups, rest your wrist, use ice to reduce inflammation, and check your push-up form. You can also try doing push-ups on your fists or using push-up bars to reduce wrist strain. If the pain continues, consult a healthcare provider.
(1) Calatayud, J., Borreani, S., Colado, J. C., Martín, F. F., Rogers, M. E., Behm, D. G., & Andersen, L. L. (2014). Muscle activation during push-ups with different suspension training systems. Journal of Sports Science and Medicine, 13(3), 502–510. https://doi.org/10.1002/PMC4126284
(2) Polovinets, O., Wolf, A., & Wollstein, R. (2018). Force transmission through the wrist during performance of push-ups on a hyperextended and a neutral wrist. Journal of Hand Therapy, 31(3), 322-330. https://doi.org/10.1016/j.jht.2017.04.005
(3) Forman, T. A., Forman, S. K., & Rose, N. E. (2005). A clinical approach to diagnosing wrist pain. American Family Physician, 72(9), 1753–1758.