

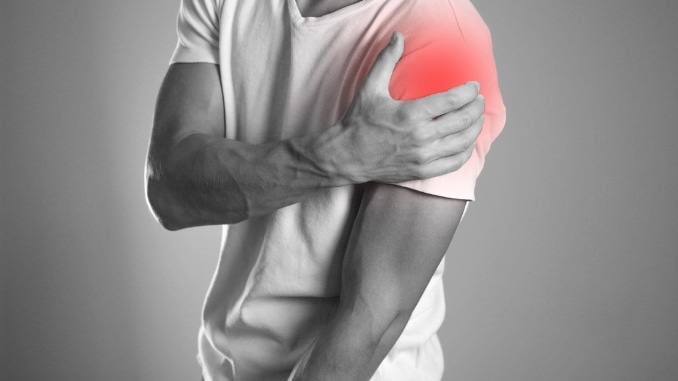
When I first started doing side planks, I loved how they strengthened my core and improved my overall stability. But pretty quickly, I started feeling pain in my shoulder joint, which was frustrating.
If you’re in the same boat, the good news is that most shoulder pain during side plank comes down to improper form or weak stabilizing muscles—things that can be fixed with some simple tweaks.
How to Modify a Side Plank to Prevent Shoulder Pain
1. Knee-Down Plank Modification
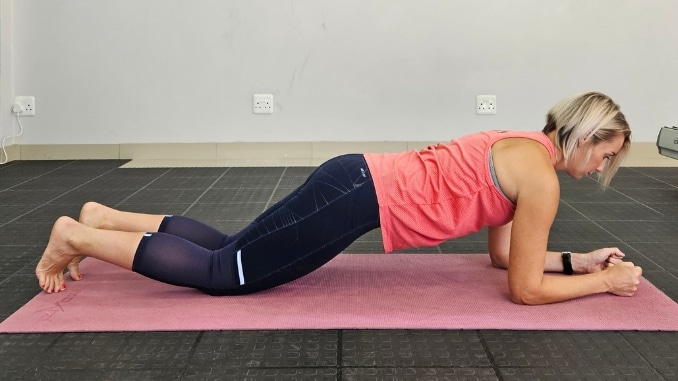
- Begin in a forearm plank position with arms below your shoulders, your legs straight and your toes tuck on the floor.
- Maintain good alignment with your head, shoulders, hips and toes.
- Tighten your abdominal muscles and lower both knees to the floor while keeping your back flat, avoiding any sagging or arching in your lower back.
- Hold this position foe several deep belly breaths, in through your nose and out through your mouth.
2. Forearm Side Plank
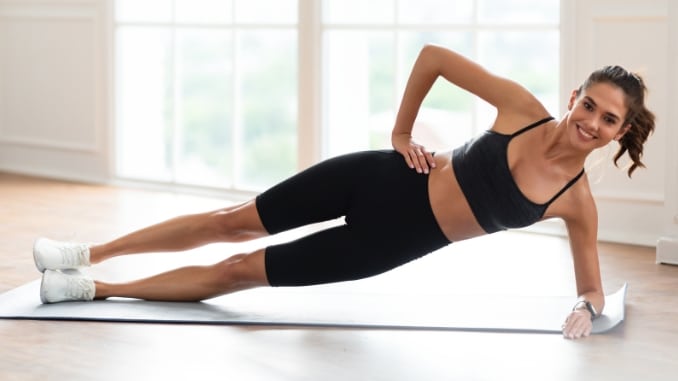
- Begin by lying on your side with your legs extended and stacked on each other.
- Prop yourself up on your forearm, ensuring your elbow is directly beneath your shoulder for proper alignment.
- Engage your core and lift your hips off the floor, forming a straight line from your head to your feet.
- Place your opposite hand on your hip or extend it toward the ceiling for balance.
- Hold this position for several deep belly breaths, in through your nose and out through your mouth.
- Relax and return to the starting position, repeating the movement on the opposite side.
Stretches and Mobility Exercises for Shoulder Pain Relief
1. Cross-Body Shoulder Stretch

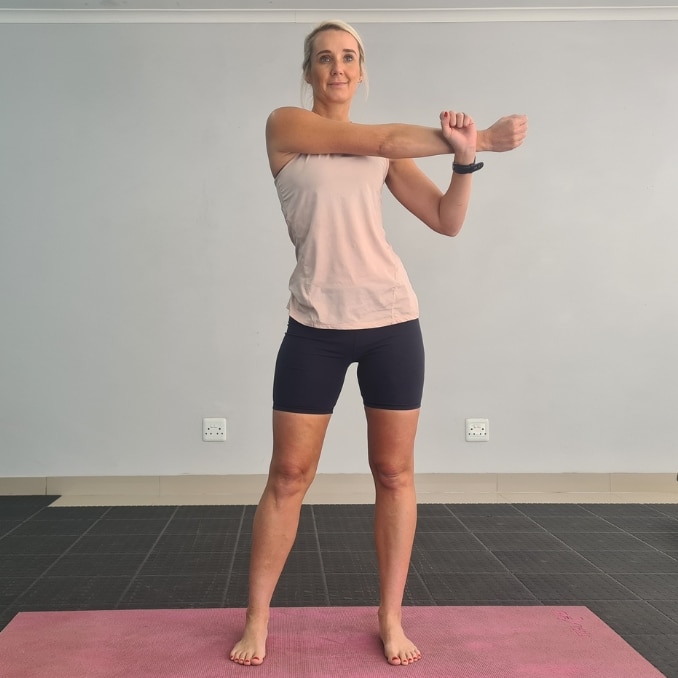
- Begin in an upright standing position with your feet shoulder-width apart, while maintaining good alignment with your head, shoulders, hips, and legs.
- Contract your core. Reach across your chest with one arm and use your other hand to pull your arm closer to your body, looking for a light stretch.
- Turn your head gently toward the opposite shoulder.
- Hold this position for several deep belly breaths, through your nose and then out through your mouth.
- Relax and repeat the movement on the opposite side.
2. Doorway Chest Stretch
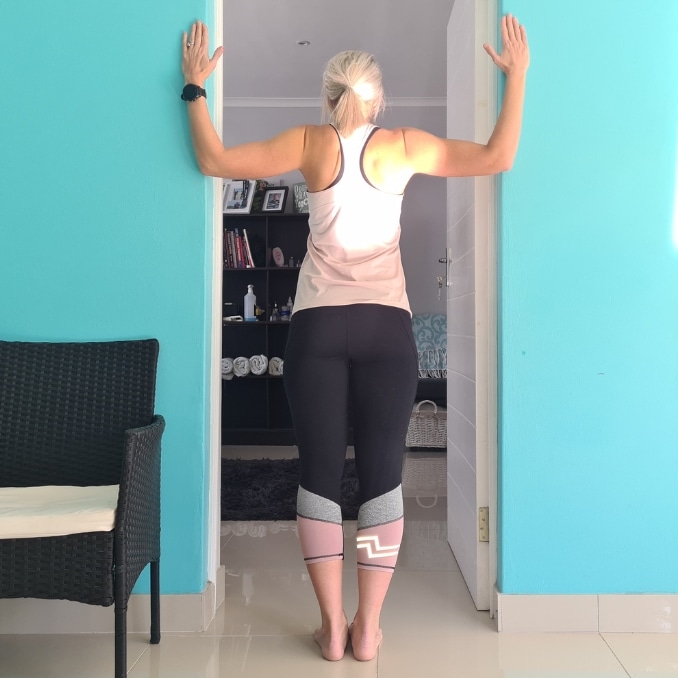
- Begin in an upright standing position in a doorway with your feet close together, while maintaining good alignment with your head, shoulders, hips, and legs.
- Position your arm at a 90-degree angle against the door frame at shoulder level.
- Engage your core.
- Lean forward gently to stretch your shoulder and chest.
- Hold this position for several deep belly breaths, in through your nose and then out through your mouth.
- Relax and repeat the movement with 5 repetitions.
3. Thread the Needle Stretch
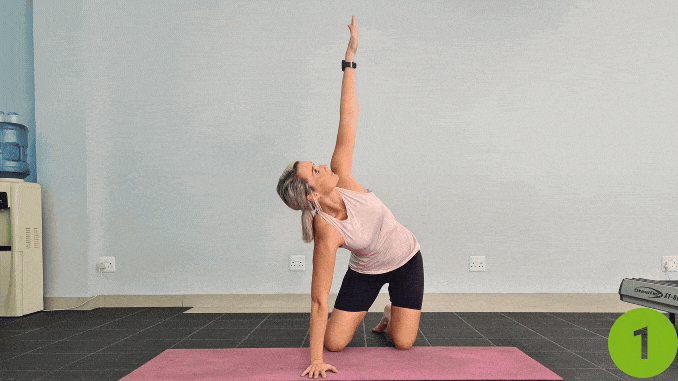
- Begin in an upright kneeling position with your hands placed directly beneath your shoulders and your knees under your hips, while maintaining good alignment with your head, shoulders, and hips.
- Tighten your core and lift one arm toward the ceiling, rotating your torso gently.
- Then, thread the lifted arm underneath your body, lower your shoulder, and head toward the floor.
- Hold this position for several deep belly breaths, in through your nose and out through your mouth.
- Return to the starting position and repeat the movement on the opposite side.
4. Shoulder Rolls
- Begin in an upright standing position with your feet shoulder-width apart, while maintaining good alignment with your head, shoulders, hips, and legs.
- Rest your arms at your sides or place your hands on your shoulders.
- Engage your core.
- Shift your shoulders forward, then roll them up and back until you feel resistance in your shoulder blades.
- Relax and repeat the movement.
- Complete 10 repetitions.
5. Wall Angel
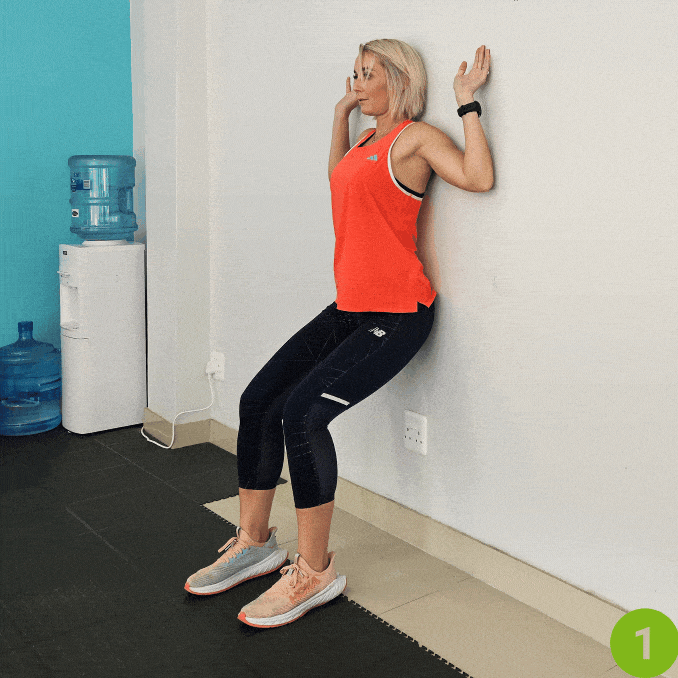
- Begin in an upright standing position with your back against the wall with your feet hip-width apart and a few inches away from the wall.
- Ensure your head, shoulders, and lower back are touching the wall.
- Engage your core and bend both knees to lower your hips as you position your arms in a “W” shape with elbows bent at a 90-degree angle, and press them against the wall.
- Slowly slide your arms up into a “Y” position, maintaining contact with the wall.
- Hold this position for several deep belly breaths, in through your nose and out through your mouth.
- Return to the starting position by sliding your arms back down into the “W” shape.
- Repeat the movement.
Importance of Side Plank Exercises
The side plank is an excellent exercise [1] for improving balance and stability. Many people have one side that’s stronger than the other, which is common. Side planks help balance those strength imbalances, particularly around the shoulder joint.
When you work on both sides, you’re not just getting stronger, but you’re also becoming more balanced and stable, which can help prevent injuries and improve your overall movement. Side planks are one of those exercises [2] that help you build that even strength.
However, despite their benefits, side plank can sometimes lead to shoulder pain [3] if not done correctly, especially when your rotator cuff muscles or stabilizing muscles aren’t strong enough to support the movement. So, it’s important to understand what might be causing that discomfort.
According to a PT, one main tip to prevent shoulder pain is to push the floor away with your elbow, keeping the shoulder away from the ear. This ensures proper scapular retraction and optimal shoulder positioning, preventing strain on the anterior shoulder and allowing better activation of the obliques.
What Causes Shoulder Pain During Side Planks
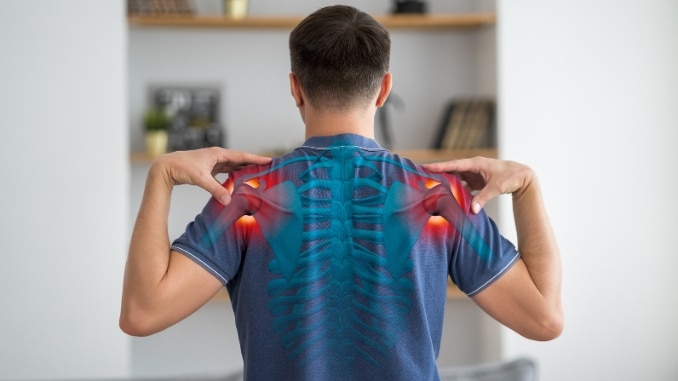
- Rotator cuff strain: Overloading or poor form can lead to issues with the rotator cuff muscles.
- Improper shoulder alignment: Poor positioning of the shoulder joint can lead to strain and discomfort.
- Weak scapular muscles: The scapular muscles play a crucial role in stabilizing the shoulder during side planks.
- Overuse injuries: Repetitive plank exercises without proper rest can cause overuse injuries.
Is This Pain Normal
It’s normal to feel your shoulders working, especially when you’re just starting or building strength. However, sharp or persistent pain during a side plank indicates something may be wrong.
I learned to watch out for:
- Sharp pain during the plank.
- Pain that sticks around after you’re done.
- Weakness or trouble moving your shoulder.
- Pain when lifting your arm.
These signs often point to issues with the rotator cuff or stabilizing muscles, so it’s important to address them early.
Conclusion
To prevent the shoulder pain during side plank, focus on maintaining proper form—it’s crucial for avoiding strain. Strengthening muscles like the rotator cuff and scapular muscles helps stabilize the shoulder.
Don’t hesitate to use modifications such as the knee-down or forearm-side plank to reduce the load and protect your shoulder as you build strength.
If the pain continues despite these adjustments, see a professional. Don’t push through sharp pain—your body is telling you something, and it’s important to listen.
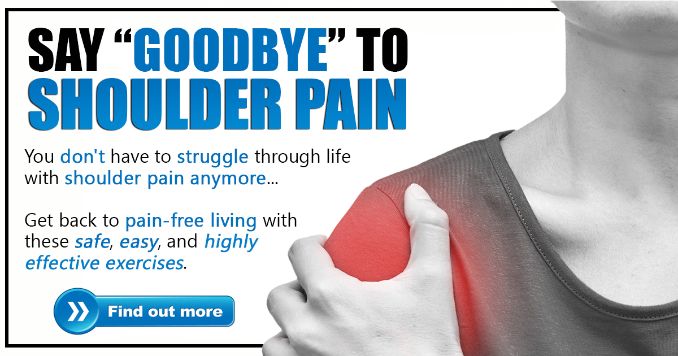
If you are looking for a program to help you overcome shoulder pain for good, click here to check out the Shoulder Pain Solved program.

Frequently Asked Questions
Why does my shoulder hurt when I do side planks?
Shoulder pain during side planks can occur for a few reasons. Commonly, it happens if your shoulder isn’t properly aligned or if you’re putting too much pressure on it.
This can be due to weak shoulder muscles, improper form, or overloading the shoulder joint. If you’re not engaging your core and glutes correctly, your shoulder might have to bear more weight than it should.
How to do a side plank without hurting your shoulder?
To prevent shoulder pain during side plank, make sure our shoulder is directly stacked over your elbow, keeping your body in a straight line. Engage your core, glutes, and inner thighs to distribute the weight more evenly and reduce strain on the shoulder. Keep your shoulder blade pulled down and away from your ear, which helps reduce tension in the shoulder joint.
Are side planks good for shoulders?
Yes, side planks can be good for shoulders when done with proper form. They help strengthen the muscles around the shoulder, including the rotator cuff, and improve stability. Side planks also engage the core and improve overall balance, which indirectly benefits shoulder and posture.
Are planks bad for rotator cuff?
Planks themselves aren’t inherently bad for the rotator cuff. However, if you don’t use proper form, or if you push yourself too hard. It’s essential to ensure you’re maintaining a neutral shoulder position and not allowing the shoulders to collapse or bear too much weight. If you already have a rotator cuff injury or weakness, it’s a good idea to consult professional before doing planks.
1. Laskowski, E. (2018). Are isometric exercises good for strength training? Mayo Clinic. https://www.mayoclinic.org/healthy-lifestyle/fitness/expert-answers/isometric-exercises/faq-20058186
2. Plank Exercises: What They Do For Your Body. (2021, November 17). Cleveland Clinic. https://health.clevelandclinic.org/plank-exercise-benefits
3. Murphy, R. J., & Carr, A. J. (2010). Shoulder pain. BMJ Clinical Evidence, 2010, 1107. https://www.ncbi.nlm.nih.gov/pmc/articles/PMC3217726/