Understanding Shin Splints
Shin splints are pain in the lower leg, usually from doing the same activity over and over again. They are often felt along the inner side of the shinbone.
According to Dr. Richu Mary Grace, a doctor of medicine, shin splints are also called medial tibial stress syndrome. This condition happens when there is stress on the shinbone and the tissue that connects muscles to the bone, which can lead to swelling. It can be treated with rest, ice, and other methods to reduce pain and inflammation.
Shin splints happen when activities that involve a lot of impact, like running, put too much strain on the muscles and bones in the lower leg. Having flat feet or high arches can also make shin splints more likely.
Shin Splint Symptoms
- Dull ache or pain along the shinbone [1].
- Tenderness or swelling along the inner edge of the tibia.
- Pain may worsen during exercise and improve with rest.
- Severe cases can lead to pain even during daily activities.
Preparing for Foam Rolling
- To manage shin splints effectively, foam rolling for relief techniques should target the lower leg muscles, namely the gastrocnemius (calf) and tibialis anterior muscle in the front of the lower leg.
- It is essential to listen to your body when performing foam rolling for shin splints relief: go slowly, stay relaxed, and don’t force yourself into any adverse pain.
- Use a foam roller that is suitable for your body weight and comfort level.
Foam Rolling Shin Splints
- Begin in a full-arm plank position with your hands directly under your shoulders, maintaining alignment with your head, back, and legs.
- Place a foam roller under under your body just below your hips. Engage your core.
- Bend one knee and place your shin on top of the foam roller while keeping the other leg extended.
- Roll the foam roller back and forth gently along the shin, pausing at areas of tightness.
- Repetitive the movements for 10 repetitions.
- Relax and repeat the movement on the opposite side.
Benefits of Foam Rolling
- Improves Flexibility: Helps reduce stiffness in muscles and fascia (the connective tissue around muscles).
- Enhances Recovery: Relieves muscle tension and adhesions, which may speed up muscle recovery after exercise.
- Boosts Circulation: Foam rolling can improve blood flow to the muscles, helping with healing and reducing soreness.
- Supports Performance: Regular foam rolling for shin splints relief can also enhance muscle function, making movements smoother and more efficient during sports or exercise.
- Reduces Pain and Tightness: Helps alleviate discomfort caused by thickened or tight fascia and muscles.
- Promotes Relaxation: Releases built-up tension in muscles, which can lead to overall relaxation.
- Aids in Injury Prevention: By keeping muscles and fascia loose, foam rolling can help reduce the risk of overuse injuries.
- Supports Overall Health: Foam rolling improves fascial health, which is connected to wound healing, immune response, and even fat and water storage in the body.
5 Easy Exercises for Shin Splints
1. Calf Stretch
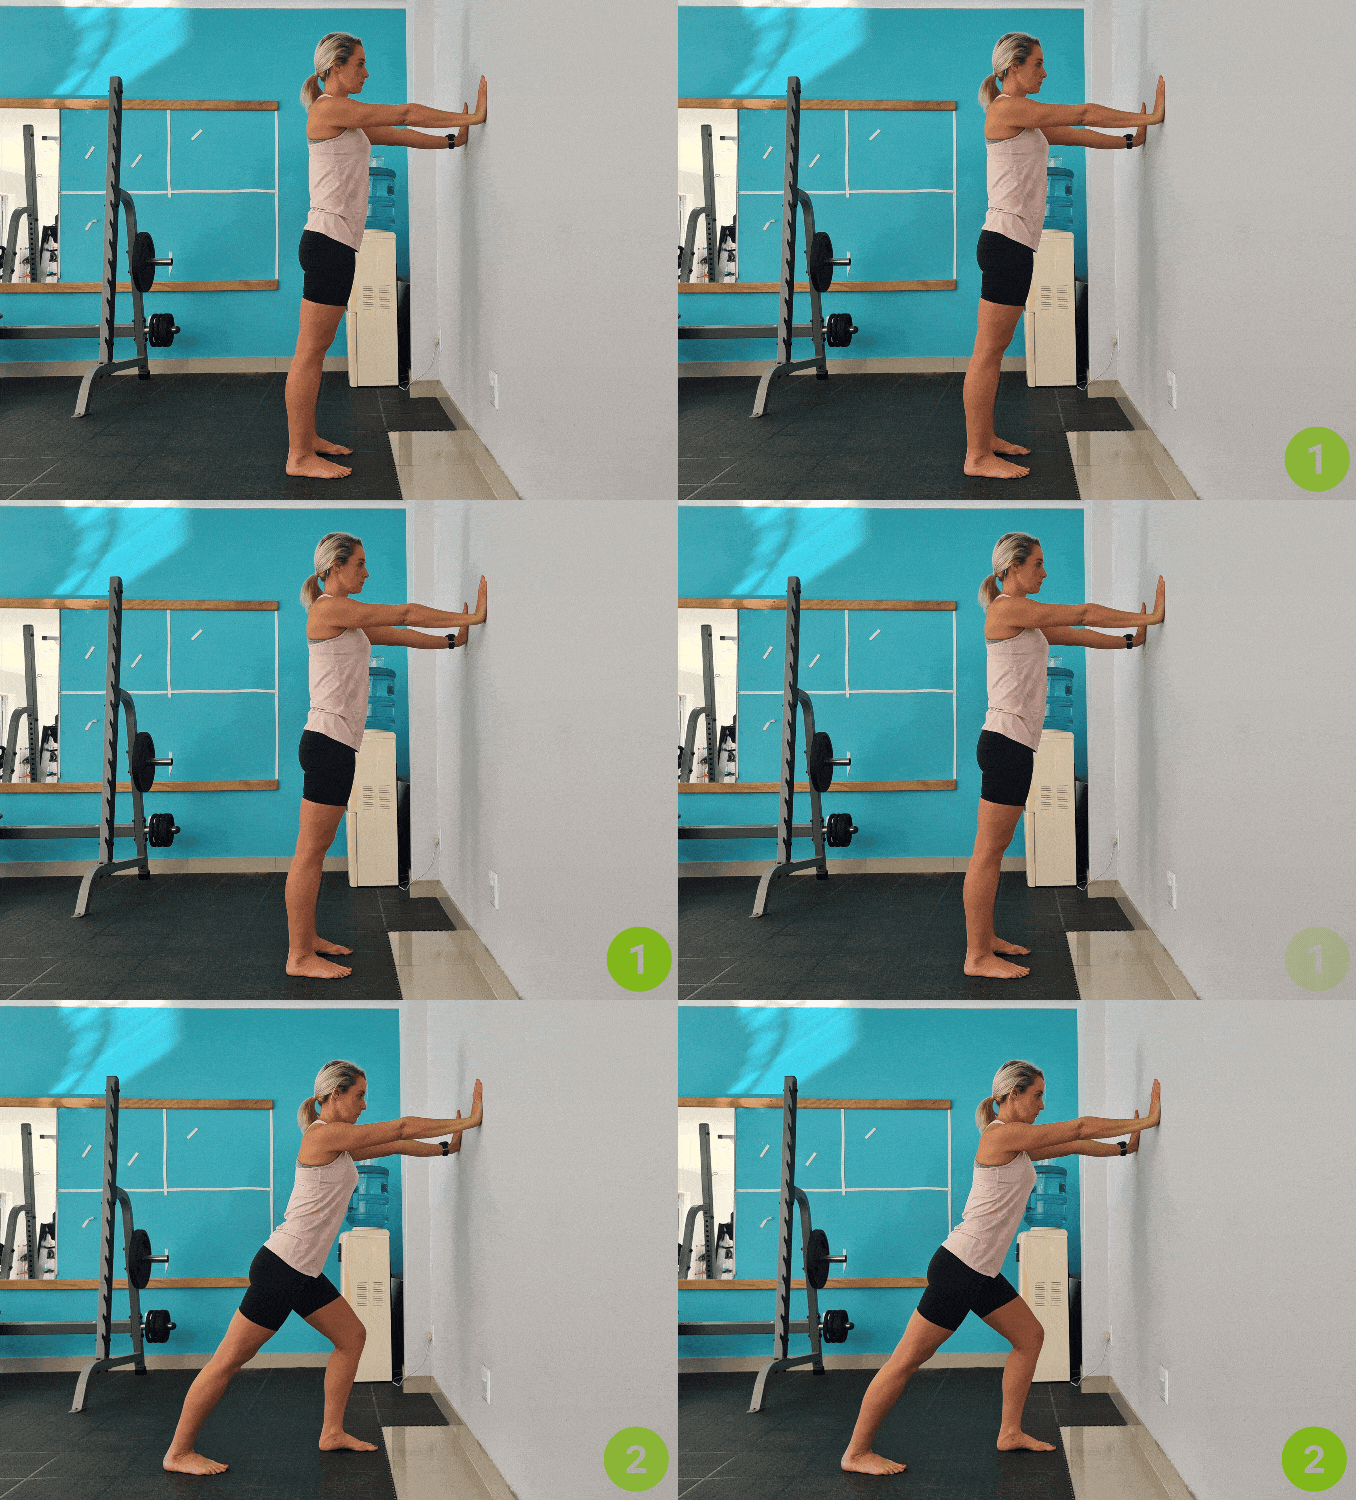
- Begin in an upright standing position in front of a wall with your feet hip-width apart, maintaining good alignment with your head, shoulders, hips, and legs.
- Engage your core. Extend and press your hands on the wall at chest level.
- Step one leg back, keeping it straight with your heel pressed firmly into the ground while bending your front knee slightly.
- Lean forward gently, maintaining the stretch in your back calf and ensuring your body stays aligned.
- Hold this position for several deep belly breaths, inhaling through your nose and exhaling through your mouth.
- Return to the starting position and repeat the movement on the opposite leg.
2. Heel Walks
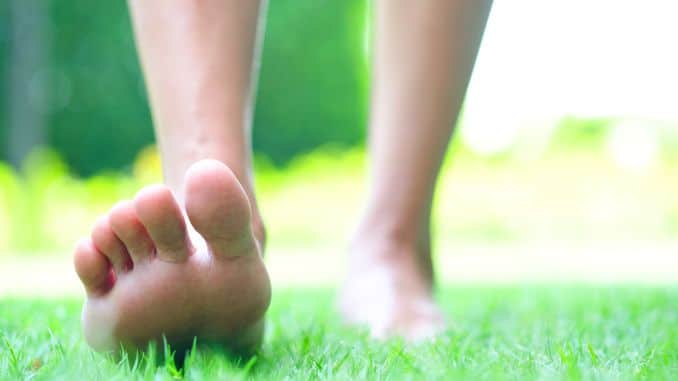
- Begin in an upright standing position with your feet hip-width apart.
- Maintaining good alignment with your head, shoulders, hips, and legs.
- Step one foot forward and lift your toes off the ground so you are walking on your heels.
- Take small steps forward for 20-30 seconds.
- Rest and return to the starting position before repeating the movement 2-3 times.
3. Seated Toe Stretch
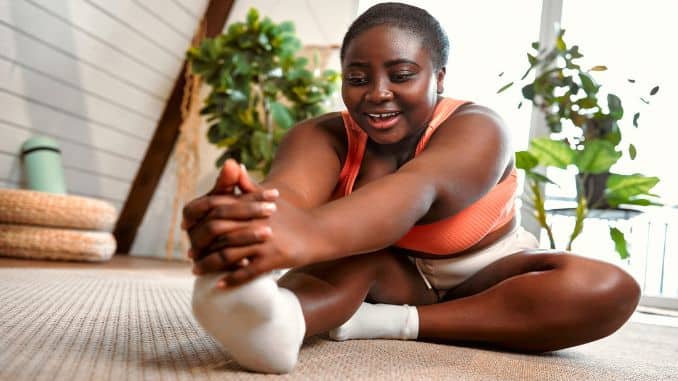
- Begin in an upright sitting position on the floor with your legs extended in front of your body, keeping your toes pointing upward.
- Maintain good alignment with your head, shoulders, and hips.
- Bend one knee and plant your foot against the side knee of your extended leg.
- Contract your core and hinge from your hips to bend your upper body forward, wrapping your hands around your extended foot and keeping your spine straight.
- Hold this position for several deep belly breaths, in through your nose and out through your mouth. Relax and repeat the movement on the opposite side.
4. Ankle Pumping
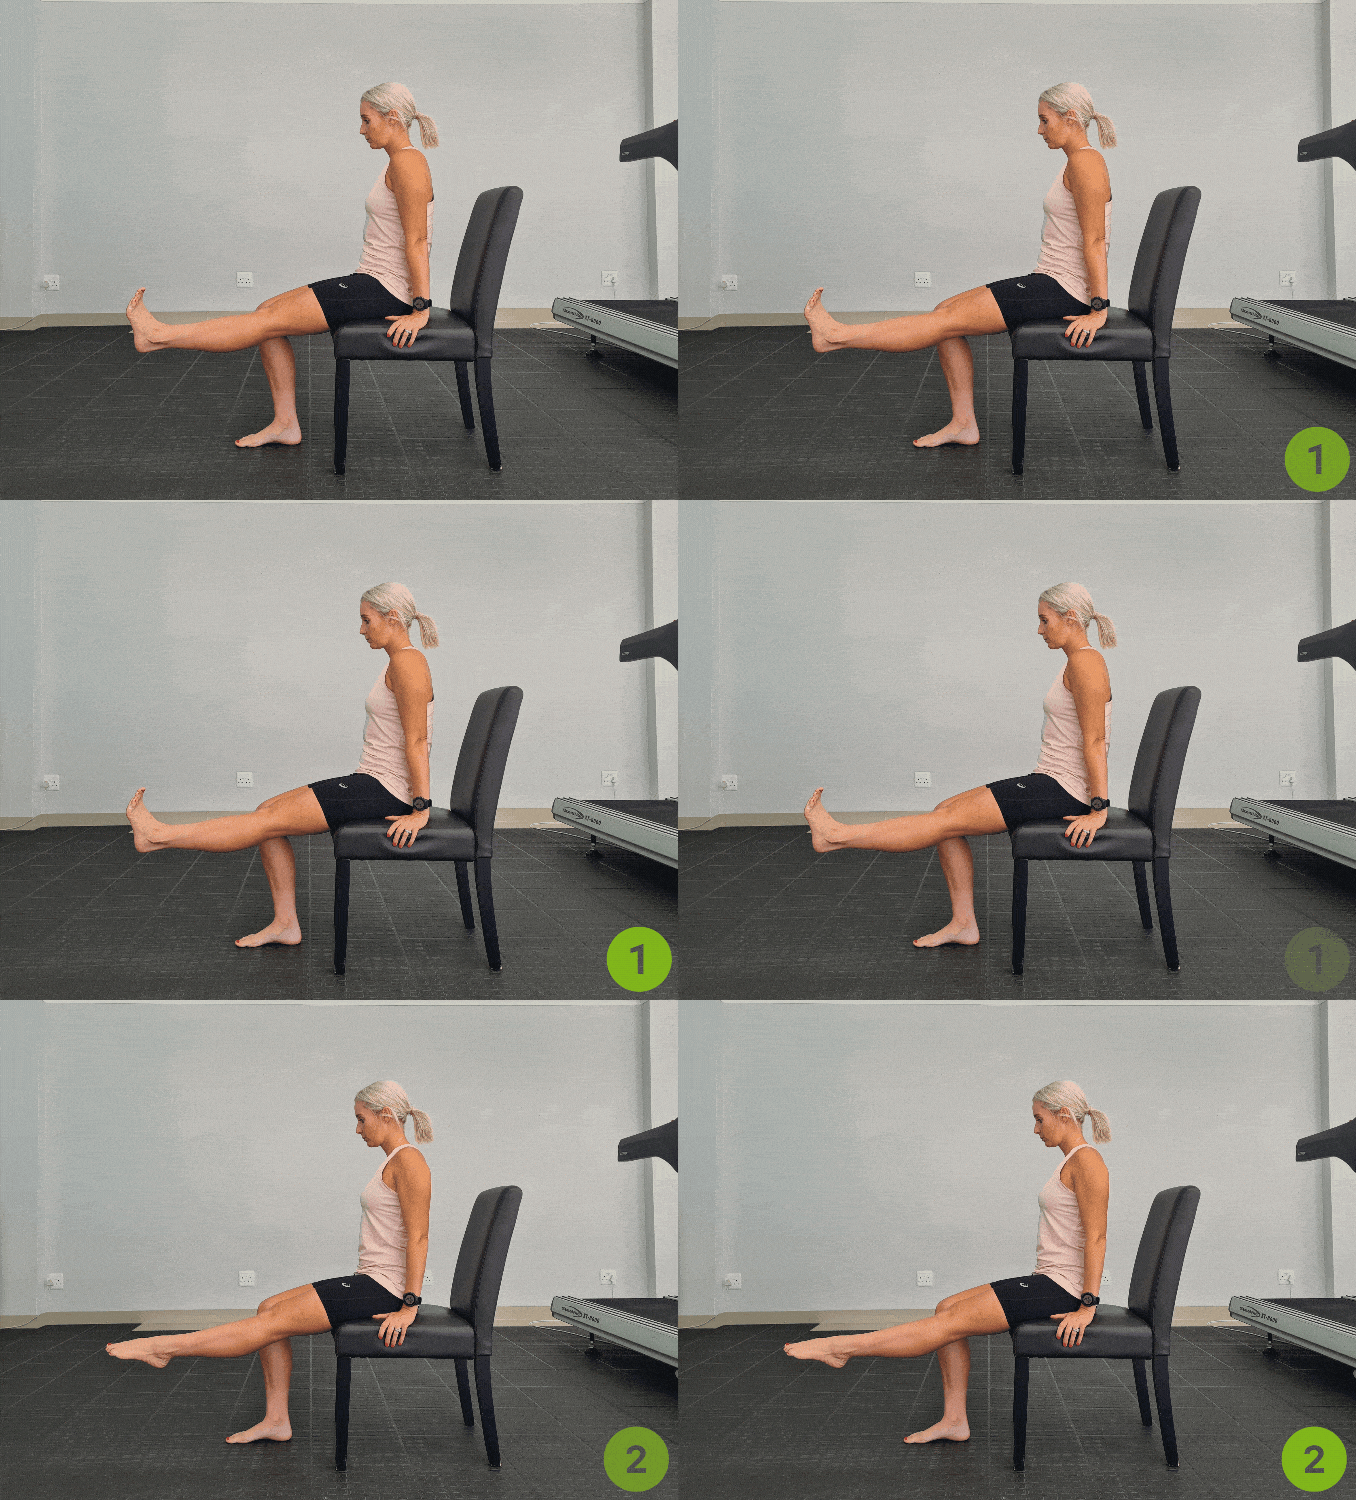
For this exercise, use a sturdy chair, for support.
- Begin in an upright sitting position on a chair with your knees bent and feet flat on the floor, maintaining good alignment with your head, shoulders, and hips.
- Place your hands at your side. Engage your core.
- Straighten one leg in front of you, keeping your toes pointing upward.
- Slowly move your toes up toward the ceiling, then point them down toward the floor.
- Repeat the movement with 10 repetitions.
- Relax and repeat the movement on the opposite leg.
This simple exercise helps improve blood flow, strengthen your calves, and increase ankle flexibility.
5. Ankle Circles
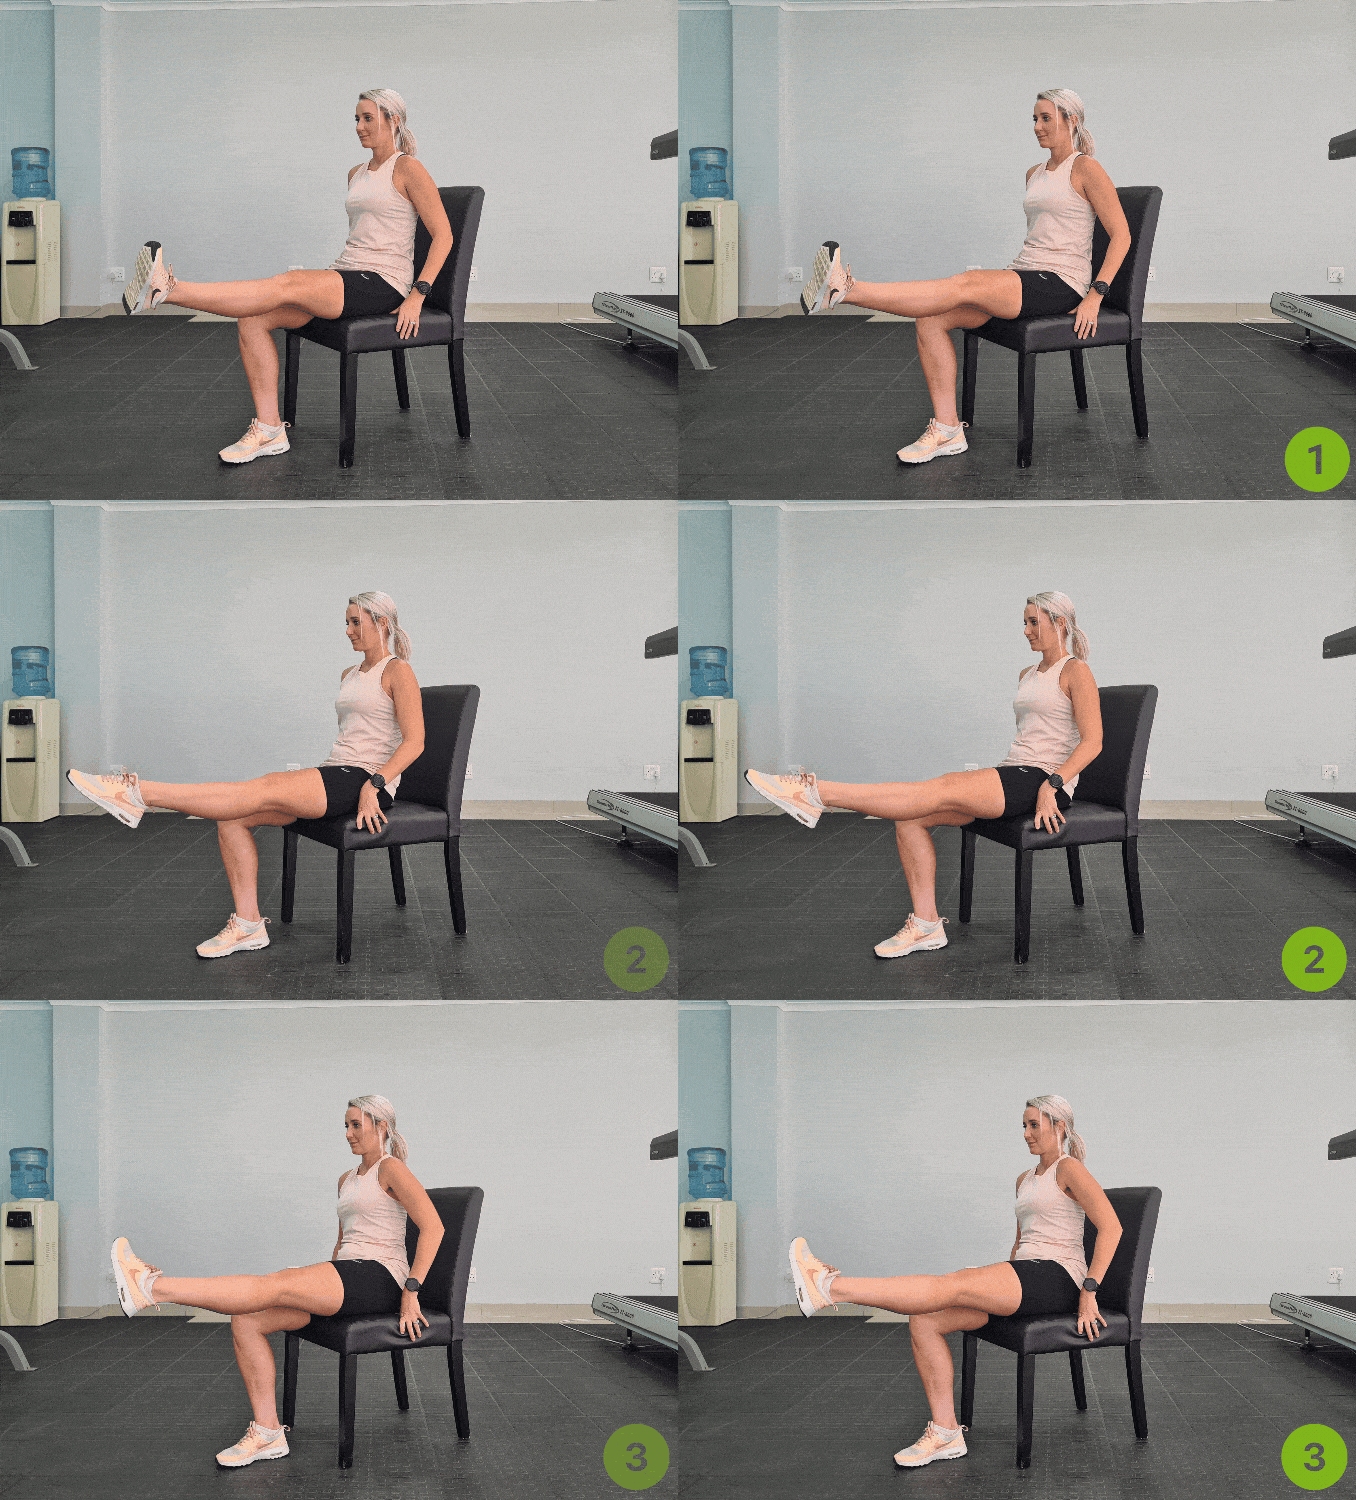
For this exercise, use a sturdy chair, for support.
- Begin in an upright sitting position on a chair with your knees bent and feet flat on the floor.
- Maintain good alignment with your head, shoulders, and hips.
- Place your hands on the sides. Engage your core.
- Lift and extend one leg at hip height with your toes up towards the ceiling.
- Rotate your ankle in a clockwise direction for 10-15 circles, then reverse the direction to counterclockwise.
- Switch legs and repeat. Relax and return to the starting position.
Other Alternative Treatments:
- Rest to allow healing [2] and prevent further damage.
- Ice therapy to reduce inflammation and pain.
- NSAIDs like ibuprofen for pain relief.
- Use of orthotic devices for biomechanical corrections.
Conclusion
Foam rolling is a simple and effective way to relieve shin splint pain and reduce inflammation. By following these steps and tips, you can use a foam roller to treat shin splints and prevent them from developing. Remember to listen to your body and stop if you experience any adverse pain.
If you suffer from shin pain and are looking for a solution to help you overcome shin splint, click here to check out Shin Splints Solved. I put this program together to help runners and others with shin pain overcome shin splints and get back to a pain-free life.
Frequently Asked Questions
When to Use a Foam Roller for Shin Splints?
Using a foam roller can help ease shin splint pain and reduce swelling. It’s also a good way to prevent shin splints and lower the chance of getting them. Adding foam rolling to your regular exercise routine can help your muscles recover better and reduce soreness.
Does foam rolling help with shin splints?
Yes, foam rolling can help with shin splints. It can reduce pain, relax tight muscles, and help reduce swelling.
How long should you roll your shins for?
You should foam roll your shins for about 1 to 2 minutes, gently moving up and down the shin area. If you feel pain, pause for a moment before continuing.
How to get rid of shin splints fast?
To get rid of shin splints quickly, try resting, applying ice to reduce swelling, and using a foam roller. Stretching and strengthening your muscles can also help. Avoid activities that cause pain until you feel better

