

Following a knee replacement, recovery time depends on how bad the injury/condition is and can take four to six months to heal. But you can speed up recovery based on the activities you perform regularly.
But before you jump into the actual exercises prior to knee replacement, here are 3 rules you need to follow to maximize the results you will get from using movement progressions in your training.
3 Movement Progression Rules
Instead, focus on how the movement feels. Focus on mastering the movement, so you have complete control every step of the way. Do not consider moving on to the next progression unless you have mastered the movements.
- Rule #2 – Be patient.
To be able to return to your usual activities of daily living, you need to be patient. One of the biggest lessons in knee injury is to take your time. Being patient is the only way to get back to your old abilities and beyond.
- Rule #3 – Seek help.
If you aren’t sure whether you are doing things right or not, seek help. Purchase products that will help you hire coaches that know how to help you, and don’t settle for your garden-variety trainer or physical therapist. If you’re not feeling better or seeing performance results in 5 sessions, find someone who can help.
Meanwhile, the first few things we often see on people who are coming off a knee surgery are a lack of terminal knee extension and flexion, their glute has turned off, and their gait is out of whack from walking with a brace on. Second, you need to re-establish their connection to their glute muscle. Here’s how we like to approach this issue.
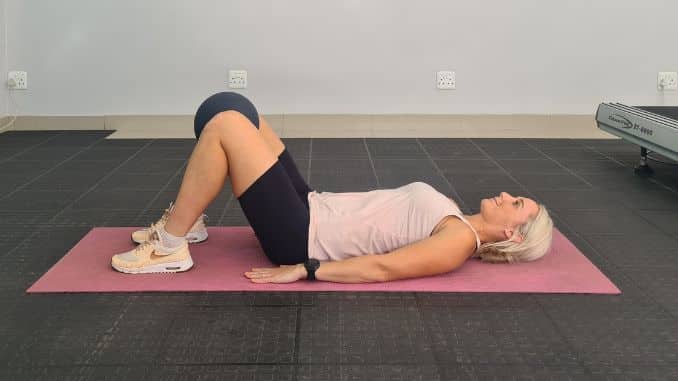
Connecting with Gluteus Maximus
To reactivate their glute to lay prone, bend both knees so the bottoms of your feet are facing the ceiling, and then lift one leg at a time, attempting to use just your glute muscle and not your back and hamstrings. This should be a small range of motion and, if held for a time, should yield a mean butt burn rather than a set of pumped spinal erectors or cramping hamstrings.
There are 4 drills to use in a standing position to stabilize your knee through the hip. The first two are the basic drills, the third drill should be done when mastering the first two, and the fourth drill should follow mastery of the third drill.
-
Drill #1
-
- Start by facing a wall with your toes about 2 feet from the wall.
- Place a pad on the wall about hip height, lift one leg with the knee bent to parallel, and place that knee on the pillow.
- Keep your spine neutral and your pelvis parallel to the floor and the wall. Press your knee into the wall using your glute muscle. In this position, which emulates a triple extension found in most sports, you should feel the glute muscle firing hard.
- You may need someone to test your glute or give it a series of light pokes to ensure it is firing rather than your calf and hamstring. Hold for a time and think of perfecting the feel of the movement rather than following a set time limit.
-
Drill #2
-
- The second glute drill starts by turning 90 degrees from the wall, bringing your feet underneath your hips, and crossing your arms.
- From there, descend into a ¼ squat, ensuring you feel the weight in your heel and either side of the ball of your foot.
- Lastly, lift the foot closest to the wall off the ground by curling your hamstring and pushing your knee, the side of your thigh, your hip, and your shoulders into the wall while maintaining a neutral spine.
- Hold for a time and feel the burn! You know you have it right when you feel the muscles of your hip and glute burning. You know you’re not quite doing it right when you feel your leg muscles burning out or your knee is bothering you.
-
Drill #3 – Standing Glute Activation Holds
-
- These positions should emulate the 2 moves mentioned above practiced without using a wall to provide proprioceptive feedback.
- For the top position, stand on one leg with your thigh around parallel, and complete the extension of your hips by firing your glute.
- For the ¼ squat drill, assume the same position as when your side was against the wall, and again feel the burn in those glute muscles.
-
Drill #4 – Extension to Flexion
-
- Finally, once you have mastered the 2 static standing positions, make one move by SLOWLY moving from the extended position into the flexed position.
- Again the first muscle to say hello should be the muscles of your hip and butt. If your knee hurts or your quad and foot burn, go back to the preceding steps and take your time to master them.
Home Care Tips for Nursing a Knee
A. Do the “RICE” method.
Rest, Ice, Compression, and Elevation (RICE) are recommended for knee pain. Rest your knee, apply ice to alleviate pain, wear a compression bandage to reduce swelling, and keep your knee elevated to promote blood circulation.
B. Don’t take your weight for granted.
If you’re overweight, losing weight reduces the stress placed on your knees. You don’t have to achieve your “ideal” weight. Small changes still make a difference.
C. Don’t rest too much.
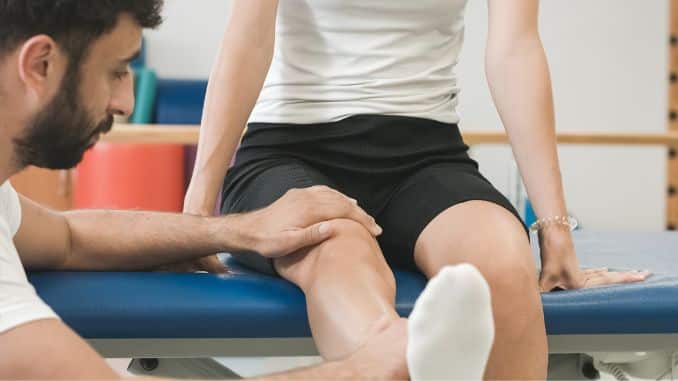
Too much rest can weaken your muscles, which can exacerbate joint pain. Explore some exercises that are safe prior to knee replacement, and make sure that you stick with them. If you’re unsure which motions are safe or how much you can do, talk with your doctor or a physical therapist.
D. Do exercise.
Cardio exercises, weight training, and stretching exercises prior to knee replacement strengthen the muscles that support your knees and increase their flexibility. Some good cardio choices include walking, swimming, water aerobics, stationary biking, and elliptical machines. Tai Chi and Yoga may also help decrease stiffness and improve balance.
You should try to do exercises prior to knee replacement one to two times a day, every day, before surgery. Work up to doing 10 to 20 repetitions of each exercise. It may be helpful to do these exercises on both legs.
For the most comfort, do the exercises lying down. Your bed is an excellent place to do your exercises prior to knee replacement.
Exercises Prior to Surgery
1. Ankle Pumps and Circles
-
- Pump your feet up and down by pulling your feet up toward you, then pushing your feet down away from you.
- Next, rotate your feet clockwise and counterclockwise.
2. Thigh Squeezes (Quadriceps Sets)
-
- Tighten the muscles on the top of your thigh by pushing the thigh down into the chair.
- Hold for 5 seconds and relax.
3. Heel Slides (Hip and Knee Flexion)
-
- Bend your surgical hip and knee by sliding your heel up toward your buttocks while keeping your heel on the bed.
- Slide your heel back down to the starting position and relax. Keep your kneecap pointed up toward the ceiling during the exercise.
- You may want to use a plastic bag under your heel to help it slide easier.
4. Leg Slides (Abduction/Adduction)
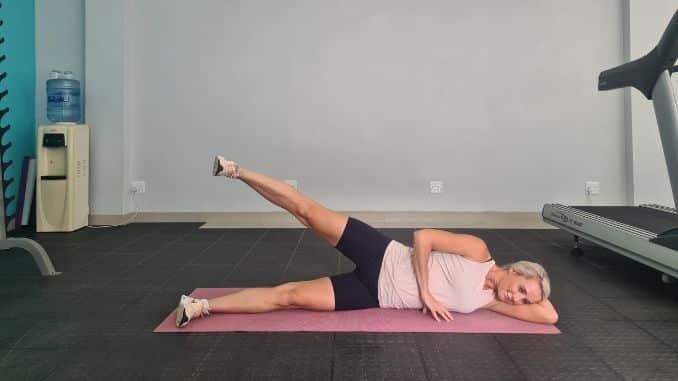
-
- Slide your surgical leg out to the side, keeping your kneecap pointed up toward the ceiling.
- Slide your leg back to the starting position. Use a plastic bag under your heel to help it slide easier.
5. Lying Kicks (Short Arc Quadriceps)
-
- Lie on your back with a rolled-up blanket or towel (at least 6 inches in diameter) under the knee of your surgical leg.
- Straighten your surgical leg. Hold for 5 seconds.
- Slowly lower your leg down and relax. The back of your knee should stay in contact with the blanket or towel during the exercise
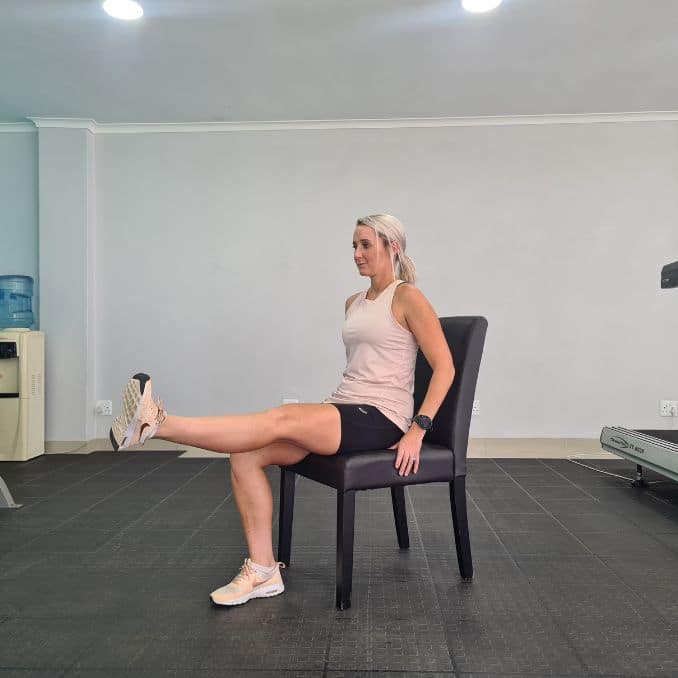
6. Straight Leg Raises
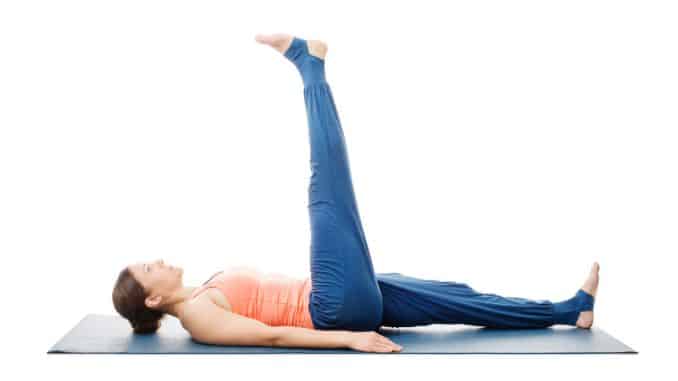
-
- Bend your other leg with your foot flat on the bed.
- Raise your surgical leg up (about 12 inches), keeping your knee straight.
- Also, bend your ankle up, pulling your toes toward you.
- Work up to holding for 5 seconds. Slowly lower your leg down and relax.
7. Bed Mobility Exercise
-
- Lie flat on your back. Come up on both elbows.
- Straighten your arms out behind you and come to a sitting position.
- Lower yourself down onto your elbows again, then down to lying flat.
8. Chair Push-Ups
-
- Sit on a sturdy chair with arms. Hold the arms of the chair.
- Push down on the chair arms, straightening your elbows so you raise your buttocks a few inches off the seat of the chair.
- Work up to holding for 5 seconds. Lower yourself slowly back into the chair.
- If your arms are weak, use your legs to help raise your buttocks off the chair seat.
9. Knee Bending Stretch (Sitting Knee Flexion)
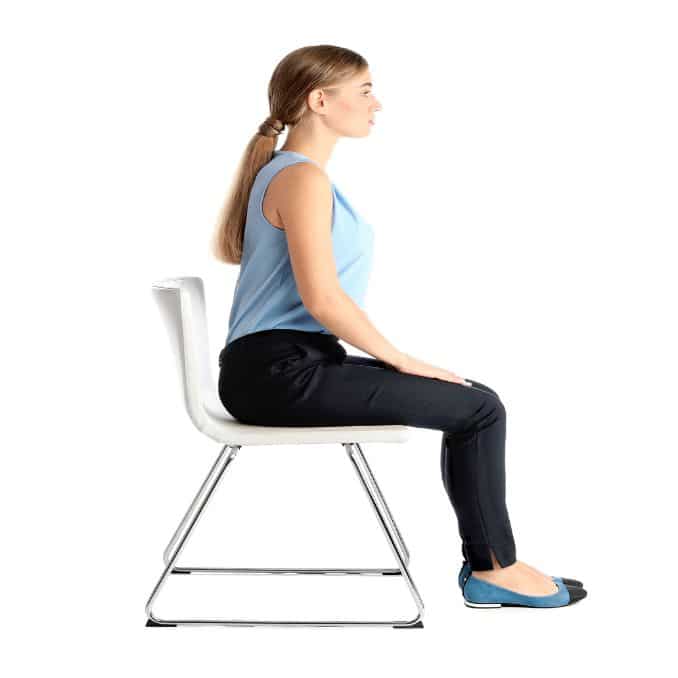
-
- Sit toward the front of a sturdy chair.
- Slowly slide your foot back and forth 10 times as a warmup.
- Then slide your foot back inch-by-inch, bending your knee as much as you can.
- You can use your hands to help. Hold for 30 seconds. (Your heel can lift up from the floor).
- Return to the starting position and relax. Repeat 3 times slowly.
10. Knee Straightening Stretch (Sitting Knee Extension)
-
- Sit on a sturdy chair with your lower leg up on another chair, or a footstool, in front of you.
- You should feel a stretch on the back of your knee.
- You can do thigh squeezes or add a towel roll under your ankle to increase the stretch.
- Do this stretch for 5 to 10 minutes as you are able. This exercise can also be done lying in bed.
NOTE: Because everyone responds to exercise differently, you need to be the judge of how much exercise you can do each day. If an exercise causes an increase in discomfort, stop doing that exercise.
How to negotiate going up and downstairs:
- Following surgery, it is important to learn the correct techniques for negotiating steps. Using stairs after knee surgery can be especially scary since the last thing you want to do is re-injure yourself and compromise your knee.
- The saying, “Put the right foot forward,” takes on an entirely different meaning when you are recovering from a lower extremity injury. Despite what some may think, there is a “right” and “wrong” foot and the foot that you lead changes depending on the direction you are moving. To help you remember which foot to lead with when going up and down the stairs, remember the phrase, “Up with the good; Down with the bad.”
- You should lead with your stronger leg to walk up the stairs and lead with your weaker leg to descend.