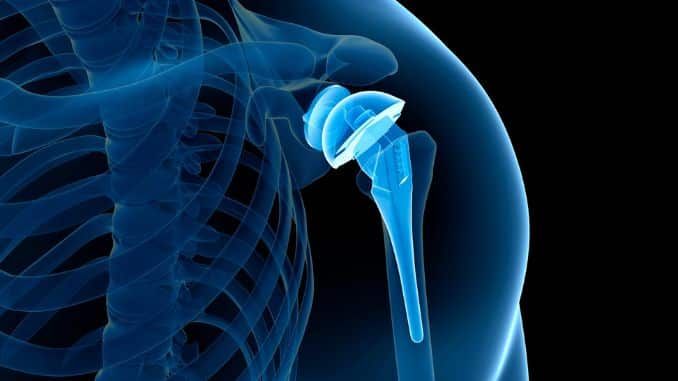
A total shoulder replacement surgery is most commonly done in most patients who suffer from shoulder arthritis. The standard total shoulder replacement, however, cannot benefit those people who have large rotator cuff tears and acquire a complex type of shoulder arthritis called “cuff tear arthropathy.” Because of this, the standard total replacement surgery might not work on these patients as it may result in pain and limited motion. In these cases, reverse total shoulder replacement surgery is recommended.
The Anatomy Of The Shoulder
Knowing the anatomical structures of the shoulder joint helps us understand replacement surgeries, their benefits, and more. People consider the shoulder as the most mobile joint in the body. It has a wide range of motion, such as adduction, abduction, flexion, extension, internal rotation, external rotation, and circumduction. Not only that, but it can also help in scapular protraction, retraction, elevation, and depression. However, the wide range of motion that the shoulder can do highly compromises its instability. The rotator cuff muscles, tendons, ligaments, and glenoid labrum greatly compensate for it.
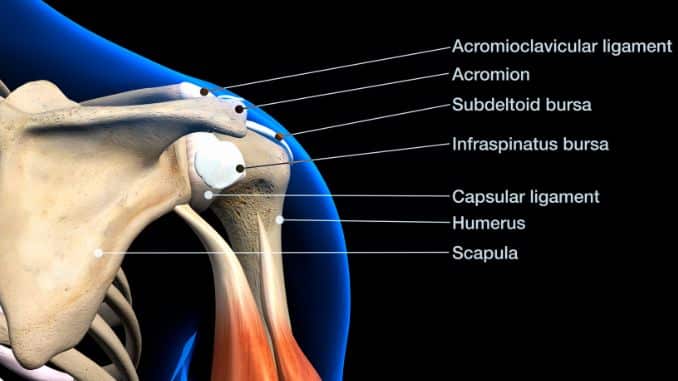
The shoulder joint consists of the articulation between the head of the humerus and the glenoid cavity (or fossa) of the scapula, thus the other name, the glenohumeral joint. The spherical head of the humerus is bigger than the glenoid fossa, which is why it could offer a wide range of motion. Also, because of this, the shoulder joint is unstable. To reduce this kind of disproportion between the head of the humerus and the glenoid fossa, a fibrocartilage rim called the glenoid labrum is attached to the margins of the fossa to deepen it.
Shoulder Ligaments
Several ligaments, such as the coracohumeral, glenohumeral, and transverse humeral ligaments, limit the movement of the glenohumeral joint to prevent dislocation.
The transverse humeral ligament extends across the tubercles of the humerus and covers the intertubercular sulcus and the long-head tendon of the biceps brachii muscle to prevent the displacement of the tendon from the sulcus. The coracohumeral ligament is attached to the base of the coracoid process to the greater tubercle of the humerus and supports the superior part of the joint. It also prevents excessive external rotation and inferior translation of the humerus.
The superior, middle, and inferior glenohumeral ligaments are the main source of stability because they connect the humerus to the glenoid fossa. They help stabilize the anterior part and prevent anterior dislocation of the joint as you also take steps in managing healthy joints.
In the shoulder, there are 4 muscles, namely supraspinatus, infraspinatus, teres minor, and subscapularis muscles, that form a musculotendinous unit around it. Together, they are called rotator cuff muscles. Their function is to provide stability to the shoulders upon movement.
Standard Total Shoulder Replacement Vs. Reverse Total Shoulder Replacement
In a standard total shoulder replacement, the arthritic joint is replaced by a highly polished metal ball attached to a stem and a plastic socket. These components mimic the normal anatomy of the shoulder. On the other hand, in a reverse total shoulder replacement, the components are switched. Someone fixated the metal ball to the socket and fixated the plastic cup to the upper end of the humerus.
-
Why Is Reverse Total Shoulder Replacement Better Than Standard Total Shoulder Replacement For Patients With Cuff Tear Arthropathy?
During arm movements in a healthy shoulder, the rotator cuff muscles contract and power it up to achieve the shoulder’s full range of motion. It also prevents the sliding of the head of the humerus with added stability. A standard total shoulder replacement needs these muscles to function like a healthy shoulder properly. If a patient has cuff tear arthropathy, they will not benefit from this type of shoulder replacement as they cannot use the rotator cuff muscles to function properly. At the same time, a reverse total shoulder replacement uses the deltoid muscle instead of the rotator cuff muscles to power the arm movement.
-
How Will I Get A Reverse Total Shoulder Replacement?
Not everyone could get this kind of shoulder replacement. Its suitability depends on the patient’s case.
This type of surgery may be recommended to you if you have the following:
-
- Cuff tear arthropathy
- Complete rotator cuff tear
- Previous unsuccessful shoulder replacement
- The complex fracture shoulder joint
- Chronic or repetitive shoulder dislocation
- Tumor in the shoulder joint
- Severe shoulder pain and difficulty moving the arms or could be frozen shoulder
-
What Are The Possible Complications Of This Type Of Surgery?
Because the reverse total shoulder replacement surgery is a highly technical procedure, careful consideration and evaluation should be done. As with any other surgery, this has risks and possible complications. This includes infection, excessive blood loss, nerve damage, shoulder fracture, dislocation of the new artificial joint, and anesthesia complications.
Some of these risks and complications may be higher than others as they may vary depending on the anatomy of the shoulders, general health, and more.
Reverse Total Shoulder Replacement Rehabilitation
I. Stage 1: Day 1 – Week 6 Post-Op
You may start exercising as early as day 1 to avoid possible complications such as muscle atrophy. Muscle atrophy is the wasting or loss of muscle tissue. These exercises should be done passively, meaning there should be no active movement of the muscles, allowing only gravity or the help of your unoperated hand to move it.
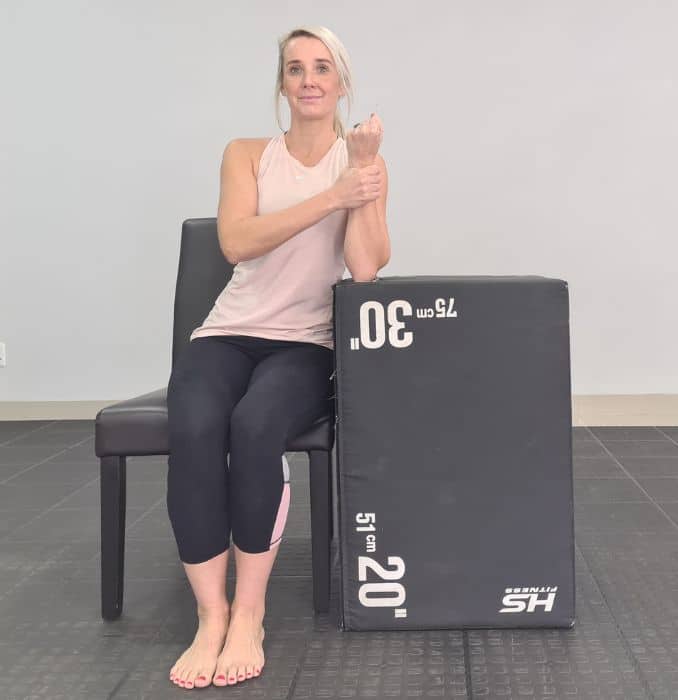
a. Passive Elbow Flexion
Use your unoperated hand to assist in bending your arm towards your body. You can do this while sitting or standing. Repeat 10 times. 1-2 sets.
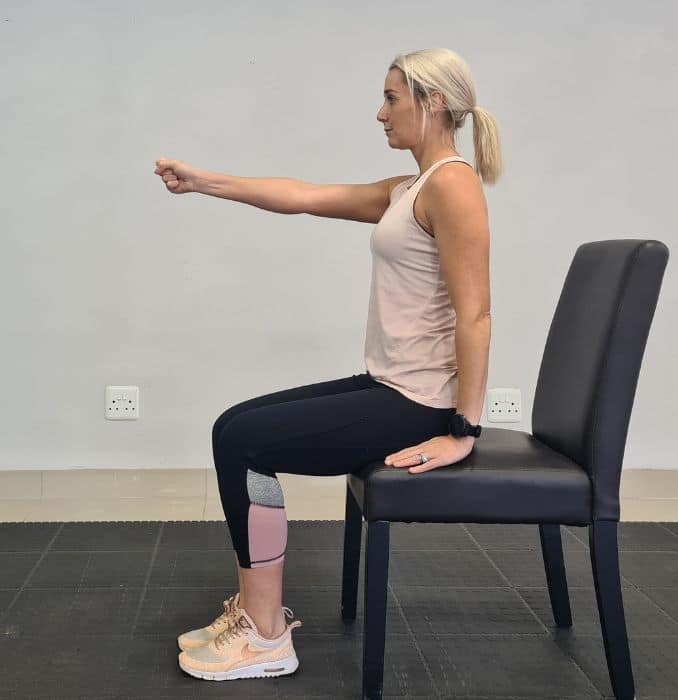
b. Hand Squeeze
This exercise will improve your hand strength. Squeeze your fingers towards your palm as if holding something. Hold for 7 seconds, then release it. Repeat 1-2 sets 10 times.
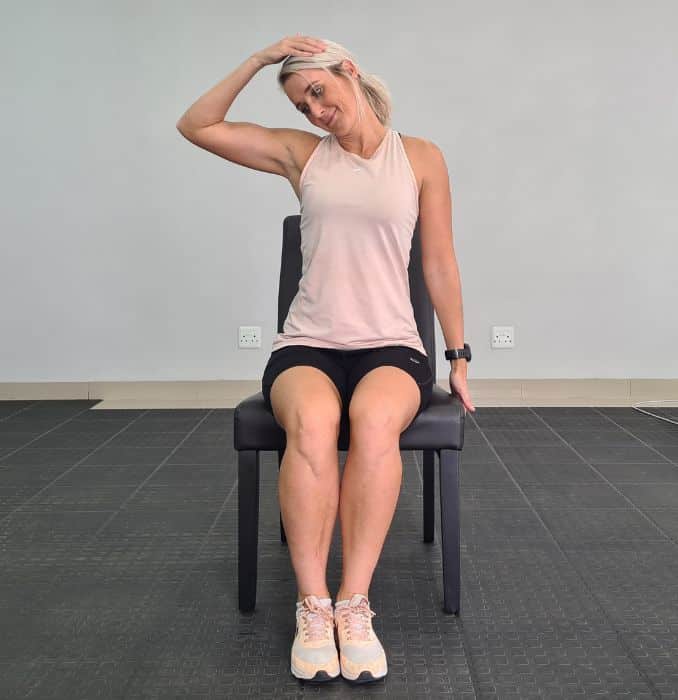
c. Neck Stretch
Your neck may feel stiff from wearing a sling and preventing shoulder movements. So it is necessary to stretch it too. Put your unoperated arm to the opposite side of the head, then gently pull it sideways; a gentle stretch on the neck and shoulder should be felt. Hold for 30 seconds. Do it 3 times. 1-2 sets.
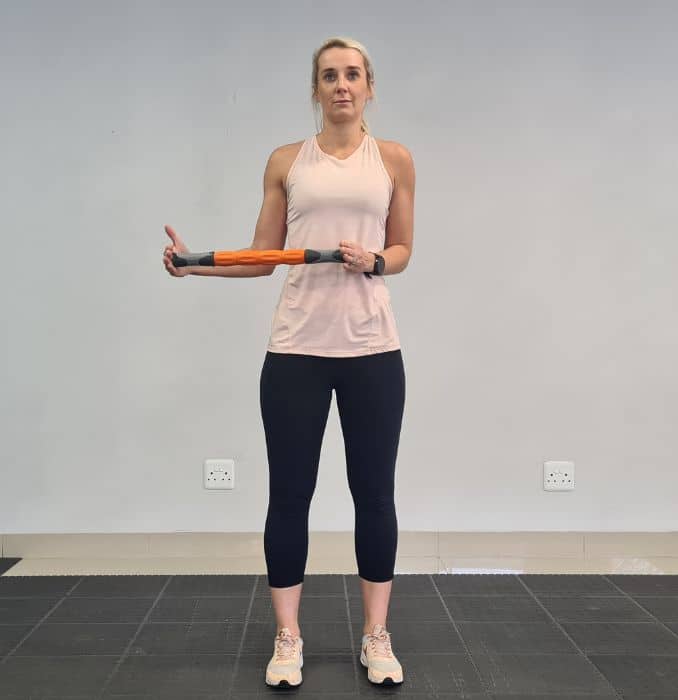
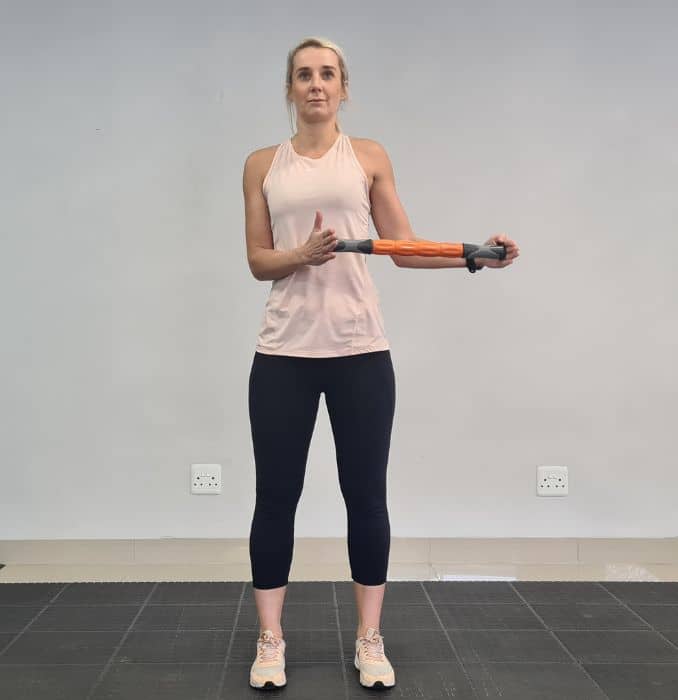
d. Passive Shoulder External Rotation
Bend both of your elbows 90 degrees while keeping them on your side, and hold a cane or a stick. Then slowly push against the hand of the operated arm so that it rotates outwards.1-2 sets.
 |
 |
-
Do’s And Don’ts
- Rest your arm on a pillow or a soft armrest when you are sitting, especially when sitting too long.
- Do not lift heavy things or do overhead activities
- Don’t forget to drink pain medications and use ice in case of inflammation
- Don’t forget to wear your sling when you get up
II. Stage 2: Week 6-12 Post-Op
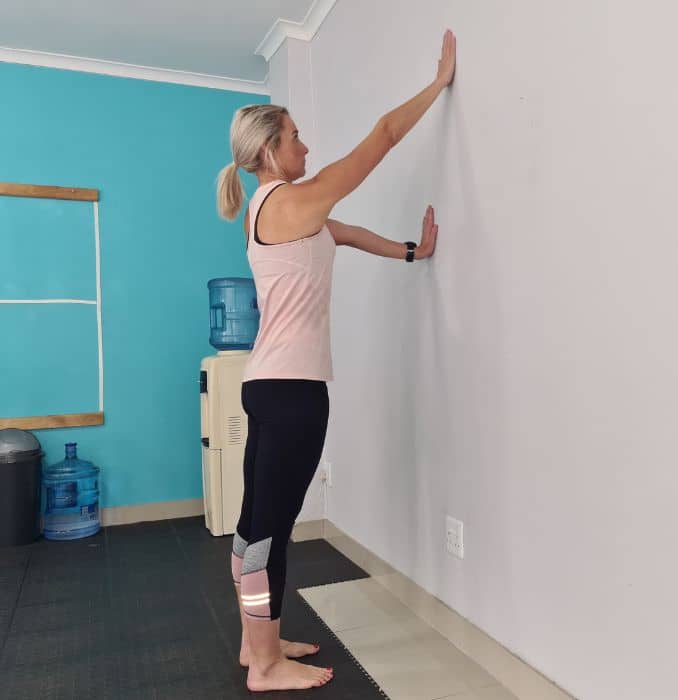
a. Shoulder Flexion Stretch
Stand in front of the wall. Then slowly lift your arm and slide it on the wall while simultaneously moving closer to the wall and stop when you feel a gentle stretch. Hold this for 30 seconds. Do this 3 times. Remember to do this pain-free for 1-2 sets.
b. Active Shoulder External Rotation
Stand or sit on a chair with your elbows bent at 90%. Keeping your shoulder blades still, slowly slide the forearm of the operated shoulder away from the body. Do 10 repetitions.1-2 sets.
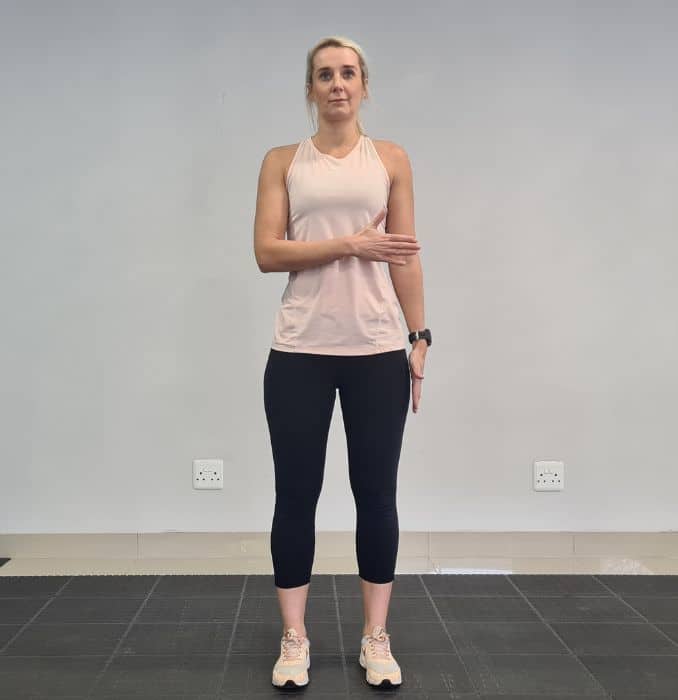
c. Active Shoulder Internal Rotation
Stand or sit on a chair with your elbows bent at 90 degrees. Keeping your shoulder blades still, slowly slide the forearm of the operated shoulder close to the body. Do 10 repetitions.1-2 sets.
d. Wand Exercises
You may use a cane or a straight stick alternatively.
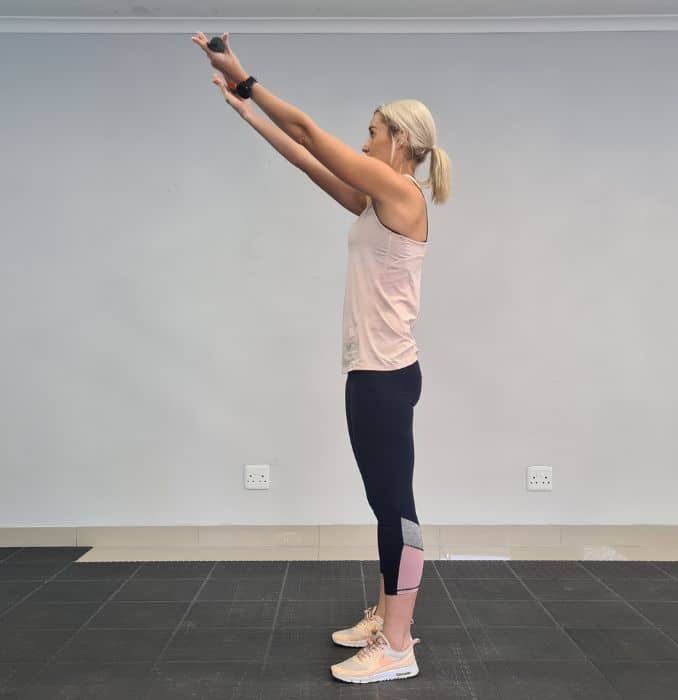
1. Shoulder Flexion With wand
Hold the wand in both hands and place it wider apart than the shoulder. Then lift the wand up until you feel a gentle stretch on your operated shoulder. Please note that this must be done pain-free. Hold this for 7 seconds. Do 10 repetitions.
 |
 |
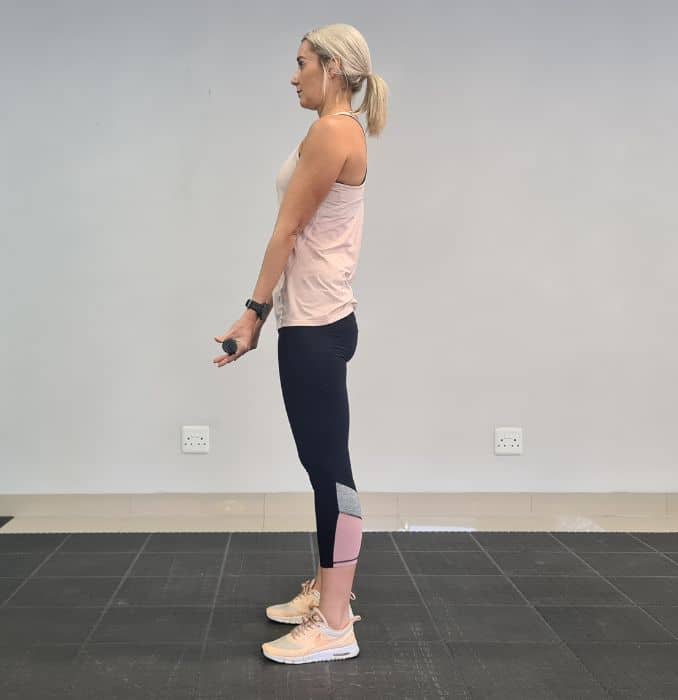
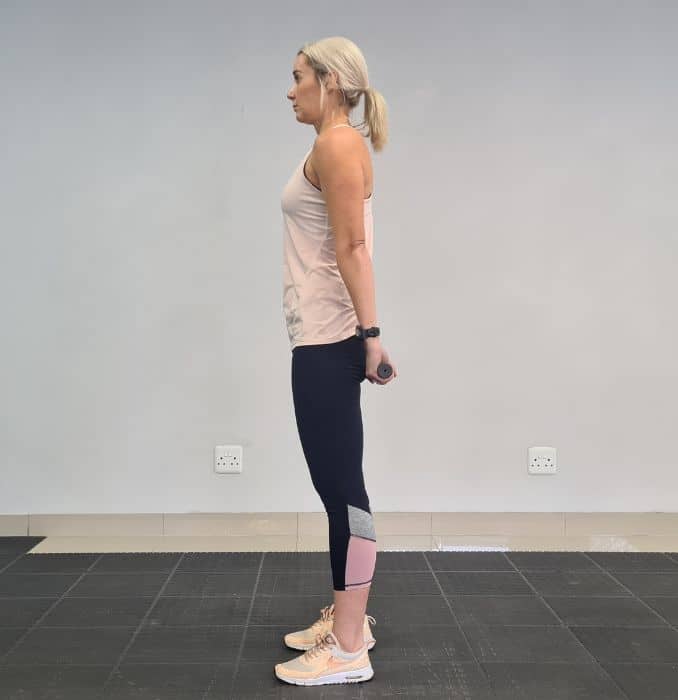
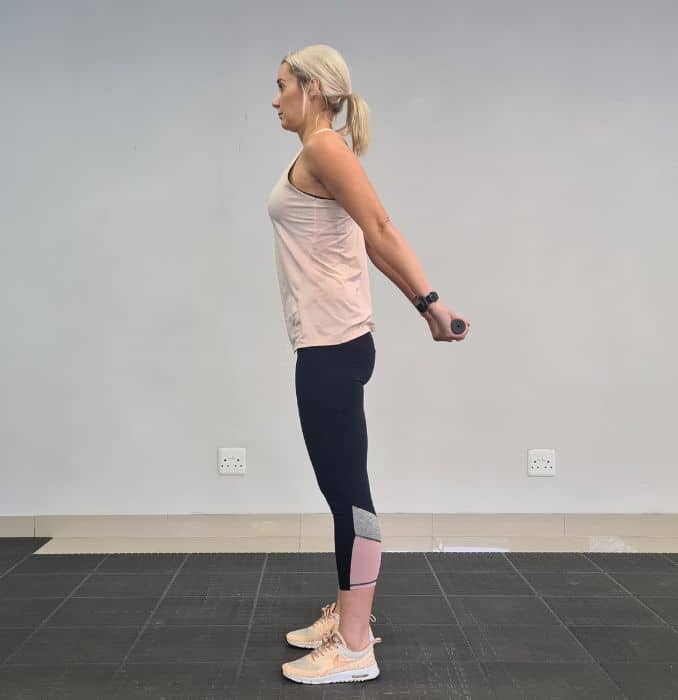
2. Shoulder Extension With wand
Hold the wand behind your back with an underhand grip. Gently push the wand away from your back. Please note that this must be done pain-free. Hold this for 7 seconds. Do 10 repetitions. 1-2 sets.
 |
 |
Do’s And Don’ts
Do not do overhead activities
You can lift things that weigh about 1kg up until your waist
III. Stage 3: 3 – 6 Months Post-Op
a. Theraband Exercises
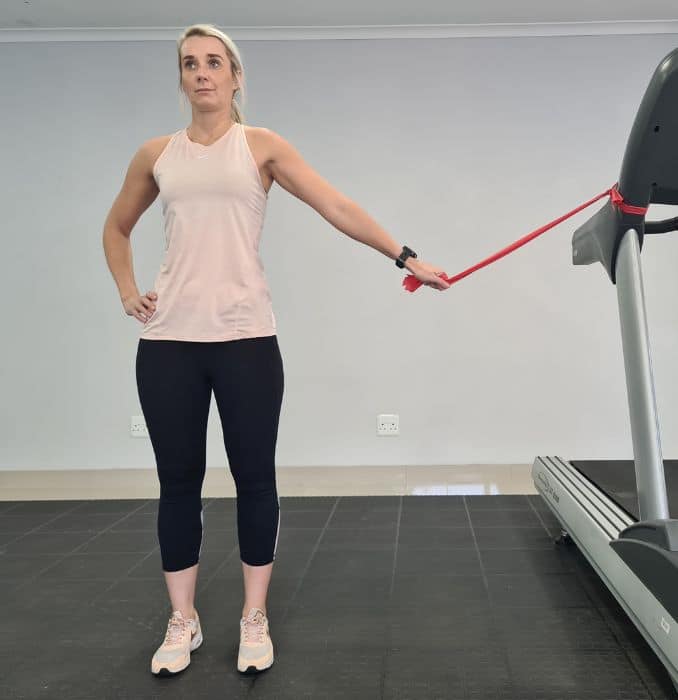
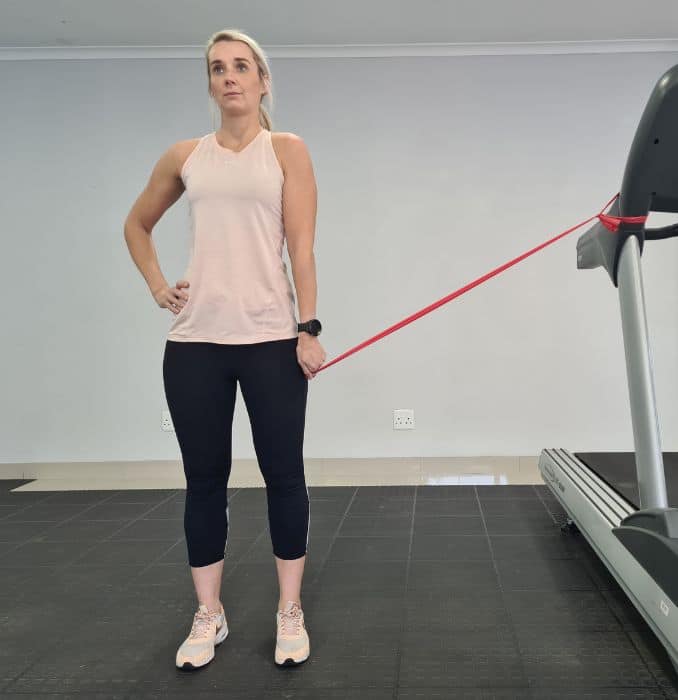
1. Resisted Shoulder Adduction
Tie the theraband on a pole, then hold the other end with your hand on your side. Then pull down the theraband toward your body. Afterward, hold for 7 seconds. Lastly, do 10 repetitions. 1-2 sets.
 |
 |
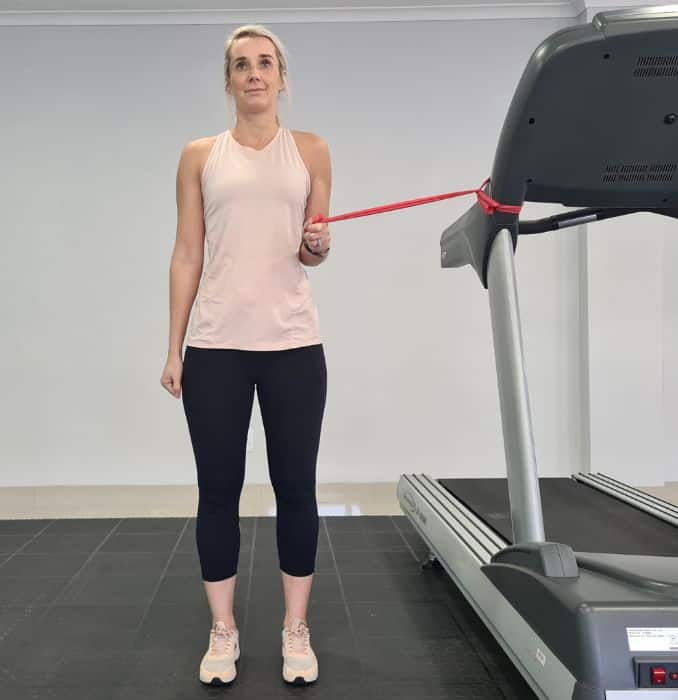
2. Resisted Internal And External Rotation
 |
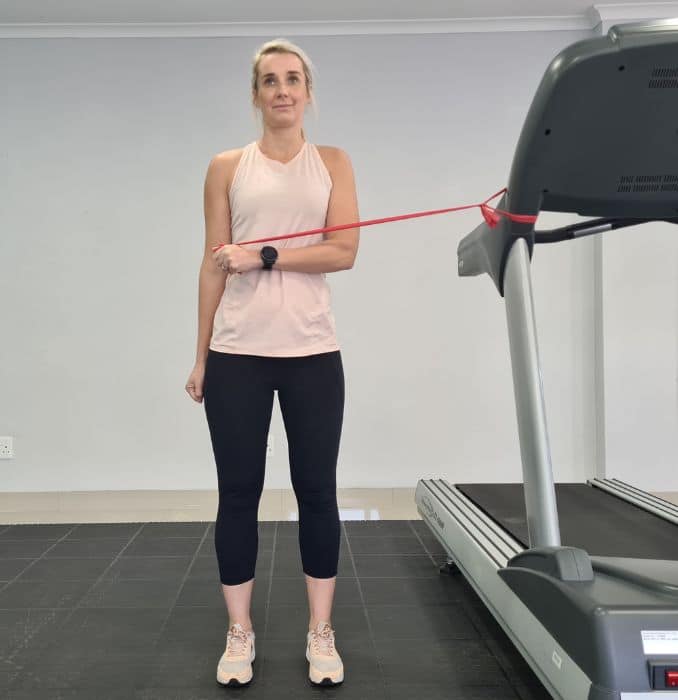 |
Tie the theraband on a pole, then hold the other end with your elbow bent 90 degrees. Pull theraband towards your body, then outwards. Hold both sides for 7 seconds. Do 10 repetitions. 1-2 sets.
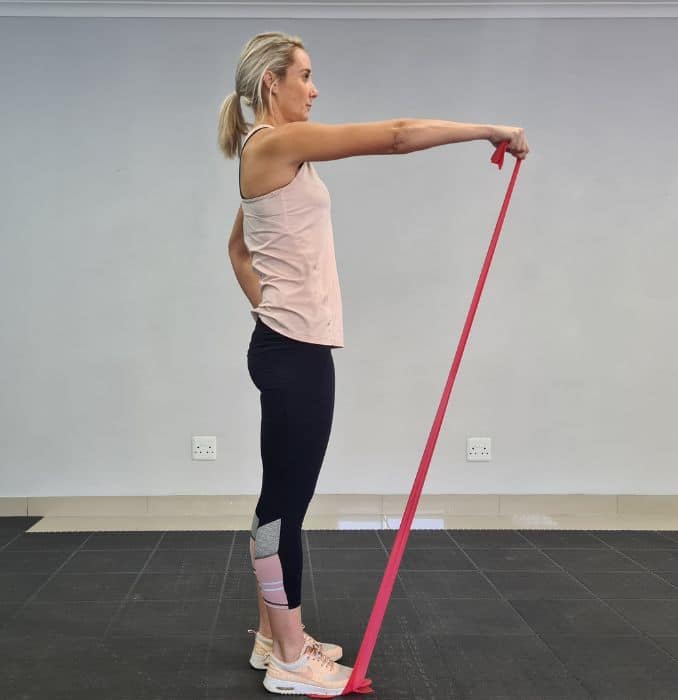
3. Resisted Shoulder Flexion
Tie the theraband on your ankle or step on it. Then hold the other end using your hand on the operated side. Lift your arm up, and hold for 7 seconds. lastly, do 10 repetitions. 1-2 sets.
IV. Stage 4: 6 – 9 Months Post-Op
Return to normal and everyday activities.
Takeaway
Shoulder replacement surgery, whether standard or reverse, relieves most pain and can improve the range of motion afterward. Both procedures are safe and highly effective as a treatment for people who suffer shoulder pain. A coordinated plan with your surgeon is essential to achieve greater results. Post-Shoulder Replacement Recovery Exercises can also be recommended by the expert.
Save yourself money and frustration – get The Frozen Shoulder Recovery Program today and restore pain-free movement!

