

Stability ball exercises are now used by virtually everyone for physical fitness, but they were originally used solely for injury recovery and ongoing physical therapy. Using the stability ball, sometimes referred to as a Swiss Ball, is the perfect way to engage your core muscles and challenge your balance. Simply sitting on the ball and slowly rocking can be therapeutic, soothing your nervous system and gently working your core stabilizing muscles to remain centered on the ball. This article presents 5 simple stability ball and resistance band exercises for injury recovery.
When first getting started with stability ball exercises, it’s important to ensure that your exercise area is safe. Make sure that the floor is clear of anything that might puncture your ball or get in the way of your exercises. We also recommend having a chair or a wall nearby for help with balance if needed. We have used a mini band resistance tubing for the exercises below. If you find this too challenging or do not have resistance tubing at home, go through the exercises using body weight alone.
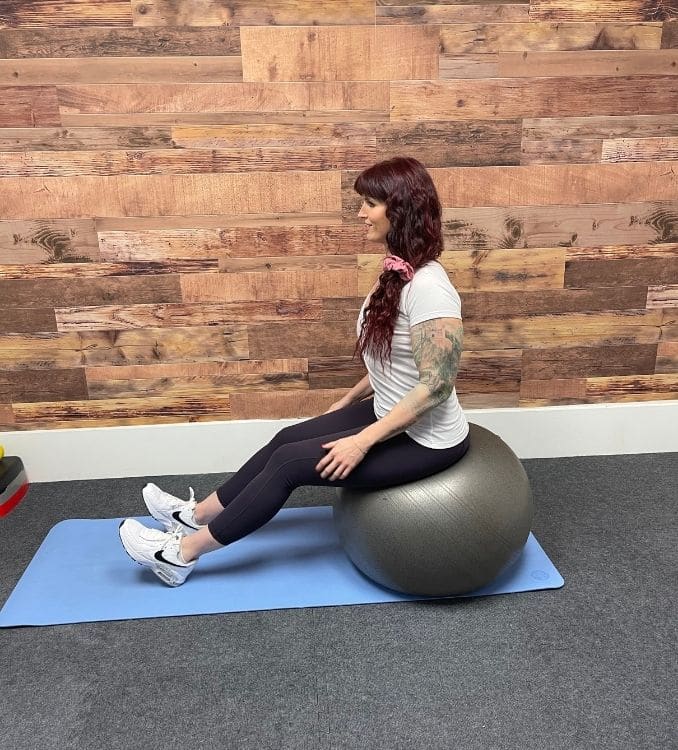
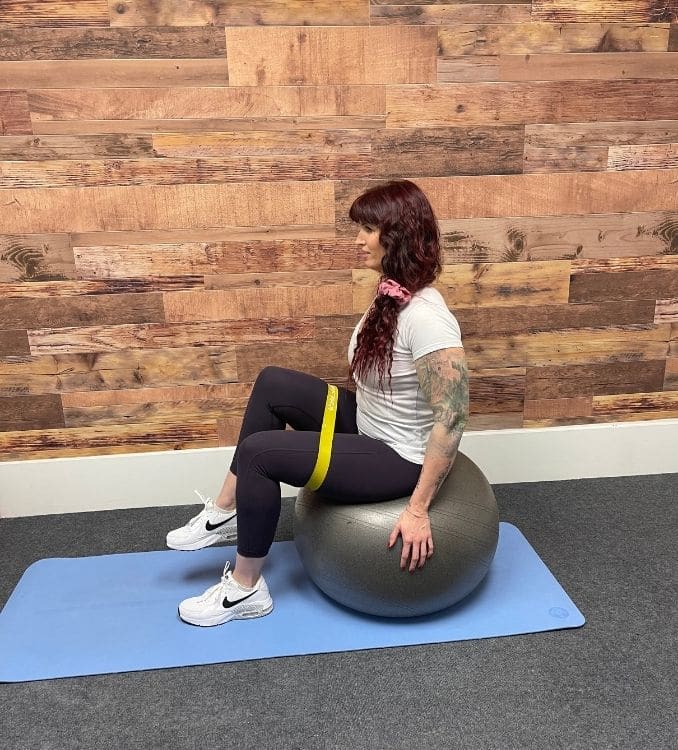
Gentle Warm-Up
For this exercise, place one hand on a chair or wall for support if needed.
Sit upright on the stability ball with your feet shoulder-width apart, maintaining good alignment with your head, shoulders, hips, and legs. Extend your legs in front of your body, flexing your feet to lift your toes with your heels on the ground. Engage your core, bend your knees, and rock the ball forward, flattening your feet on the floor. Rock the stability ball back to the starting position, straightening your legs and lifting your toes again. Repeat the sequence of movements.
 |
 |
This simple movement is a great way to warm up the muscles you’re going to challenge gently. When you’ve had a lower-body injury or surgery, therapists often recommend pumping your ankles. This exercise actively pumps your ankles and encourages ankle mobility while helping your feet and calves acclimate to gravity. It also works to flush fluids back to your center.
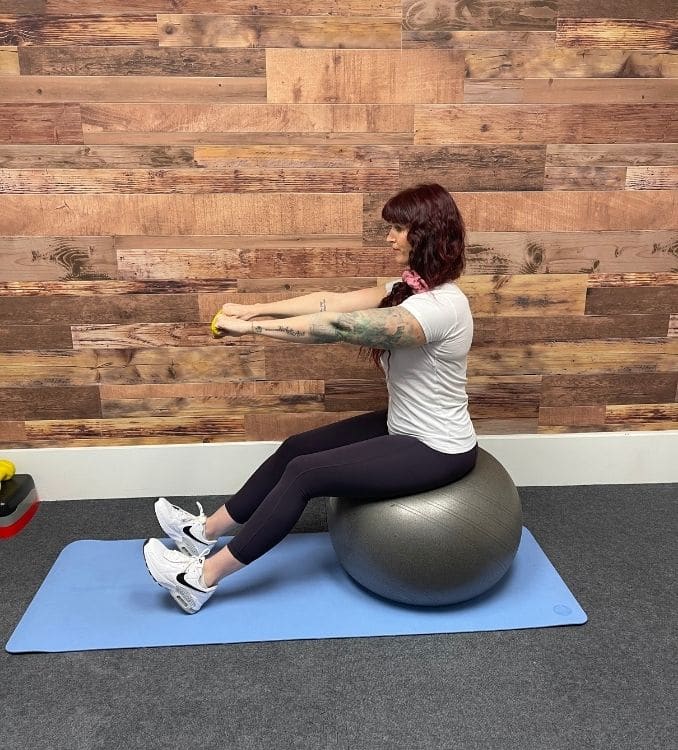
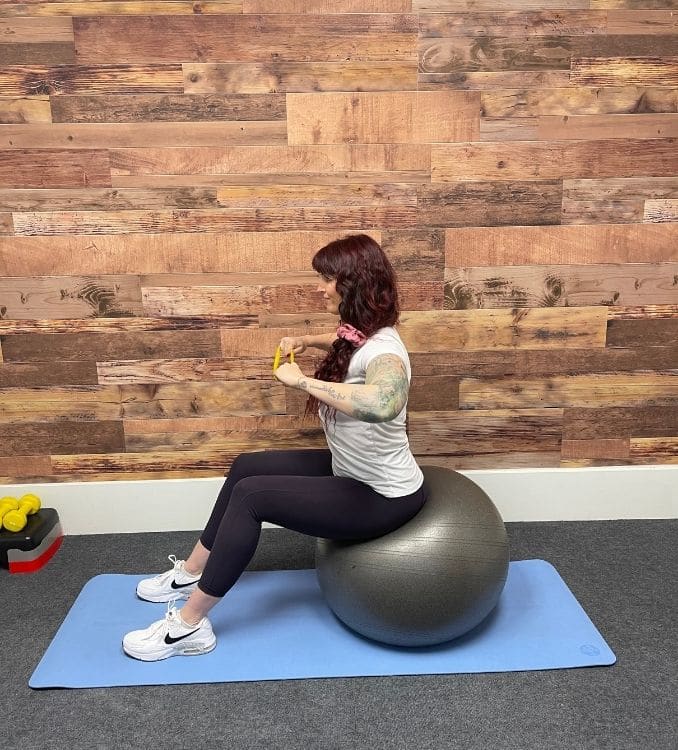
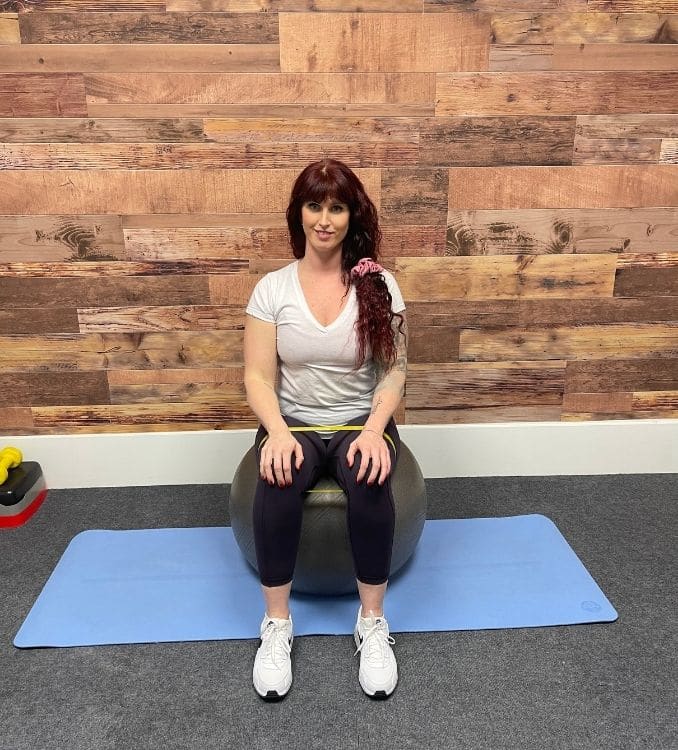
1. Rows
Sit upright on the stability ball with your feet shoulder-width apart, maintaining good alignment with your head, shoulders, hips, and legs. Wrap the mini band around your wrists or hands, extend your arms at chest height, and separate your hands to create resistance on the band. Extend your legs in front of your body, flexing your feet to lift your toes with your heels on the ground. Engage your core, bend your knees, and rock the ball forward, flattening your feet on the floor as you pull your arms back in a rowing motion. Rock the stability ball back to the starting position, straightening your legs and lifting your toes as you extend your arms forward at chest height. Repeat the sequence of movements. Start with 1 set of 10 repetitions.
 |
 |
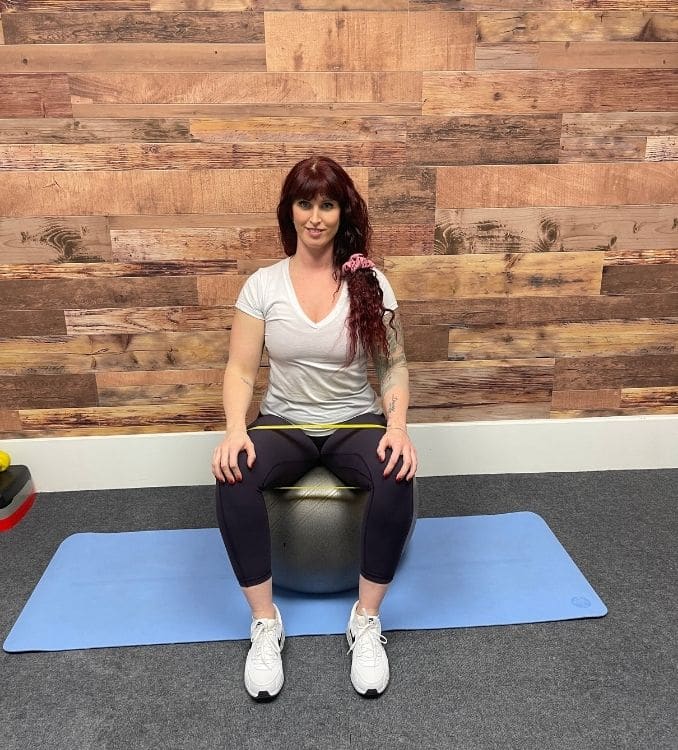
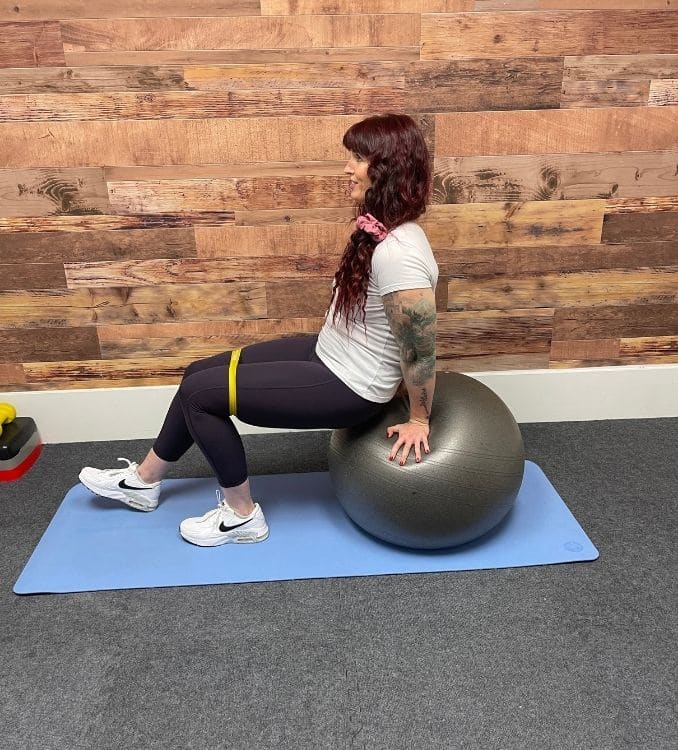
2. Seated Single Leg Lifts
To perform one of the resistance band exercises for injury, place one hand on a chair or against a wall for balance if needed.
Wrap the mini band around your legs, just above your knees. Begin in an upright sitting position on the stability ball with your feet flat on the floor, maintaining good alignment in your upper body. Engage your core and find your center, then lift one knee. Hold this position for a couple of seconds, then lower your foot back to the ground. Repeat the movement. Start with 1 set of 10 repetitions on each side.
To make the exercise more challenging, lift your arms out at your sides or extend your arms in front of your body.
 |
 |
 |
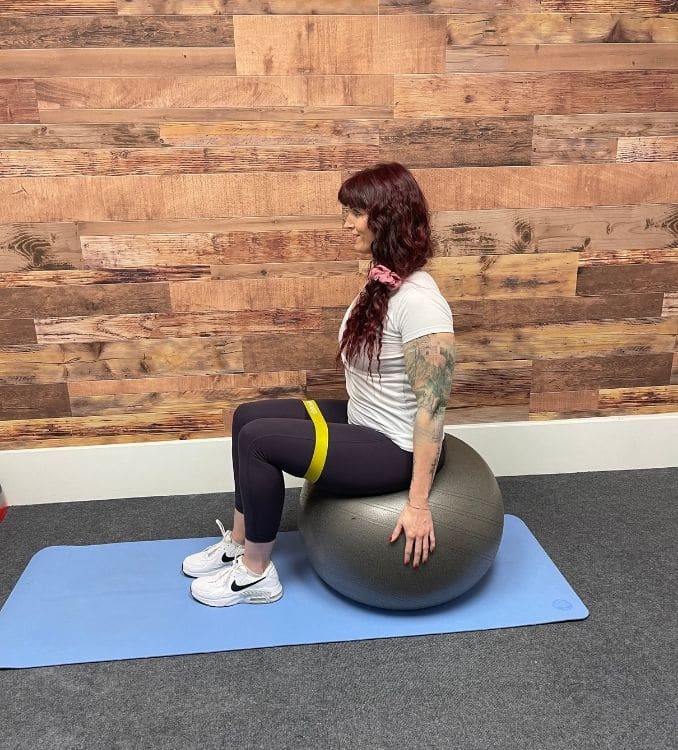
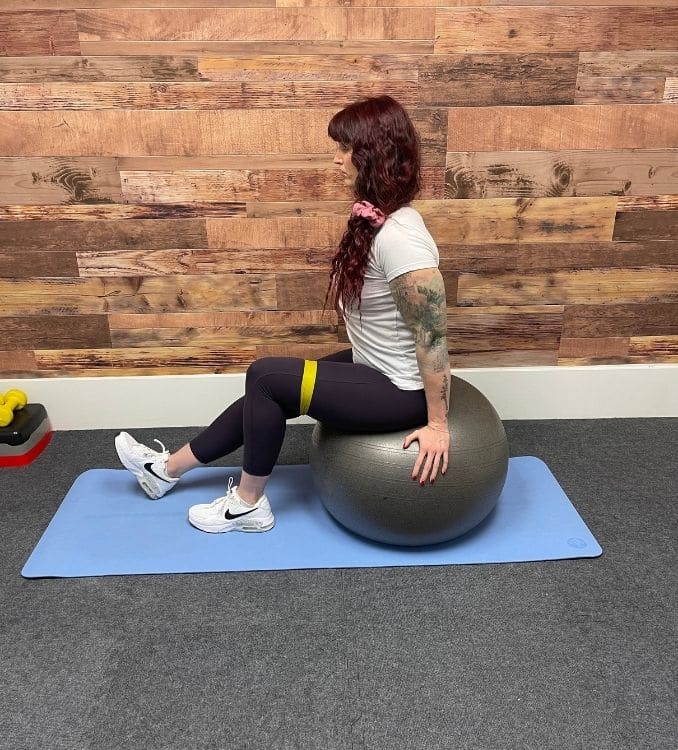
3. Leg Abduction
For this exercise, place one hand on a chair or against a wall for balance if needed.
Wrap the mini band around your legs, just above your knees. Begin in an upright sitting position on the stability ball with your feet together, flat on the floor. Maintain good alignment in your upper body. Engage your core, then pivot from your ankles to open your knees out to the sides. Bring your knees together to return to the starting position and repeat the movement. Start with 1 set of 10 repetitions.
To make the exercise more challenging, lift your toes on both feet as you go through the movement.
 |
 |
4. Seated Glute Lifts
For this exercise, place one hand on a chair or against a wall for balance if needed.
Wrap the mini band around your legs, just above your knees. Begin in an upright sitting position on the stability ball with your feet flat on the floor, maintaining good alignment in your upper body. Place your hands at your sides for support and straighten one leg in front of your body. Engage your core and squeeze your glutes. Using your arms, lift your seat slightly off the stability ball, distributing your weight between your arms and supporting leg. Hold this position for a few seconds. Relax and lower your seat to the starting position. Repeat the movement. Start with 1 set of 5 repetitions on each side.
To make one of the resistance band exercises for injury easier, perform the movement with both of your knees bent.
 |
 |
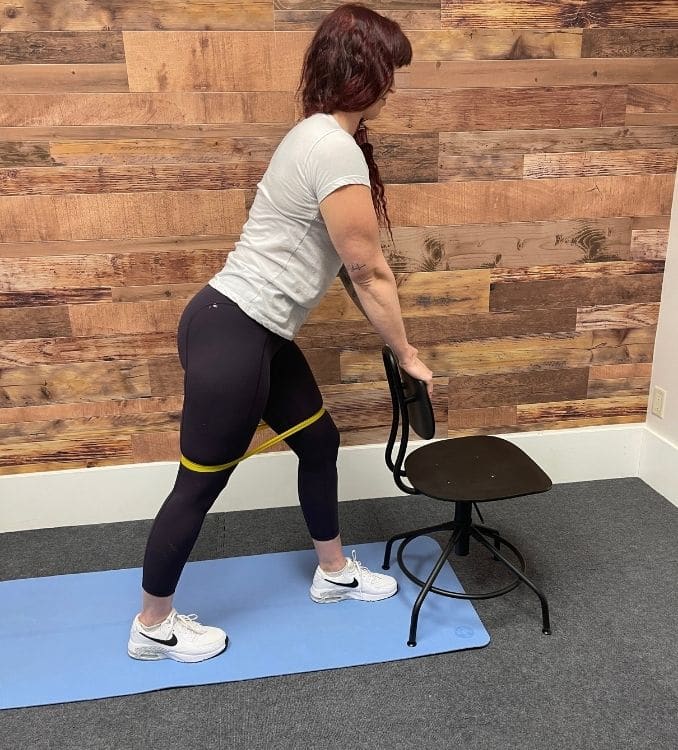
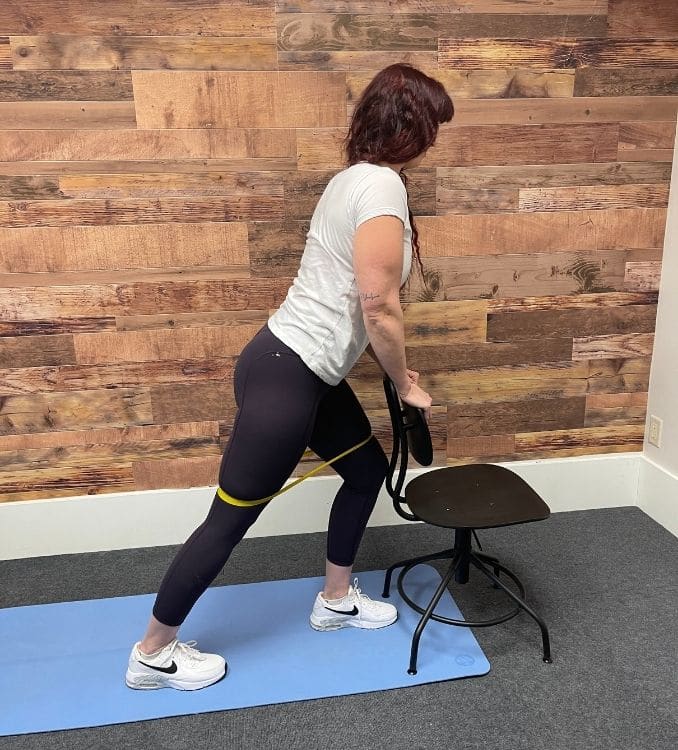
Alternate Exercise – Standing Glute Squeezes
For this exercise, place one hand on the back of a chair or against a wall for balance if needed.
Wrap the mini band around your legs, just above your knees. Begin in an upright standing position with one hand on the back of a chair, maintaining good alignment in your upper body. Step back with one foot to stagger your stance. Working on ankle mobility, bend your front knee towards the back of the chair. Rock back to the starting position as you lift your toes and squeeze your glutes. Repeat the movement. Start with 1 set of 10 repetitions on each side.
 |
 |
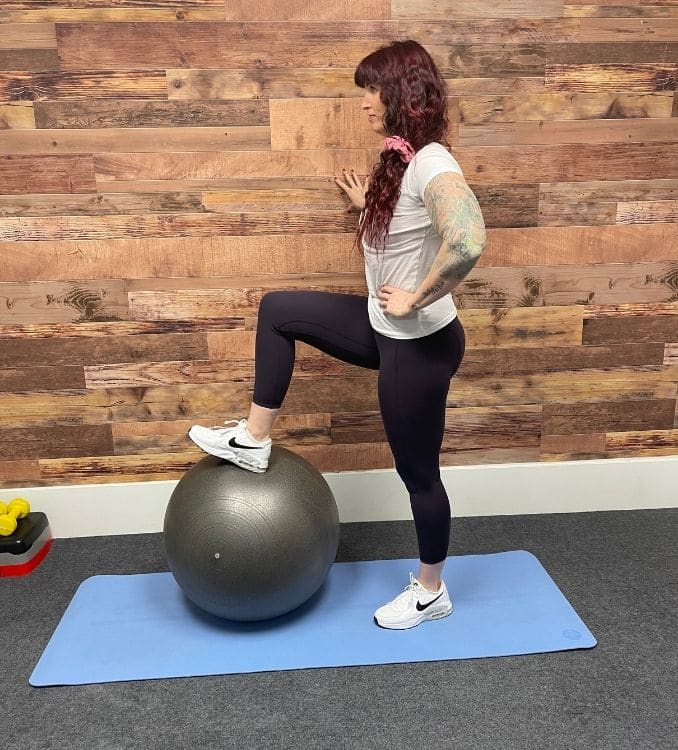
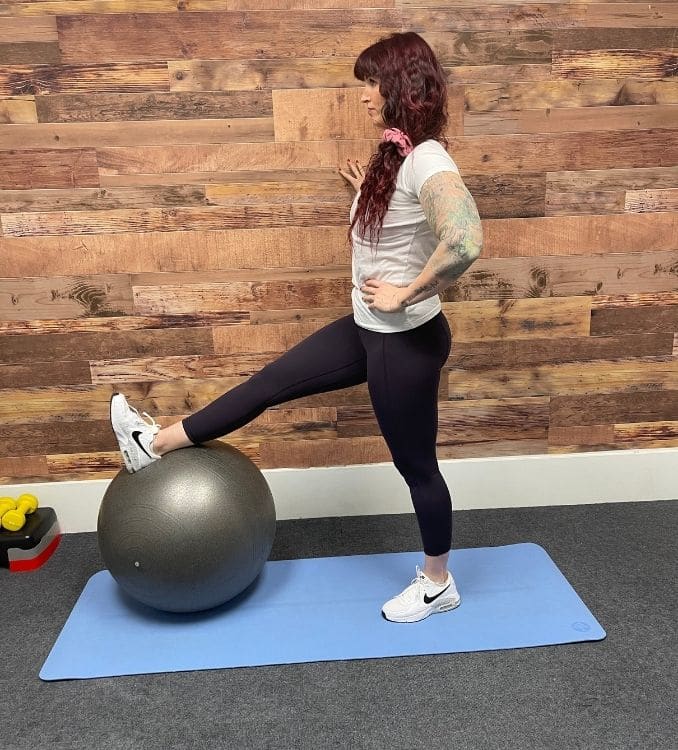
5. Ball Roll-Outs
For this exercise, place one hand on the back of a chair or against a wall for balance if needed.
Wrap the mini band around your legs, just above your knees. Begin in an upright standing position in front of the stability ball with your feet shoulder-width apart, maintaining good alignment with your head, shoulders, hips, and legs. Place one foot on top of the stability ball and one hand on the back of a chair for balance. Engage your core, squeeze your glute, and straighten your leg, rolling the ball forward. Pull your leg back to the starting position and repeat the movement. Start with 1 set of 10 repetitions on each side.
 |
 |
These exercises help prepare you for stepping movements like getting into a car or climbing up the stairs. It is important to wait until you have been cleared by your physician before engaging in any post-injury recovery exercises. Remember that the goal is to maintain your mobility while waiting for your full recovery without putting yourself at risk for further pain or added injuries.
Are you looking for the best method for losing stubborn fat quickly and easily? If so, click here to discover how.