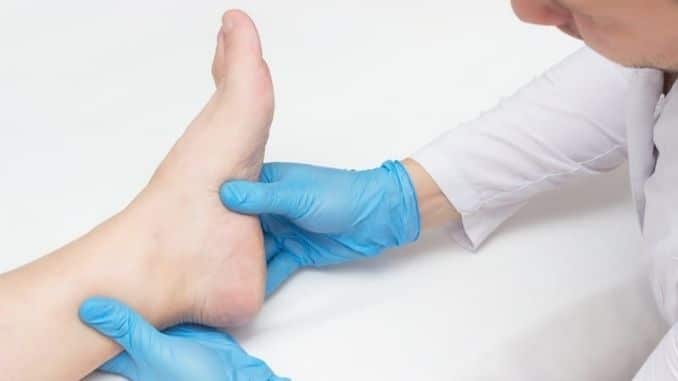
Question: “Do you have an exercise for someone with an ankle or heel hairline fracture? Also, I don’t think it’s my sartorius muscle but have pain inner right thigh. It hurts bad when sitting or getting up. Thanks.”
What Is an Ankle or Heel Hairline Fracture?
A hairline fracture, also called a “stress” fracture, is a tiny crack that occurs in the bone, often as a result of sports that involve a lot of repetitive running and/or jumping.
Unlike clean bone breaks, hairline fractures typically develop gradually over a long period of time. As you use the area repeatedly — particularly in activities that put a strain on a bone or group of bones — the bones may become damaged, and a hairline fracture may develop.
The bones in the foot and leg — including the heels and ankles — are some of the most vulnerable to hairline fractures as they absorb a lot of stress during sports and other activities. The following can increase your risk of these fractures:
- Sudden increase in workout intensity or frequency
- Changing the type of exercise you do without adequate preparation
- Failing to get enough rest between exercise periods
- Participating in high-impact sports
- Wearing shoes that don’t adequately support your feet
- Using improper technique or form during the exercise
- Changing playing surfaces, such as moving from grass to concrete or a treadmill to outdoors
- Failing to get enough calcium or vitamin D to support strong bones
- Osteoporosis or thinning bones
Symptoms of a hairline fracture are typically milder than a complete fracture, but still include pain, swelling and bruising. The pain usually gets worse over time and with continued activity and tends to lessen while you’re resting.
How the Ankle and Heel Are Susceptible to Hairline Fractures
The heel bone (calcaneus) is the large bone that forms the foundation of the rear part of the foot. It has a thin, hard shell on the outside and a softer, spongy bone on the inside, leading some to liken it to a hard-boiled egg. When the outer shell is damaged, the bone inside can collapse and fragment.
Typically, stress fractures of the heel do not involve the subtalar joint, which allows the heel to move. Instead, the fracture occurs only in the heel bone itself and may cause generalized pain and swelling in the heel area that develops slowly over a period of days to weeks.
The ankle joint is made up of three bones:
- Tibia (shinbone)
- Fibula (smaller bone in the lower leg)
- Talus (small bone that sits between the heel bone and the tibia and fibula)
Ankle fractures are classified depending on which of these bones are broken. A talus stress fracture is one of the most common as the talus is responsible for transferring weight-bearing forces from the shin to the foot. As you’re exercising, compressive forces occur on and through the talus, and with too much repetition, may damage it.
Symptoms of a talus fracture include pain during certain movements, aches at nighttime and pain when touching the talus.
Stress fractures may occur in any of the bones of the ankle; sometimes, in more than one. The injuries are sometimes misdiagnosed as “shin splints,” particularly if the fracture is closer to the shinbone. You can tell the difference, however, by checking for pinpoint tenderness around the ankle, swelling, and pain when putting weight on it. Shin splints usually don’t have the same level of pain under weight loading and no swelling.
In general, if you’re not sure whether you have a stress fracture, look for pain that gets worse with activity, pain upon weight bearing and pinpoints tenderness.
What to Do When You Get a Hairline Fracture
When you first suspect a hairline fracture, follow these steps:
- Rest: Avoid weight bearing for 24 hours or longer. You may need to use crutches.
- Ice: Apply ice (bagged, crushed ice wrapped in a thin towel) to the injured area. To avoid frostbite, ice should not be left in the area longer than 20 minutes at a time. Ice for 20 minutes every two hours for the first 24 hours to control swelling.
- Compression: Wrap the injured area with an elastic bandage to help prevent swelling and edema.
- Elevation: Raise the injured area above the hip or heart to reduce swelling. If the swelling doesn’t subside in 48 to 72 hours, seek medical treatment for a complete evaluation. If you are unable to bear weight on the injured ankle within 48 hours, seek medical treatment and have the fracture assessed.
- Exercise: Start doing rehabilitation exercises as soon as you can tolerate them without pain or as advised by your doctor. Always consult a physician for a thorough evaluation and diagnosis.
It’s very important that you address the pain you’re experiencing rather than “toughening it out” and continuing to exercise as ignoring the pain of a hairline fracture can lead to the bone breaking completely.
Once the fracture is diagnosed, follow your doctor’s instructions carefully and be sure to avoid high-impact activities while you’re healing. If you return to vigorous workouts too soon — particularly the type that caused the fracture in the first place — then you risk completely breaking the bone.
Non-weight Bearing Exercises for an Ankle or Heel Hairline Fracture
After giving the foot or ankle a few days to rest and recuperate, you can begin to work in the following exercises, depending on your level of pain, your ability to put weight on the injury and your doctor’s advice. Incorporating some movement into your treatment process can help speed up healing as long as you refrain from weight-bearing exercises until you’re ready. The following exercises will work for both heel and ankle fractures.
CLICK HERE to watch the YouTube video.
Begin With Non-weight Bearing Exercises
Non-weight bearing dorsiflexion: Moving only your ankle, point your foot back toward your nose while keeping knees straight. Continue until you feel discomfort or can’t tilt it back any farther. Hold this position for 15 seconds, and then return to a neutral position.
Non-weight bearing plantar flexion: Moving only your ankle, point your foot forward while keeping knees straight. Continue until you feel discomfort or can’t move it any farther. Hold this position for 15 seconds, and then return to a neutral position.
Non-weight bearing inversion: Moving only your ankle and keeping your toes pointed up, turn your foot inward, so the sole is facing your other leg. Continue until either discomfort is felt or you can no longer turn your foot inward. Hold this position for 15 seconds, and then return to a neutral position.
Non-weight bearing eversion: Moving only your ankle and keeping your toes pointed up, turn your foot outward, away from your other leg. Continue until either discomfort is felt or you can no longer turn your foot outward. Hold this position for 15 seconds, and then return to a neutral position.
The alphabet: Sit on a chair with your foot dangling in the air or on a bed with your foot hanging off the edge. Draw the alphabet one letter at a time by moving the injured ankle and using the great toe as your “pencil.”
Move to Incorporate Strengthening Exercises, Starting With Isometric Contractions
Strengthening exercises usually begin with isometric contractions — no motion occurs around your ankle joint during the muscle contraction. These exercises may be done early after injury or surgery to start to gently — and safely — add force to the muscles that support your ankle.
Eversion isometrics: While seated, place the outside of the injured foot against a table leg or closed door. Push outward with your foot into the object ― your ankle joint should not move ― causing a contraction of your muscles. Hold this muscle contraction for 15 seconds, and then relax for 10 seconds.
Inversion isometrics: While seated, place the inside of the injured foot against a table leg or closed door. Push inward with your foot into the object ― your ankle joint should not move ― causing a contraction of your muscles. Hold this muscle contraction for 15 seconds, and then relax for 10 seconds.
Resisted Strengthening Exercises
Resisted strengthening exercises should be performed with a TheraBand providing resistance to your movements. Never tie a TheraBand or anything else around your foot, ankle or leg in a way that would restrict blood flow. These exercises will also work to strengthen the muscles around your ankle. This will provide added support to the joint. Perform each exercise 10 to 15 times in a row.
Resisted strengthening dorsiflexion: Moving only your ankle, point your foot back toward your nose while keeping knees straight. Continue until you feel discomfort or can’t tilt it back any further. Hold this position for two seconds and slowly release. Return to a neutral position, and then repeat the exercise.
Resisted strengthening plantar flexion: Moving only your ankle, point your foot forward while keeping knees straight. You may feel tightness in your calf muscle behind your lower leg. Continue until you feel discomfort or can’t move it any further. Hold this position for two seconds, and then return to a neutral position.
Resisted strengthening inversion: Moving only your ankle and keeping your toes pointed up, turn your foot inward, so the sole is facing your other leg. Continue until either discomfort is felt or you can no longer turn your foot inward. Hold this position for two seconds, and then return to a neutral position.
Resisted strengthening eversion: Moving only your ankle and keeping your toes pointed up, turn your foot outward, away from your other leg. Continue until either discomfort is felt or you can no longer turn your foot outward. Hold this position for two seconds, and then return to a neutral position.
Progress to Weight-bearing Exercises ― Starting With Partial Weight-bearing Exercises
These partial weight bearing exercises will help put more weight on the injured ankle as well as strengthen the muscles around it. Each one should be performed 10 times in a row.
Partial weight-bearing seated calf raises: Sit in a chair with the injured foot on the floor. Lift your heel as far as possible while keeping your toes on the floor, and then return heel to the floor.
Partial weight-bearing standing weight shift: Stand upright while holding onto a stable object. Shift some of your weight onto the injured foot. Hold the position for 15 seconds. Relax and put your weight back onto your uninjured foot.
Full Weight-bearing Exercises
These exercises will help put more weight on the injured foot. You should be sure that your ankle can tolerate the pressure that you are putting upon it. Checking in with your physical therapist may be necessary to be sure you are doing the right exercises for your ankle. Perform each one 10 times in a row.
Simple walking: When you recover enough to put weight on the injured area, you can Start doing rehabilitation exercises.
Full weight-bearing single leg stance: Stand on the injured foot while lifting the uninjured foot off the ground. Hold the position for 15 seconds. Relax and put your weight back onto your uninjured foot.
Full weight-bearing standing calf raises: Stand on the injured foot while lifting the uninjured foot off the ground. Rise up, standing only on the ball of the injured foot and lifting your heel off the ground. Hold the position for 15 seconds. Relax and put your weight back onto your uninjured foot.
Full weight-bearing lateral stepping: Increase the speed of this exercise as your healing progresses. Place a rolled towel or short object on the ground to the side of your injured foot. Step over the towel with the injured foot and remain on that foot. Then, bring the uninjured foot over the object and stand on both feet. Step back over the towel with the uninjured foot and remain on that foot. Then, bring the injured foot back over the towel and stand on both feet.
Full weight-bearing lateral jump: This exercise starts to incorporate plyometrics into your rehab routine, which can help you get back to running and sports. (Increase the speed of this exercise as your healing progresses.) Place a rolled towel or short object on the ground to the side of your injured foot. Hop over the towel and land on the injured foot. Then, hop back over the towel and land on the uninjured foot.
Now It’s Time to Improve Your Balance
Injury to ankles and heels can often result in decreased balance ability. Towards the end of rehabilitation, performing balance activities is an important way to prevent future injury. Perform this exercise 10 times in a row.
Balance ― single leg stance on a towel: Fold a towel into a small rectangle and place on the ground. Stand with the injured foot on the towel. Lift the uninjured leg off the ground standing only on the towel with the injured leg. Hold for 15 seconds. (As balance improves, increase stance time on injured leg up to 45 seconds.) Return your uninjured foot to the floor.
You can increase the challenge by standing on more unsteady surfaces like a wobble board. Stand upright while holding onto a stable object. Shift some of your weight onto the injured foot. Hold the position for 15 seconds. Relax and put your weight back onto your uninjured foot.
What’s Causing My Inner Thigh Pain?
Inner thigh pain may be caused by a muscle or tendon problem or something more serious like a kidney stone, hernia or blood clot. Sometimes, it can be difficult to tell what’s at the root of it, so it may be best to see your doctor.
You can watch for a few things to help glean more clues as to what may be going on:
- Hernia: If a hernia is to blame, you may feel a bulge or lump somewhere in the inner thigh. These most commonly occur where the groin and thigh meet.
- Blood clot: These are most common in the lower legs and calves, but sometimes they can occur in the thigh. Look for tenderness in a small area, swelling, a warm sensation and a bluish color to the skin.
- Kidney stones: These can cause pain that radiates into the inner thigh. Usually, you will experience other symptoms like pain while urinating and increased urgency and frequency of urination.
If you’re not noticing these other symptoms, your thigh pain is likely related to muscle strain or damage. The inner thigh muscles can become strained or torn with activity, particularly running or playing sports that require quick turns and changes in direction, like tennis and soccer. Common symptoms may include:
- Pain and soreness in the inner thighs or groin region
- Swelling, inflammation
- Stiffness
- Difficulty making certain movements
- Muscle spasms
As with other injuries, begin by resting for 24-48 hours and applying ice or heat packs as needed. Then, start incorporating exercises slowly to help in healing. We have some that can help with injuries to the inner thigh and groin area here.
If the pain gets worse or is accompanied by other symptoms like those listed above, check with your doctor right away.
If you are looking for ways to eliminate pain and properly heal your Ankle Sprain, then check out the Ankle Sprain Solved program.

