
Today we will be sharing a simple workout using mini bands and fitness sliders. Both mini bands and fitness sliders are versatile, easy to transport fitness tools that you can use to spice up your workouts. We will be focusing on the legs in this routine, strengthening your glutes, quads, hamstrings, and calves. Your legs will be burning by the end of it, and you can be sure you got a great lower body workout.
Ideally, you will use two mini-bands, but if you only have one, that will work as well. You will also need a pair of fitness sliders. If you do not have fitness sliders, there are other alternatives you can use. If you are on the carpet, you can use paper plates – they will move easily on the carpet. If you are on a hard surface, you can use towels or other fabric items such as clothing or rags. Make sure you have adequate space around you to go through the exercises safely, and that there are no obstacles that could get in your way.
You can do this workout as a circuit by going through one set of each of the 4 exercises back to back. Take a break after you have gone through each exercise once, then repeat the circuit 1-3 times. The circuit is quicker but will be more challenging as you will have less time to rest between exercises. The other option is to do one set of the first exercise, take a short break, then do the next set of the same exercise, until you have completed up to 3 sets. Take a longer break and then do the same for all 4 exercises. This way of doing the workout will take you longer and will likely be a bit easier as you will have more breaks. Let’s get started!
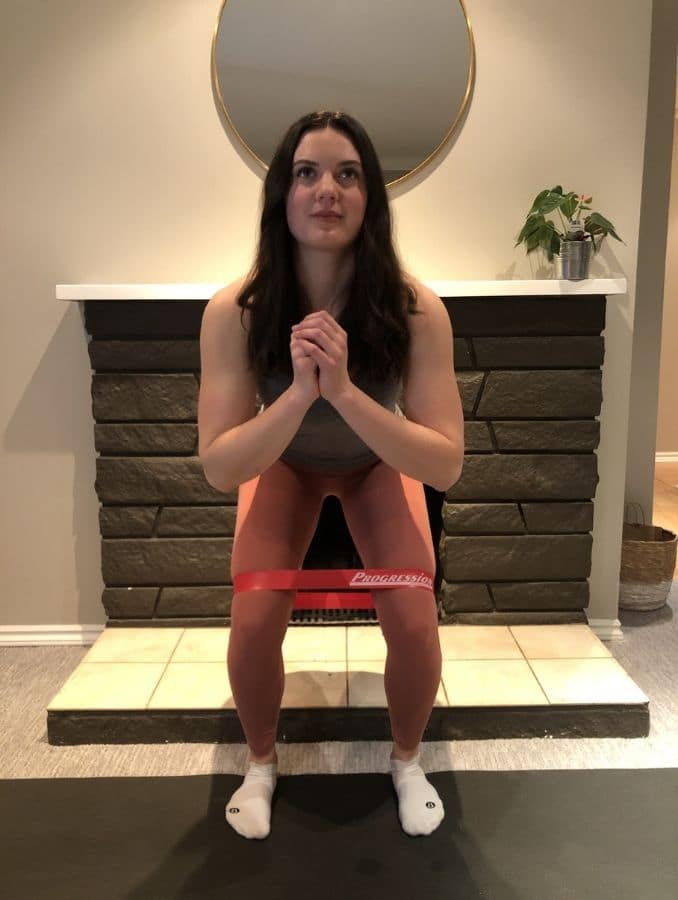
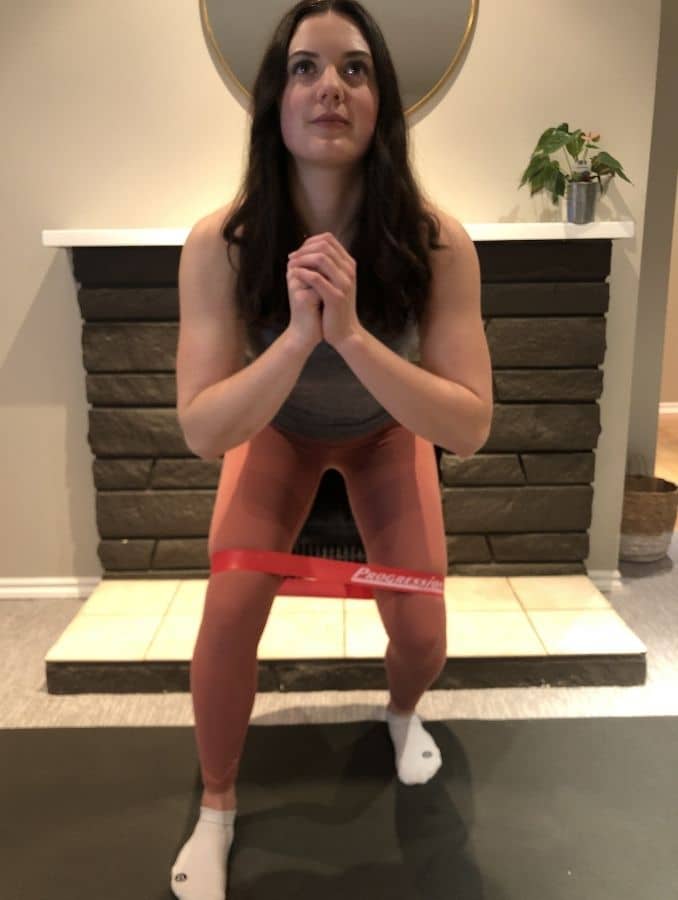
1. Band Walks
 |
 |
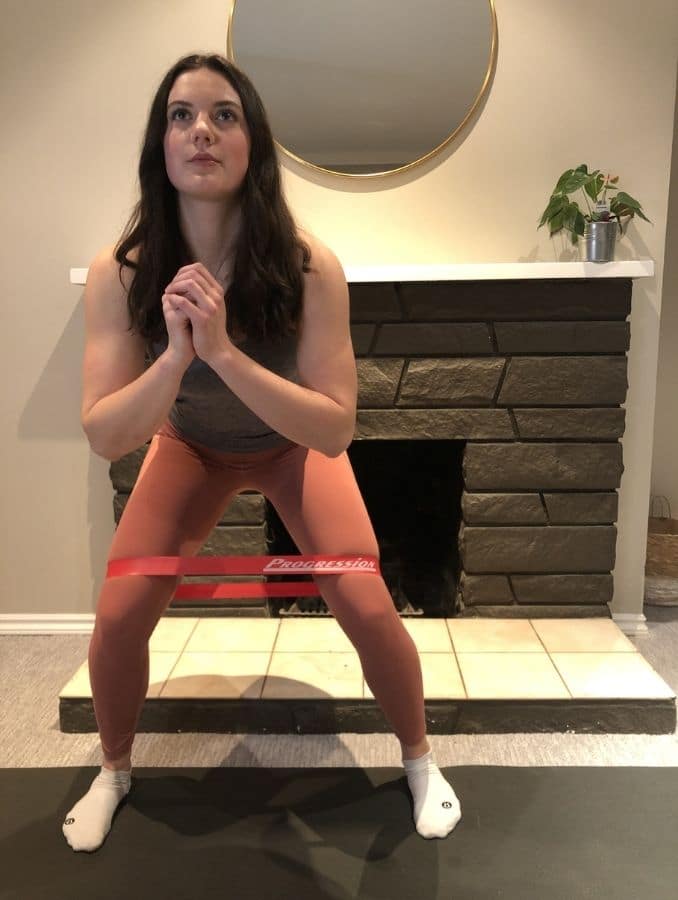 |
This first exercise is a common one, but using two minibands steps it up a notch. If you only have one band, don’t worry, you can still do the exercise.
Begin by wrapping one mini-band just above your knees, and the other one just above your ankles. If one of your mini bands is a higher resistance, put that one above your knees, and put the one with less resistance around your ankles. If you only have one band, wrap the band above your knees. Position your feet slightly wider than hip-distance apart, and move into a shallow squat by slightly bending your knees and hinging at your hips. With your hands on your waist and keeping the resistance tight on the bands, walk forward in small steps. Make sure that your knees and ankles do not fall inward. Take 4 steps forward, 4 steps back, 4 steps to the right, and 4 steps to the left. This is considered one repetition.
Perform 3 sets of 1-3 repetitions.
Modifications: To make this exercise easier, use only one band above your knees. You can also use a lower resistance band. To make this exercise more challenging, use bands with higher resistance or increase the repetitions.
2. Band Toe Taps
 |
 |
 |
This exercise will work your glutes, especially your gluteus medius, while also working your core and upper body.
Begin by wrapping the mini-band just above your knees. Move down to the floor into a modified plank position with your hands beneath your shoulders, your knees bent and your toes tucked. Make sure you keep a neutral spine by engaging your core and not allowing your lower back to arch. Once you are stable in this position, step one foot out to the side and tap your toe. Step your foot out as far as is comfortable while keeping the rest of your body stable. Bring your foot back to the center position and repeat the movement on the opposite side.
Perform 3 sets of 5-10 repetitions on each side.
Modifications: You can make this exercise easier in a couple of ways. First, you can do this from your knees. Wrap the band above your knees and move into a plank position on your knees, with your head, shoulders, hips, and knees in alignment. Instead of tapping your toes out to the side, bring one knee out at a time. Make sure you are on a comfortable surface to protect your knees. Alternatively, you can choose to omit the band, eliminating the resistance for the toe taps. To make this exercise more difficult, straighten your legs so you are in a full plank. From here, do the toe taps while keeping the rest of your body stable and in alignment.
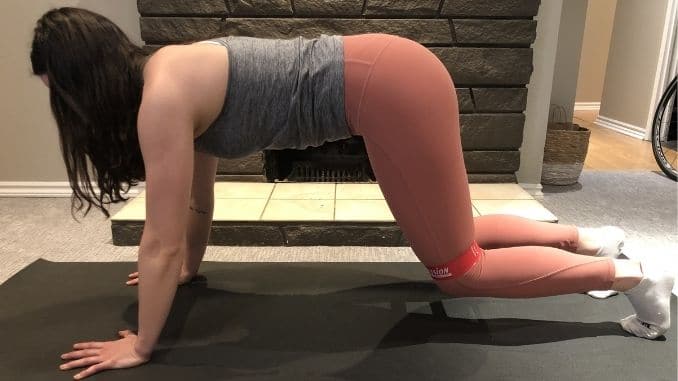
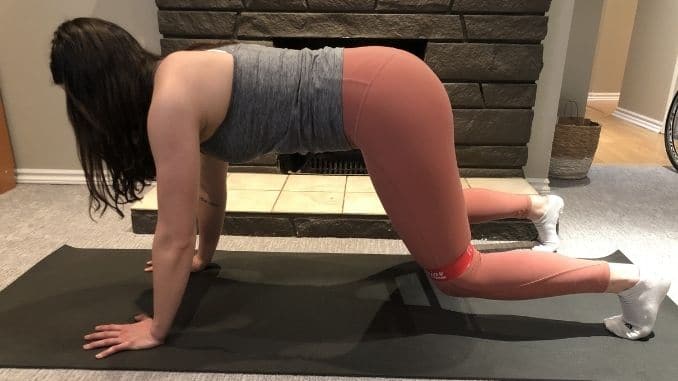
3. Slider Mountain Climbers
 |
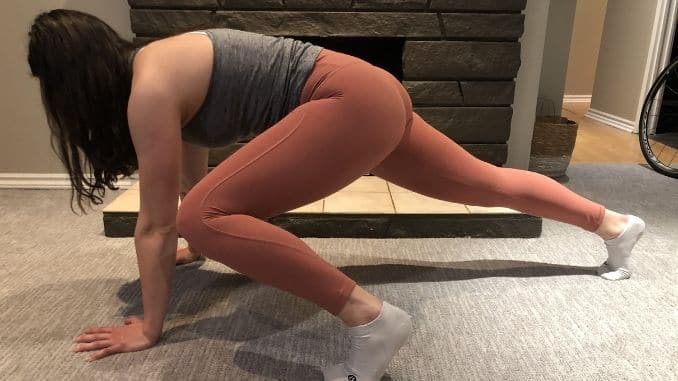 |
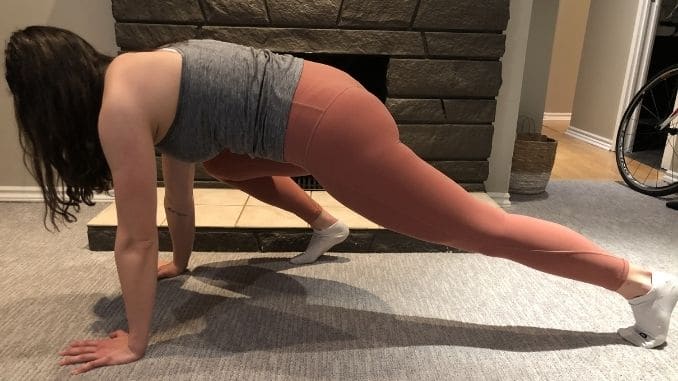 |
The last two exercises in this workout will use the fitness sliders (or alternatives discussed earlier). For slider mountain climbers, you will be working your legs along with your core and upper body. Depending on how quickly you go through the repetitions, you may get a cardio workout as well.
Begin in a high plank position with the sliders under your toes. You should have your wrists under your shoulders and your head, shoulders, hips, knees, and ankles in alignment. Keep your shoulders down from your ears, and imagine pulling your belly button up towards your spine. This will help keep your spine in a neutral position and prevent you from overarching your lower back. Once you are stable in your plank position, slide your right foot forward to bring your right knee towards your right shoulder. Drive your knee up as far as your can, then slide your foot back to your plank position. Repeat this movement on the left side. Keep alternating legs.
Perform 3 sets of 5-10 repetitions on each side.
Modifications: To make this exercise easier, you can elevate your upper body. Instead of planting your hands on the floor, you can put them on a stable raised surface such as a coffee table or workout bench. This will take some of the weight off of your upper body. To make this exercise more challenging, try sliding both feet in and out at the same time. This will require more core strength to keep your body stable while you move your legs.
4. Slider Curtsy Lunge
 |
 |
Curtsy lunges work the quads and glutes like a traditional lunge, but also engage the gluteus medius and adductors. This exercise is great for increasing strength and improving your balance.
Begin by standing with one fitness slider under your left foot. Your right foot should be firmly planted on the floor. Place your hands on your hips. Begin to slide your left foot behind your right leg while you bend your right knee. Make sure you keep your right knee stacked on top of your right ankle throughout the entire movement. Once you are in the curtsy lunge position, press into your right leg and slide your left foot back. Squeeze your right glute as you move back to the starting position. This is considered one repetition.
Perform 3 sets of 5-10 repetitions on each side.
Modifications: To make this exercise easier, do a shallower lunge. Do not bend your knees as much and do not reach your sliding leg back as far. To make this exercise more difficult, hold a weight while you perform the lunge.
There you go! Those are four great exercises you can do using mini bands and fitness sliders to get a fun and effective leg workout. We hope you try them out and enjoy this short lower body challenge.
Learn even more great resistance band exercises that will help you burn calories and fat. Click here for more information.