Many of us tend to forget about our hips until they give us issues. Incorporating mini resistance band exercises for hip strength and alleviating hip pain is important yet easy to neglect.
You will learn and enjoy an easy hip-strengthening workout with a mini resistance band. This workout helps you feel and move better with stronger hips, especially if you spend most of your days sitting.
Moreover, experiencing hip pain [1] can significantly impact daily activities, from walking to sitting comfortably. Common causes include muscle imbalances, arthritis, or injuries.
Incorporating resistance band exercises for hip pain into your routine can be an effective, low-impact method to alleviate discomfort and enhance hip function.
Mini bands are small, looped resistance bands typically made of latex or fabric. They come in various resistance levels, allowing for progressive training. Due to their compact size and versatility, mini bands are particularly effective for targeting hip muscles, making them a valuable tool for rehabilitation and strength training.
Moreover, give these 5 mini resistance band Exercises for hip strength [3] a try. Even if you have a job that causes you to sit all day, you can help undo some of the damage sitting causes with these exercises.
- Monster Band Walk
- Forward Walk
- Squats With the Band
- Hip Hinge
- Glute Bridge
1. Monster Band Walk
Monster Band Walk
- Begin in an upright standing position with your legs shoulder-width apart and your toes slightly pointed outward.
- Wrap the mini band around your legs above your knees and bring your hands to chest height.
- Bend your knees slightly and hinge through your hips to move into an athletic position.
- Take a big step on one side, then return to the starting position and repeat the movement on the opposite side.
Start with one set of 5 repetitions on each side. Perform this exercise in a smooth, controlled movement. The intensity is light.
2. Forward Walk
Forward Walk
- Begin in an upright standing position with your legs shoulder-width apart and your toes slightly pointed outward.
- Wrap the mini band around your legs just above your knees and bring your hands to chest height.
- Bend your knees slightly and hinge through your hips to move into an athletic position. Step one foot forward, following with your other foot.
- Keep your feet shoulder-width apart to maintain band tension.
- Walk back to return to the starting position.
Start with one set of 5 repetitions in each direction. Additionally, perform this exercise in a smooth, controlled movement. The intensity is light.
3. Squats With the Band
Squats With the Band
- Begin in an upright standing position with your legs shoulder-width apart and your toes slightly pointed outward.
- Maintain a proper alignment with your head, shoulders, hips, and legs. Wrap the mini band around your legs just above your knees and bring your hands at chest height.
- Then, contract your core, bend your knees, and hinge through your hips to move into a squat position, ideally to about 90 degrees.
- Raise up to return to the starting position and repeat the movement.
Moreover, start with one set of 5 repetitions. Perform this exercise in a smooth, controlled movement. The intensity is light.
4. Hip Hinge
Hip Hinge
- Begin the in an upright standing position with your legs shoulder-width apart and your toes slightly pointed outward.
- Then, maintain a proper alignment with your head, shoulders, hips, and legs.
- Wrap the mini band around your legs just above your knees and place your hands at your sides.
- Contract your core, bend your knees slightly, and pivot through your hips to bend your upper body forward. Ideally, your back should be parallel to the floor.
- Moreover, raise up and repeat the movement.
Start with one set of 5 repetitions. Perform this exercise in a smooth, controlled movement. The intensity is light.
5. Glute Bridge
Glute Bridge
- Wrap the mini band around your legs just above your knees.
- Lie on the floor with your arms at your sides, relaxing your upper body.
- Then, bend your knees and flatten your feet on the floor, keeping your legs shoulder-width apart.
- Contract your core, and then push from your heels to lift your hips up.
- Moreover, lower your hips to return to the starting position and repeat the movement.
Benefits of Resistance Band Exercises
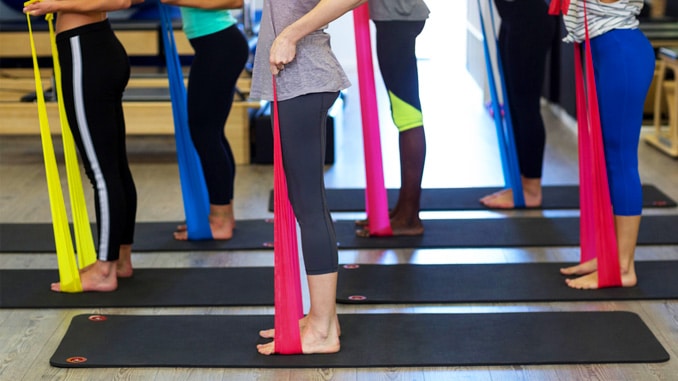
- Strengthening Muscles: Resistance bands [2] provide consistent tension, activating and strengthening the muscles around the hip joint. This targeted strengthening supports joint stability and function.
- Improving Mobility: Resistance bands provide consistent tension, activating and strengthening the muscles around the hip joint. This targeted strengthening supports joint stability and function.
- Low-Impact Nature: Exercises with resistance bands are gentle on the joints, making them suitable for individuals with varying fitness levels or those recovering from injuries.
- Convenience and Accessibility: Mini bands are affordable, portable, and can be used anywhere. They facilitate consistent exercise routines without the need for bulky equipment
Additional Exercises to Consider
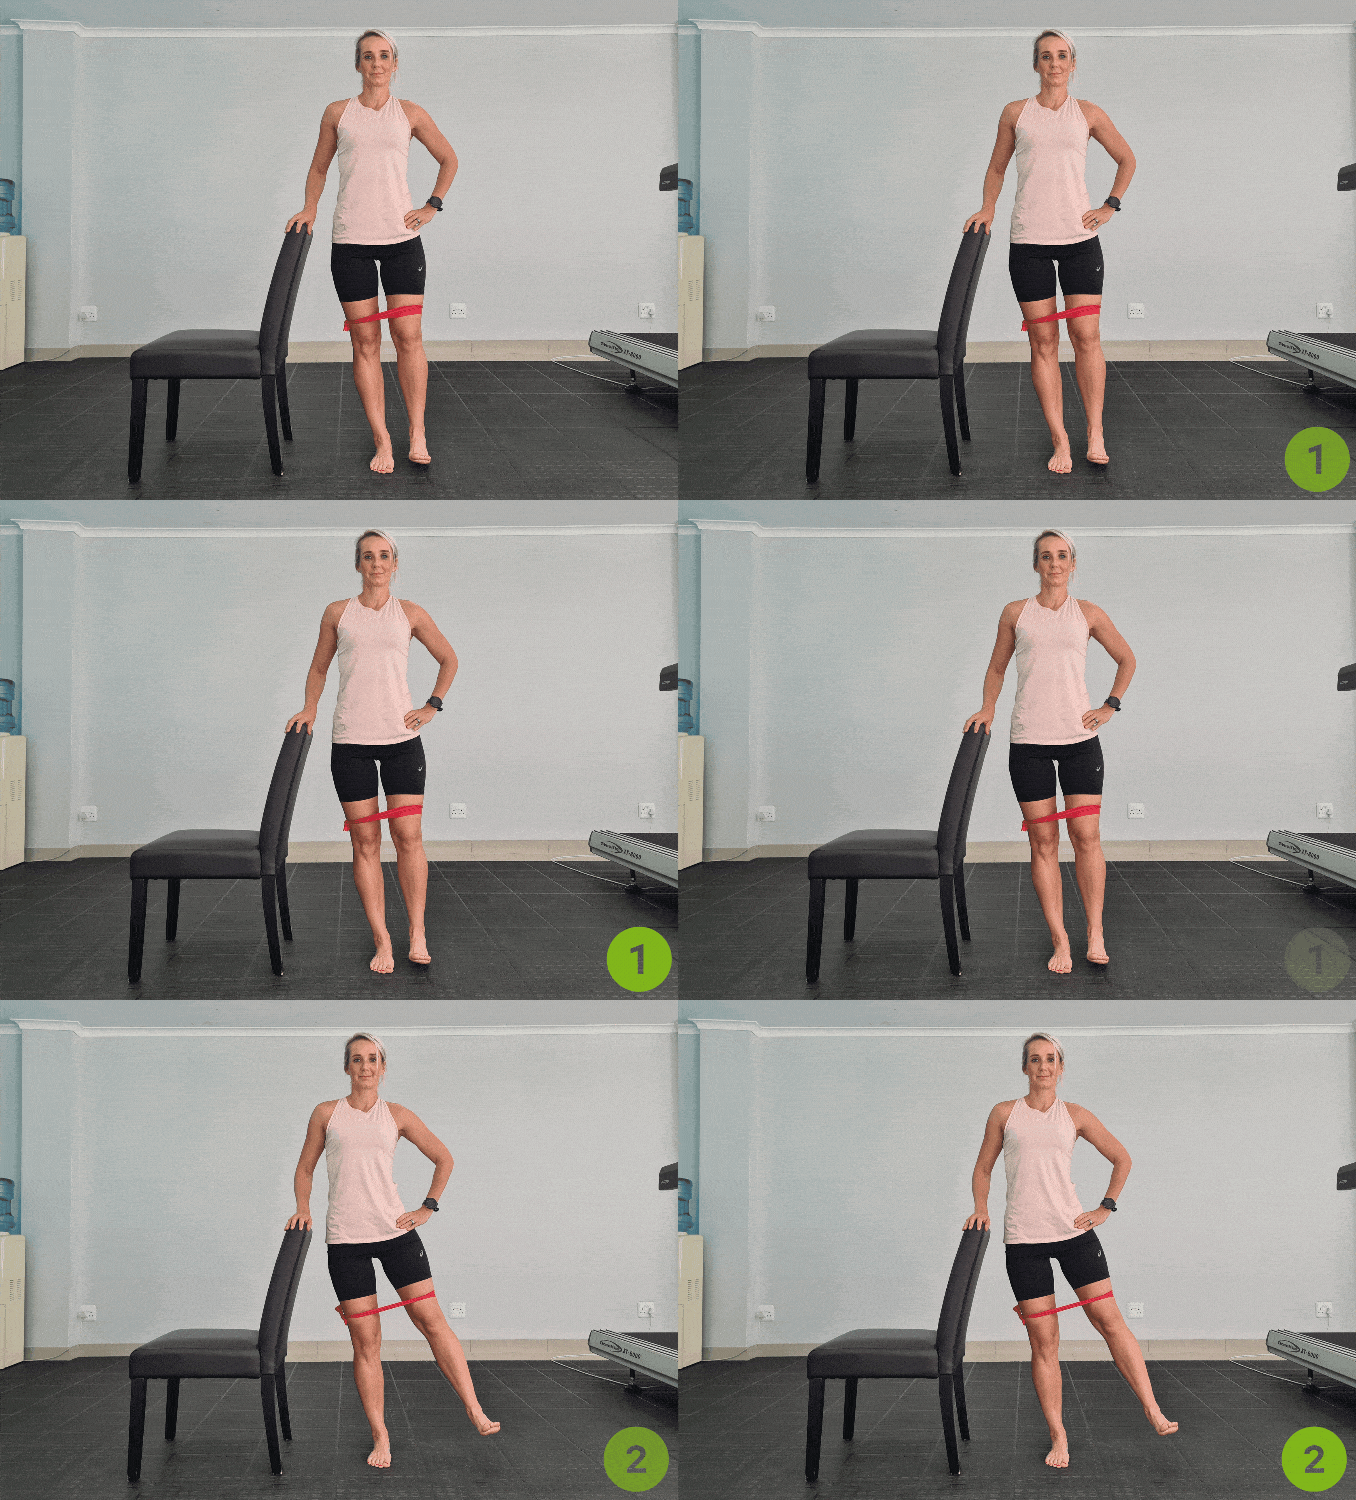
1. Standing Hip Abductions

This exercise targets the outer hip muscles, enhancing strength and balance.
For this exercise, kindly utilize a sturdy chair with a backrest and a mini band.
- Begin in an upright standing position beside a chair with a mini band around your legs just above your knees with your feet hip-width apart, maintaining good alignment with your head, shoulders, hips, and legs.
- Then, place one hand on the backrest of the chair while the opposite hand is on your hip. Engage your core.
- Shift your weight onto one leg and slowly lift the other leg out to the side, keeping it straight.
- Lower your leg back to the starting position and repeat the movement with 10 repetitions.
- Moreover, repeat the movement on the opposite side.
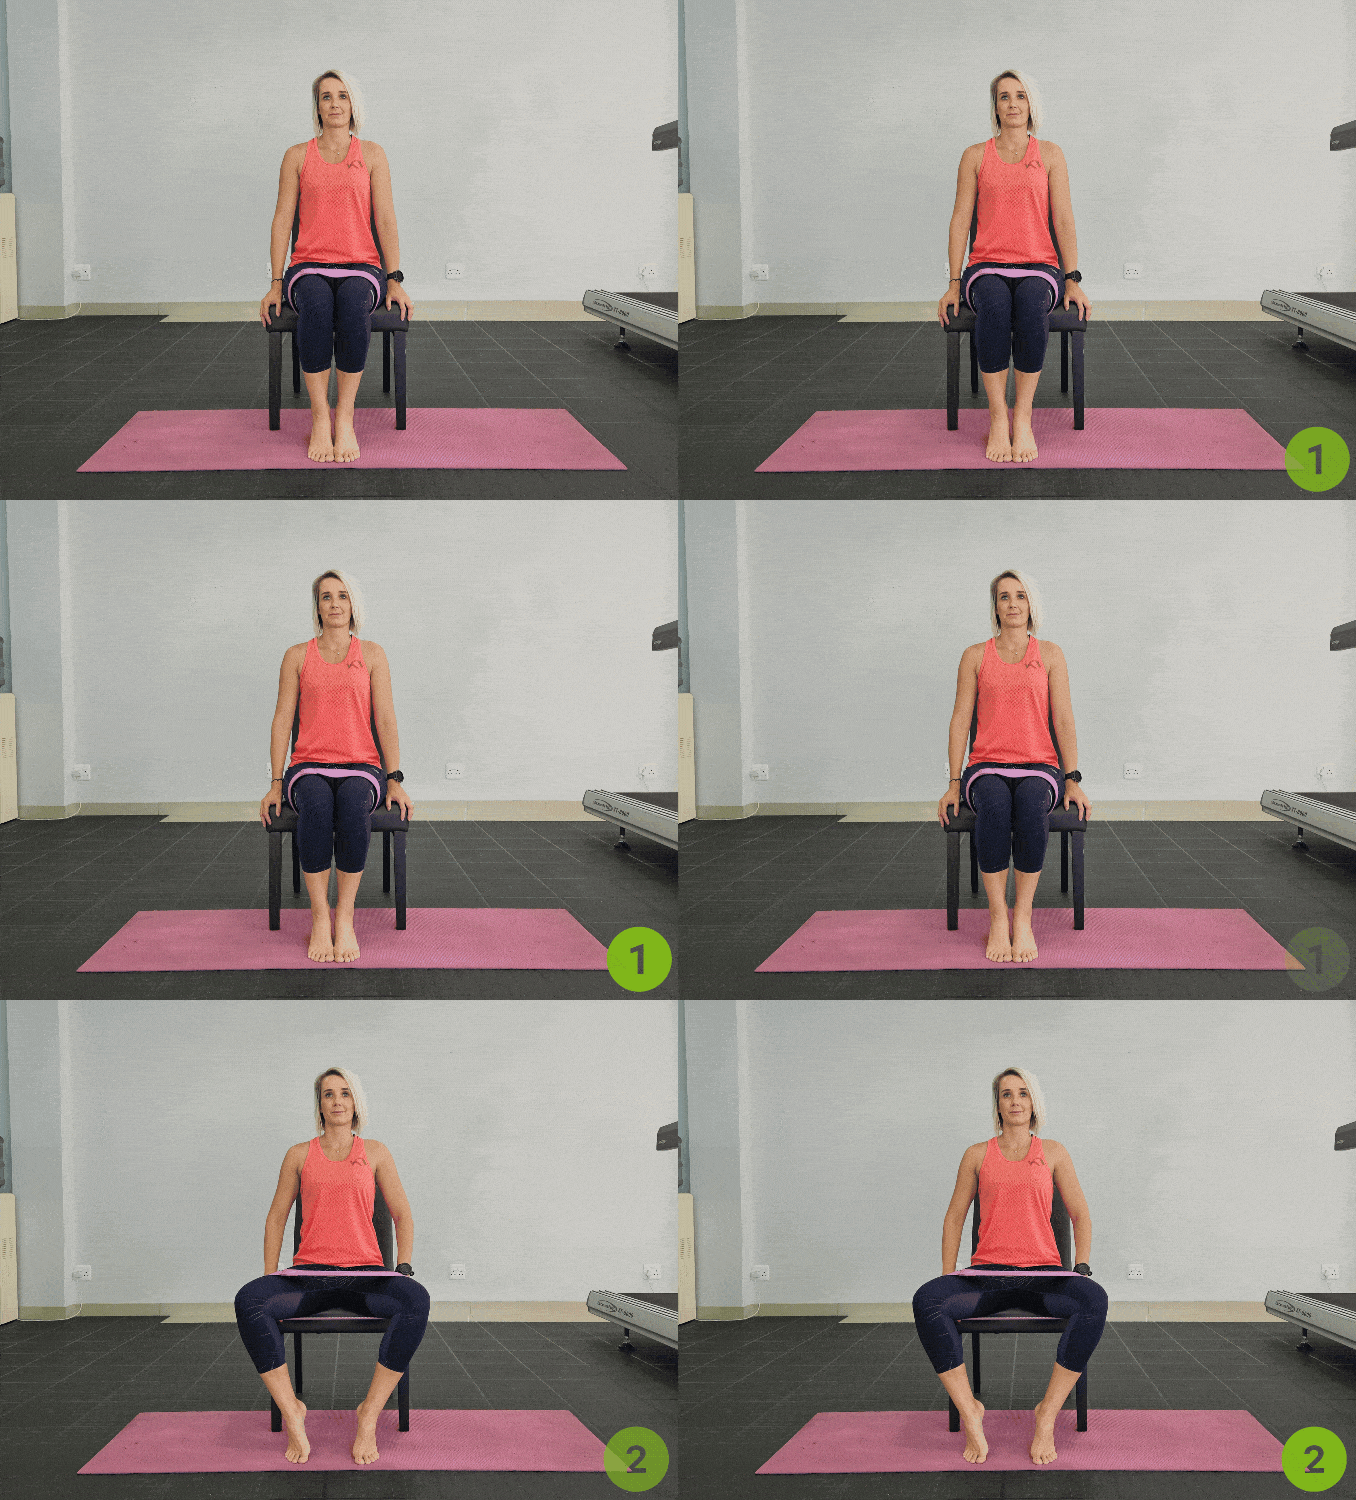
2. Seated Abductions

This exercise activates the outer hip muscles and is suitable for beginners.
For this exercise, kindly utilize a sturdy chair with a backrest and a mini band.
- Begin in an upright sitting position on a chair with a mini band around your legs just above your knees.
- Keep your knees bent and feet flat on the floor.
- Then, place your hands at your side. Engage your core.
- Open your knees outward, creating resistance to the band.
- Moreover, return to the starting position and repeat the movement with 10 repetitions.
Justin Nessel, DPT, a physical therapist and a specialist in hip arthritis, emphasizes that while exercise cannot reverse arthritis, additionally, it can help maintain the range of motion in the hip joint and strengthen surrounding muscles, which support the joint and improve balance.
Additionally, the Arthritis Foundation highlights that adding a resistance band to side-step exercises can increase leg strength and stability, which benefits individuals with hip pain.
Safety Tips and Recommendations
- Proper Form: Ensure correct posture and technique during each exercise to maximize benefits and prevent injury.
- Appropriate Resistance: Start with a light-resistance band and gradually progress to higher resistance as your strength improves.
- Consult a Professional: If you experience persistent or severe hip pain, seek advice from a healthcare provider or physical therapist before beginning any new exercise regimen.
Conclusion
Incorporating resistance band exercises for hip pain into your daily routine can be a practical and effective approach to alleviating hip pain. Mini bands versatility and accessibility make them an excellent choice for strengthening hip muscles, improving mobility, and supporting overall hip health. Remember to perform resistance band exercises for hip pain more consistently and consult a professional if you have any concerns about your hip pain or exercise routine.
If you are looking for easy and gentle strength training to melt fat and sculpt and tone your body, then check out our Sculpt & Strengthen Mini Band Workout.
FAQ’s
How do you use resistance bands for hip pain?
Use resistance bands by performing targeted exercises such as clamshells, lateral band walks, glute bridges, and hip abductions. These exercises strengthen and stabilize hip muscles, alleviating pain and improving mobility.
Are resistance bands good for hip arthritis?
Yes, resistance bands are excellent for hip arthritis as they offer a low-impact way to strengthen muscles around the hip joint, reduce stiffness, and enhance joint stability.
Is it okay to exercise with hip pain?
It is generally safe to exercise with mild hip pain, provided you focus on low-impact movements that don’t exacerbate the pain. Consult a healthcare provider for persistent or severe discomfort.
What is the fastest way to relieve hip muscle pain?
Gentle stretching, ice or heat therapy, and targeted exercises using resistance bands can provide quick relief. Over-the-counter pain relievers may also help if necessary.
What is the best natural relief for hip pain?
Natural remedies include regular stretching, strengthening exercises, maintaining good posture, and using heat or cold packs to reduce inflammation and relax tight muscles.


