
We’ve already mentioned the importance of movement progressions for post-surgery are designed to challenge your knee through different ranges of motion. But why is this so important? For starters, every single knee surgery is different. The location of the tear, the type of tear, the amount of damage to surrounding tissues, and the type of reconstruction you’ve had will all determine what type of recovery program you’ll be on. We know that no two patients will have the same post-surgery knee recovery experience. Some patients can return to their pre-injury activities within a few months, while others take a year. That’s why you must have a customized plan that helps you progress from the basics (i.e., therapy balls, table tops, single leg exercises) to more advanced movements that challenge your knee and help you regain strength for post-surgery knee recovery.
Today I have an excellent post for you on what to do post knee injury to help your knee recover.
Enjoy!
– Rick
Movement Progressions for Post Surgery, What are They?
And why you should know how to use them to help yourself or your clients recover after knee injuries.
Before you finish this article, I want to share how vital movement progressions can be in recovering from post-surgery injuries and returning to competing sports or excelling at exercise. But first, I want to share why this information is so important.
Before I get to that, here is a sneak peek into what I do:
I first saw Rick speak about a year ago in Las Vegas. I liked where his head was regarding the exercise industry and decided to keep a close eye on his programs and information. It was a good thing I did because something rather lousy was about to happen to me.
Like many fitness professionals whose goal is optimal performance, I like to cross-train in several sports. This keeps me on my feet (or so I thought) and makes me a more well-rounded coach. This time, however, I was mistaken
I had decided to join an “adult” gymnastics class with a friend. The quotation marks around the word adult signify that the young person was no older than 16. I had trouble during one part of the warm-up where we were instructed to do a punch 360 to a dive roll. I couldn’t smooth out the motion and make it flow as one movement. As I geared up for my last pass of this particular warm-up drill, I centered my thoughts and said, “I’m gonna punch so hard that there’s no way I can miss this movement.” And punch hard I did.
I felt instant and terrible pain as I landed from my 360 to punch for my dive roll. I tumbled to the ground and realized something terrible had just happened. My movement mistake cost me a partial tear in my LCL and MCL, a damaged Meniscus, a torn Quad, and an ACL that officially said Bye Bye!
I knew instantly that it was a long road ahead to get back to where I was.
Now, I need to interject that this isn’t the first knee injury. I jacked the other knee up eight years before in a car vs. bike accident (I was on the bike). However, the good news is that since I had already gone through a knee injury before, I knew what had to be done to make it better. I already knew my mistakes and what progress I should be making. The knowledge that the first injury gave me would only be increased by my journey toward recovering from the more recent injury.
So what are these movement progressions that I keep talking about?
The simplest way to describe a movement progression for post-surgery is to think about how a baby goes from being born to being able to walk.
At first, the baby spends most of its time in a reclined position. As babies gain control over their core muscles, they can then roll onto their stomachs and hold their heads up. Eventually, this ‘tummy time” pushes up and crawls, lifts the body in the air, and holds a standing position with support. Once they are confident in having an upright position with support, they start their new learning journey to move on two legs.
As simplified as this may seem, if we miss any step along the way, we most likely won’t end up being as functionally (I hate that word) developed as someone who goes through all the steps.
You need to earn the right to do the next movement by developing the necessary mobility and stability to perform the preceding action properly.
Would you start a new client out on a one-leg squat?
How about a rehab client?
I don’t think so.
So let’s get you to the meat of this article to understand the exact movement progressions I initially used on myself and dozens of my clients to get rid of knee pain and return to optimal performance.
Before I jump into the actual movements, here are three rules you need to follow to maximize the results you will get from using movement progressions in your training.

The importance of movement progressions for post-surgery knee recovery
We’ve already mentioned that movement progressions are designed to challenge your knee through different ranges of motion. But why is this so important? For starters, every single knee surgery is different. The location of the tear, the type of tear, the amount of damage to surrounding tissues, and the type of reconstruction you’ve had will all determine what type of recovery program you’ll be on. We know that no two patients will have the same post-surgery knee recovery experience. Some patients can return to their pre-injury activities within a few months, while others take a year. That’s why you must have a customized plan that helps you progress from the basics (i.e., therapy balls, table tops, single leg exercises) to more advanced movements that challenge your knee and help you regain strength.
3 Movement Progression Rules for Post-Surgery
Rule 1.
Do not worry about reps, sets, or any other workout parameter that someone gives you. Instead, focus on how the movement feels. Focus on mastering the action, so you have complete control of every step. Do not consider moving on to the next progression until you could send Rick or me a video (please don’t send a video) for which we would give you the thumbs up.
Rule 2.
Be patient. You need to be patient to return to competitive sports or kill it in the gym. One of the biggest lessons I learned from knee injury #1 was to take my time. Whenever I tried to move to the next skill too fast, I woke up inflamed and in pain. Being patient is the only way to get back to your old abilities.
Rule 3.
Seek help. If you aren’t sure whether you are doing things right or not, seek help. Purchase products that will help you hire coaches that know how to help you, and don’t settle for your garden-variety trainer or physical therapist. If you’re not feeling better or seeing performance results in 5 sessions, fire them and find someone who can help. It took me years to accept help, but now I realize its importance. I hire coaches for everything from business to rock climbing. Seek help, and you will cut your road to recovery in half!
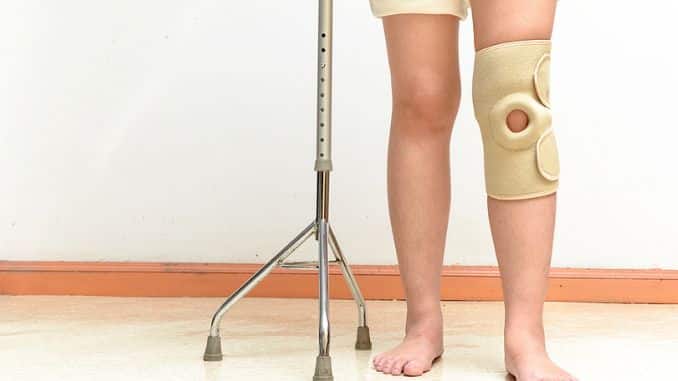
All right, let’s start with the absolute basics. The first few things I see on people coming off a knee injury or, even worse, a knee surgery are they lack terminal knee extension and flexion, their glute has turned off, and their gait is out of whack from walking with a brace on. Here’s how I like to approach this issue.
Please don’t lay your hands on your training clients pretending to be therapists. First, their physical therapist or another qualified practitioner should be responsible for restoring their range of motion. If they are not getting terminal extension and flexion, you should refer them to a physical therapist that you know can help them achieve these end ranges of motion.
Problem 1. Connecting with Gluteus Maximus
Second, you need to re-establish their connection to their glute muscle.
My favorite way to have your client or yourself (if you are the one rehabbing) reactivate their glute is to lay prone, bend both knees, so the bottoms of your feet are facing the ceiling, and then lift one leg at a time, attempting to use just your glute muscle and not your back and hamstrings. This should be a small range of motion and yield a mean butt burn rather than a set of pumped spinal erectors or cramping hamstrings if held for a time.
Once you have established a connection with that muscle, it’s time to move to a standing position.
There are four drills that I like to use in a standing position to get someone to stabilize their knee through the hip. The first two are the basic drills, the third drill should be done when mastering the first two, and the fourth drill should follow mastery of the third drill.
Drill 1
Start by facing a wall with your toes about 2 feet from the wall.
Place a pad on the wall about hip height, lift one leg with the knee bent to parallel, and place that knee on the pillow.
Keep your spine neutral and your pelvis parallel to the floor and the wall. Press your knee into the wall using your glute muscle. In this position, which emulates a triple extension in most sports, you should feel the glute muscle firing hard.
You may need someone to test your glute or give it a series of light pokes to ensure it is firing rather than your calf and hamstring. Hold for a time and think of perfecting the feel of the movement rather than following a set time limit.
Drill 2
The second glute drill starts by turning 90 degrees from the wall, bringing your feet underneath your hips, and crossing your arms.
From there, descend into a ¼ squat making sure you feel the weight in your heel and either side of the ball of your foot. Lastly, lift the foot closest to the wall off the ground by curling your hamstring and pushing your knee, the side of your thigh, your hip, and your shoulders into the wall while maintaining a neutral spine.
Hold for a time and feel the burn! You know you have it right when you feel your hip and glute muscles burning. You know you’re not quite doing it right when you feel your leg muscles burning out or your knee bothering you.
Once you ‘have mastered the above two drills, it’s time to move to the standing glute activation holds. These positions should emulate the two moves we already practiced without using a wall to provide proprioceptive feedback. For the top job, stand on one leg with your thigh around parallel, and complete the extension of your hips by firing your glute. For the ¼ squat drill, assume the same position as when your side was against the wall, and again feel the burn in those glute muscles.
Finally, once you have mastered the two static standing positions, make them one move by SLOWLY moving from the extended position into the flexed position. Again, the first muscle to say hello should be your hip and butt muscles. If your knee hurts or your quad and foot burn, go back to the preceding steps and take your time to master them.
Once you have mastered these glute drills and feel confident in your stability, here is a progression to practice to get you back to sports performance and beyond! Please do not rush through the basic steps, but rather make sure you have mastered the basic foundation without going into great detail about the execution of each exercise.
Here is a list of the exact 11 movement progressions for post-surgery I use with my clients and myself.
1. Hip Stability And Glute Activation Drills (as we already discussed)
2. Assisted Box Squat (progress by increasing range of motion)
3. Box Squat (progress by increasing range of motion)
4. Bodyweight Squat
5. Goblet Squat
6. Double Kettlebell or Barbell Front Squat
7. One Leg Assisted Box Squat (progress by increasing range of motion)
8. One Leg Box Squat (progress by increasing range of motion)
9. One Leg Bodyweight Squat
10. One Leg Goblet Squat
11. One Leg Double Kettlebell or Barbell Front Squat
A picture highlights the 10-step movement progression sequence after mastering the hip stability and glute activation drills outlined above.
Problem 2 Check on the Importance of Movement Progressions
Lastly, when someone comes off a knee injury, they are much more likely to do the peg leg walk. Instead of bending their hip and knee, they hike their pelvis using their core muscles and walk like they have a peg leg. Often, the drills highlighted- especially the foundational glute drills- help fix this issue.
I learned a lot about how the core works from watching the lectures in Muscle Imbalances Revealed, and you should, too. However, there are times when you need to dig a little deeper. I look at the first place to make sure you or they have a proper core function. So, instead of going into great detail about the various movement progressions, you can use for the core, why don’t you check out Rick’s Muscle Imbalances Revealed so you can learn directly from real experts? Watch those videos, and you will know everything you need to fix the core.
Problem 3 Check on the Importance of Movement Progressions
So, here are the takeaways from learning to use proper movement progressions for a post-knee injury. Focus on movement first, be patient, seek help if necessary, make sure your PT is competent and helps to return your entire range of motion, follow and master the foundational glute activation and hip stability drills, follow the lower body exercise movement progression outlined above, and buy Muscle Imbalances Revealed. Let’s get that knee pain-free!! No more excuses.
About the Author – Tyler Bramlett
Tyler Bramlett is a Personal Fitness Consultant and Boot Camp owner in Santa Cruz, California. He focuses on improving movement quality and skill to help people become more robust, flexible, coordinated, and injury-proof. His certifications include RCK, CK-FMS, USAW L1, and CrossFit L1. Over the last decade, he has spent countless hours and dollars seeking out and learning from many noted experts in the fitness industry, including world-renowned strongman Dennis Rogers, top physical therapist Grey Cook, originator of the kettlebell movement Pavel Tsatsouline, former Cirque Du Soliel Athlete Jean-Luc Martin, and many more. Plus, he runs an active blog called Garage Warrior.
Rick Kaselj, MS