
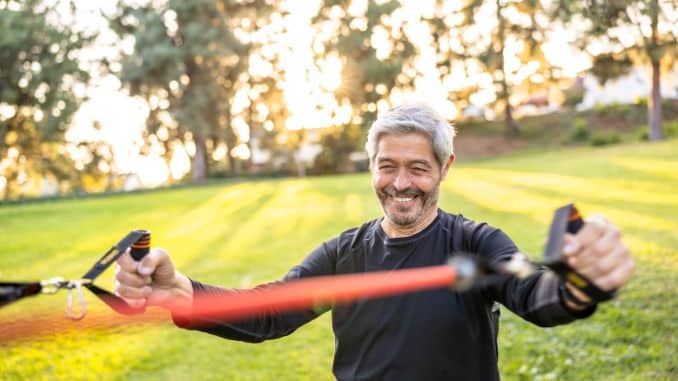
Incorporating convenient tools like resistance bands with handles into a fitness regimen significantly enhances its achievability. These versatile and portable bands offer a wide range of resistance levels, making them adaptable to various fitness levels and goals. The compact design enables easy storage and transport, making it convenient for workouts at home and while traveling. Let’s learn more about Resistance Bands With Handles as we go on.
Moreover, resistance bands with handles enable users to target specific muscle groups effectively, supporting a well-rounded exercise routine. The convenience factor also reduces barriers to consistent exercise, promoting adherence to fitness goals. Whether for strength training, flexibility, or rehabilitation, these tools also empower individuals to take control of their fitness, making regular workouts more accessible and achievable.
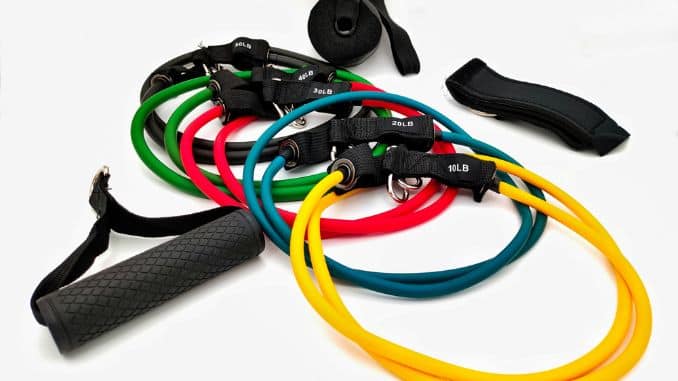
Convenience of Using Resistance Bands With a Handle
- Improved Grip And Control
The handles on exercise bands make it easier to maintain a firm grip during exercises. The foam-covered handles also allow you to perform movements more comfortably and with better control, reducing the risk of the band slipping or causing discomfort in your hands. - Variety Of Exercises
Handles can indeed expand the range of exercises you can perform with resistance bands. For example, you can do exercises like bicep curls, tricep extensions, and chest presses more effectively with handles, as they offer a more natural and comfortable hand position. - Targeted Muscle Engagement
Handles allow you to perform exercises with a more natural hand position, which can lead to better muscle engagement and isolation. This is especially valuable when focusing on specific muscle groups or performing exercises that mimic free-weight movements. - Versatility
Handles can be easily attached to resistance bands with different levels of resistance. The flexibility provided enables you to modify the level of intensity in your workouts by switching to bands with varying resistance levels, all while using the same set of handles. - Durability
Handles are typically made from sturdy materials, which can boost the durability and longevity of your resistance band set. This guarantees that they can withstand the wear and tear of regular use. - Comfort
Some people find that using handles makes resistance band exercises more comfortable, especially for movements that involve wrapping the band around your hands or wrists. The handles distribute the pressure more evenly, reducing the risk of discomfort or skin irritation. - Simplicity
Handles simplify the process of changing resistance levels during your workout. You can easily switch between bands with different resistance levels without reattaching or repositioning the band on your body. - Easy To Share
If you’re working out with a partner or in a group, handles make it convenient to share the resistance bands. You can quickly detach the handles and pass them to others without adjusting the band’s placement.
The Effect of Resistance Bands In The Body
- Strength Training
Resistance bands with handles can help increase muscle strength in multiple muscle groups. You can engage in workouts such as bicep curls, tricep extensions, chest presses, and rowing exercises, each designed to focus on particular muscles and improve strength in those regions.
- Muscle Definition
Resistance bands with handles can improve muscle definition and tone by providing resistance throughout the entire range of motion. This is particularly effective when performing isolation exercises that target specific muscle groups. - Functional Strength
Many exercises with resistance bands mimic real-life movements, improving functional strength. This is valuable for everyday activities and sports, as it helps you develop practical and transferable strength for various physical tasks. - Balance And Stabilization
Some resistance band exercises require you to stabilize muscles, helping improve balance and coordination. This is especially beneficial for athletes and older adults looking to maintain their balance and reduce the risk of falls. - Joint Health
Resistance bands provide a low-impact form of resistance training, which is easier on the joints compared to traditional weightlifting. Individuals experiencing joint problems or requiring rehabilitation may find this advantageous. - Endurance
Performing higher-repetition exercises with resistance bands can enhance muscle endurance. This is valuable for maintaining strength over longer durations and can be beneficial in sports and other activities.
- Injury Prevention
Strengthening muscles and improving joint stability with resistance bands can help prevent injuries. This is crucial for athletes and anyone engaging in physical activities.
- Injury Prevention
- Muscle Activation
Handles can help activate and isolate specific muscle groups more effectively, enhancing the engagement of the target muscles during exercises.
Resistance Band Exercises
Warm-Up
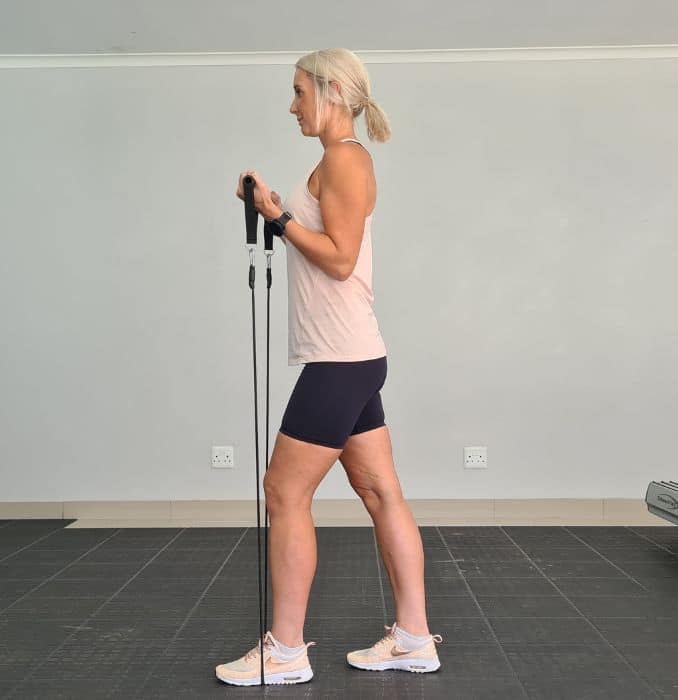
1. Shoulder Rolls
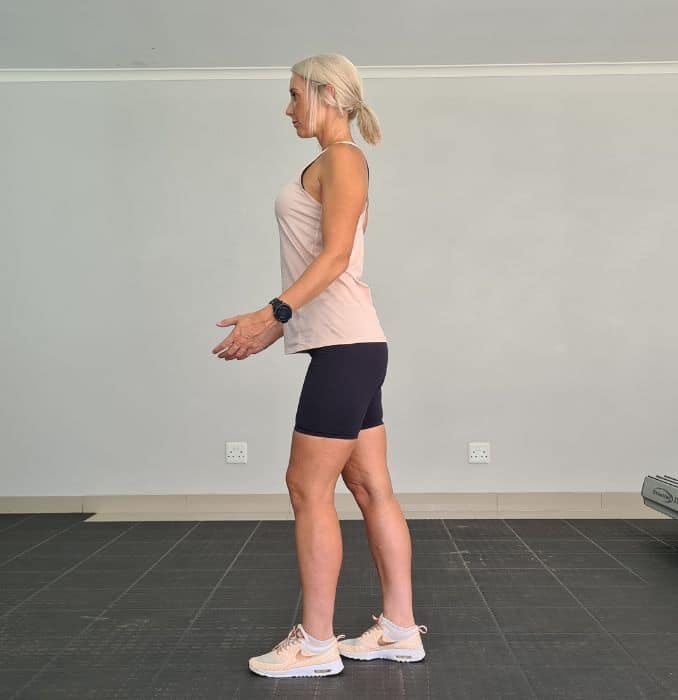
Firstly, begin in an upright standing position with your feet shoulder-width apart, maintaining good alignment with your head, shoulders, hips, and legs. Secondly, step one foot forward and engage your core. Thirdly, place your hands on the side and lift your shoulders upward, then roll your shoulders back until you feel resistance in your shoulder blades. Then, relax and lower your shoulders to the starting position. Lastly, repeat the movement in the opposite direction. Perform with 1 set of 10 repetitions in each direction.
 | 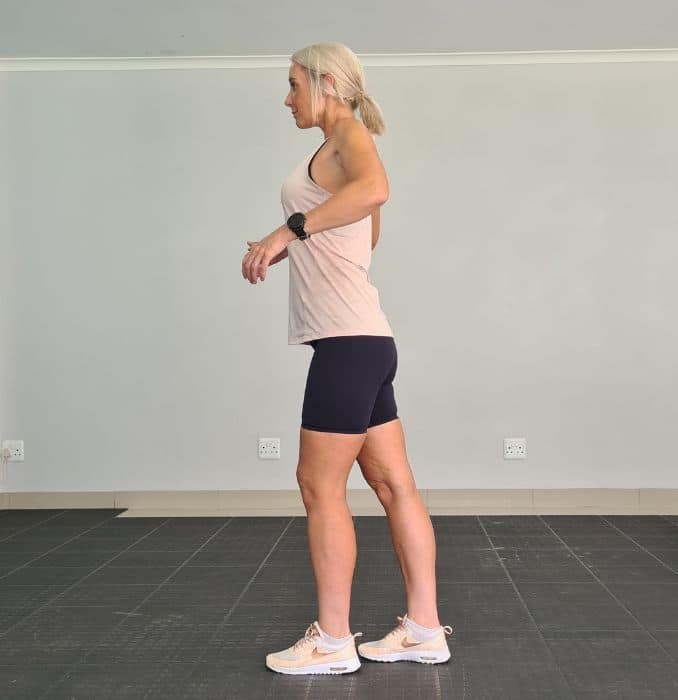 |
Shoulder Rolls
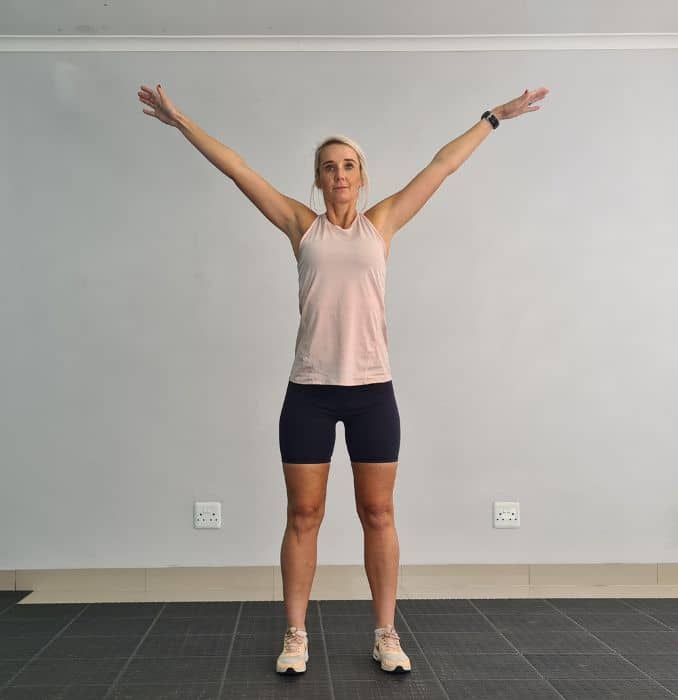
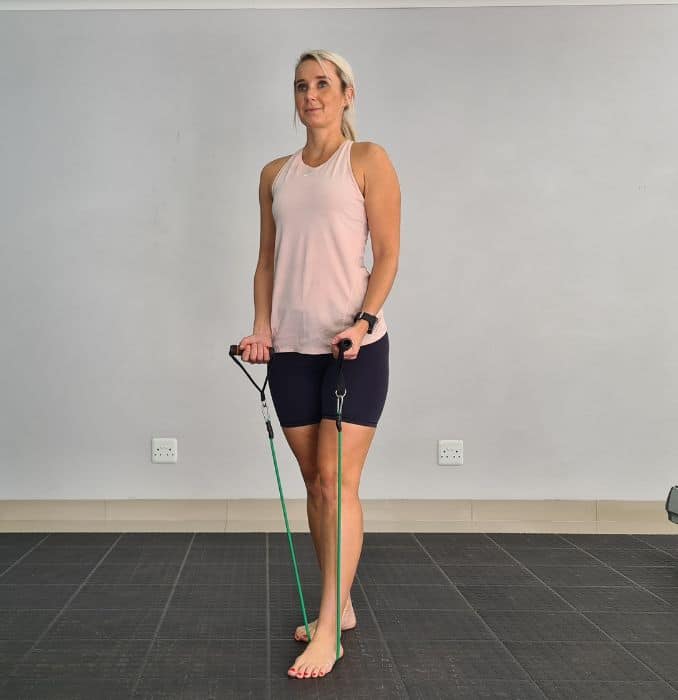
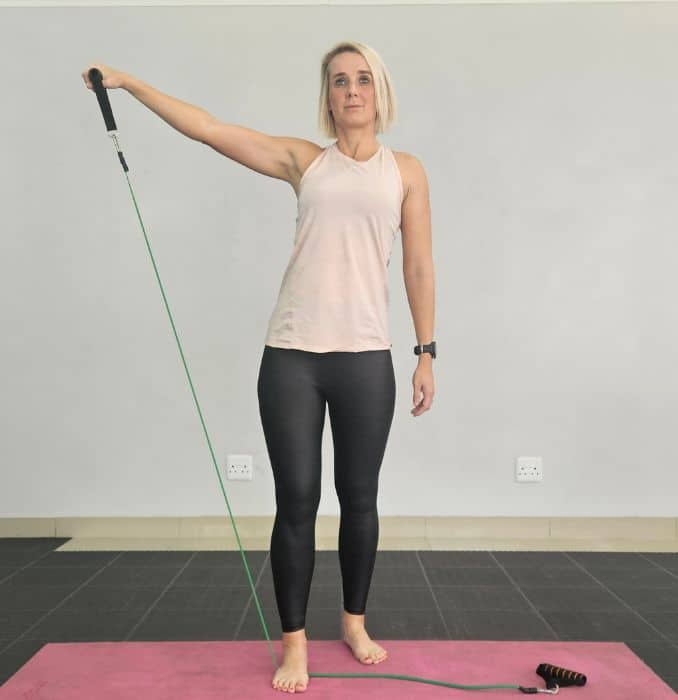
2. Arm Raises
Begin in an upright standing position with your feet shoulder-width apart, maintaining good alignment with your head, shoulders, hips, and legs. Then, step one foot forward and place your arms at your sides. Afterward, engage your core and raise both arms overhead. Finally, lower your arms to the starting position. Complete 10 repetitions.
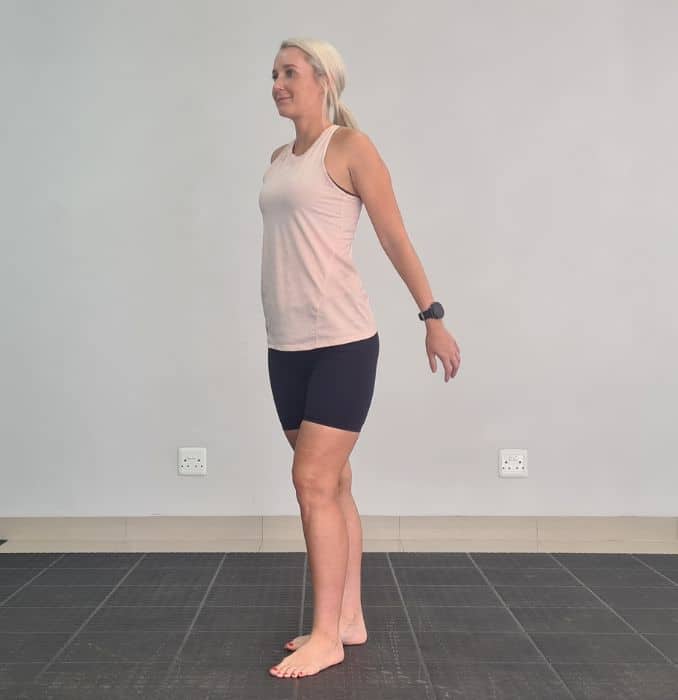 | 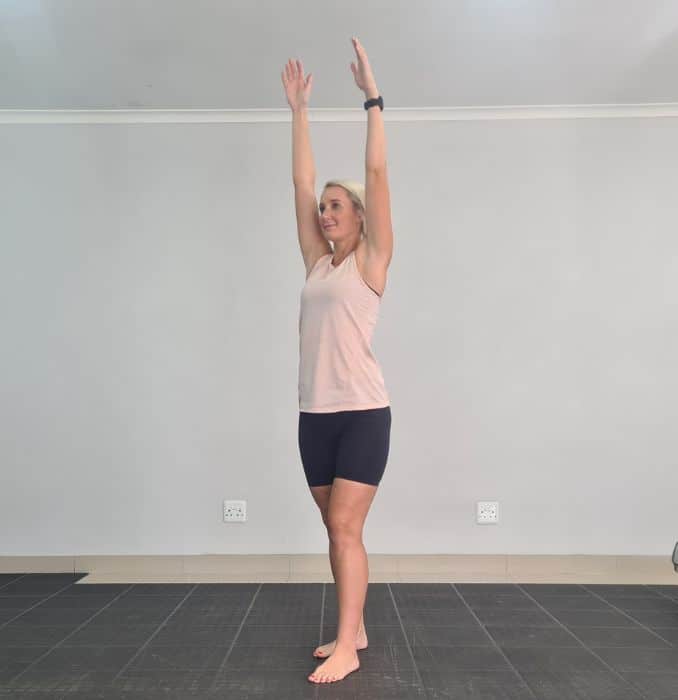 |
Arm Raises
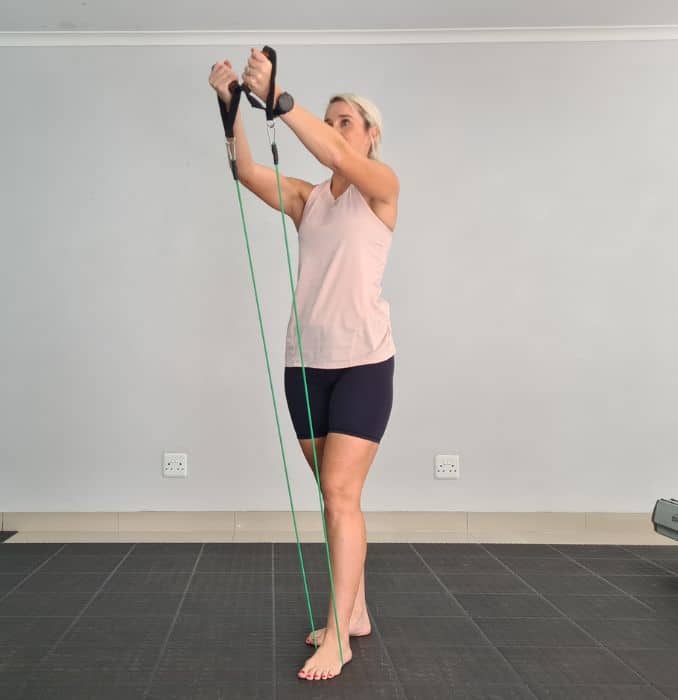
3. Arm Circles
Firstly, begin in an upright standing position with your feet shoulder-width apart, maintaining good alignment with your head, shoulders, hips, and legs. Secondly, extend your arms out to the sides at shoulder height. Then, engage your core and move your arms in a big circular motion. Lastly, repeat the movement in the opposite direction. Complete 10 repetitions in each direction.
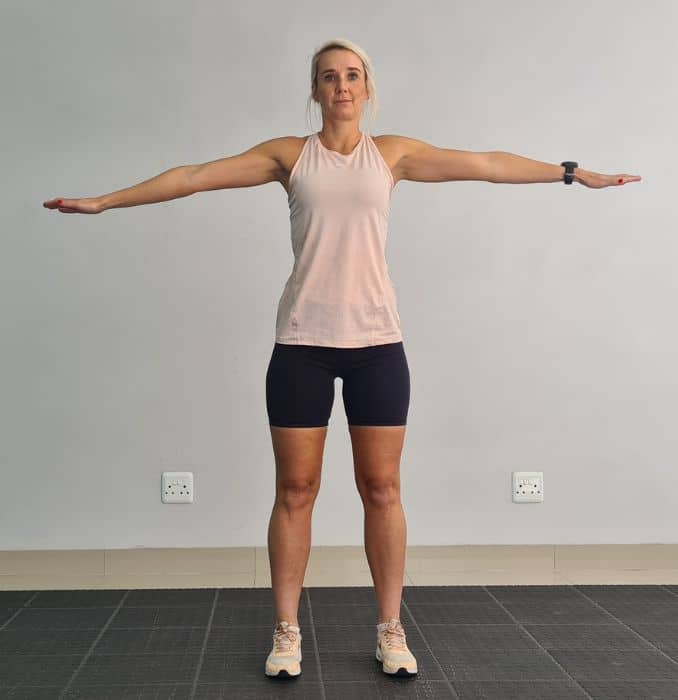 |  | 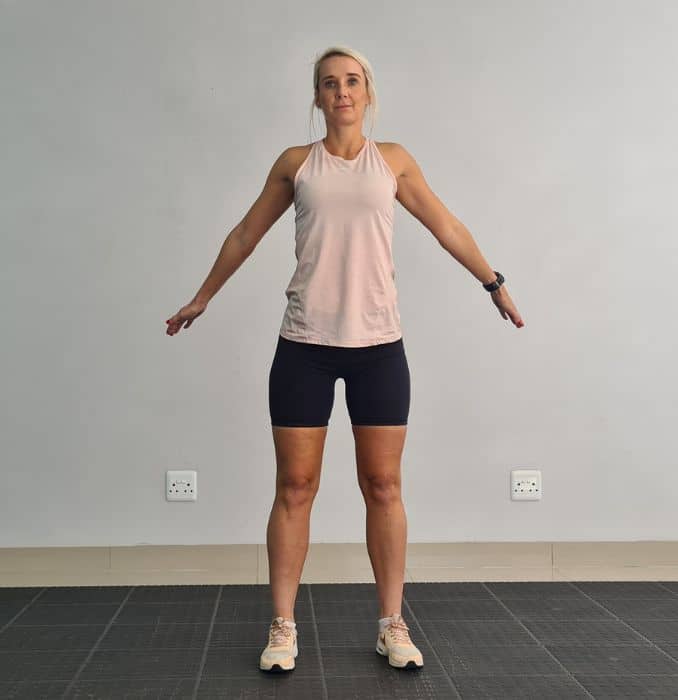 |
Arm Circles
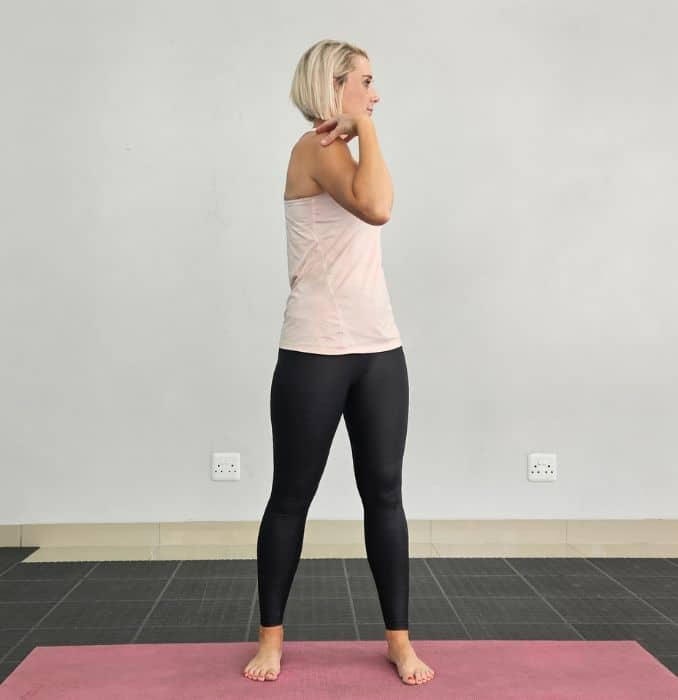
4. Standing Twists
Begin in an upright standing position with your feet shoulder-width apart, maintaining good alignment with your head, shoulders, hips, and legs. Then, bend your elbows and bring your hands to your shoulders. Afterward, engage your core and twist your upper body to one side, keeping your hips locked in the forward position. Then, return to the starting position and repeat the movement on the opposite side. Lastly, complete 10 repetitions on each side.
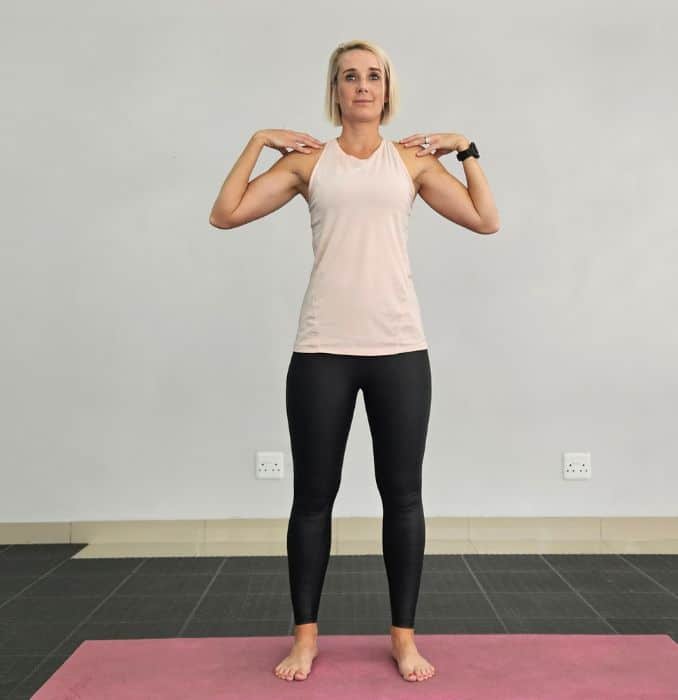 |  |  |
Standing Twists
Routine
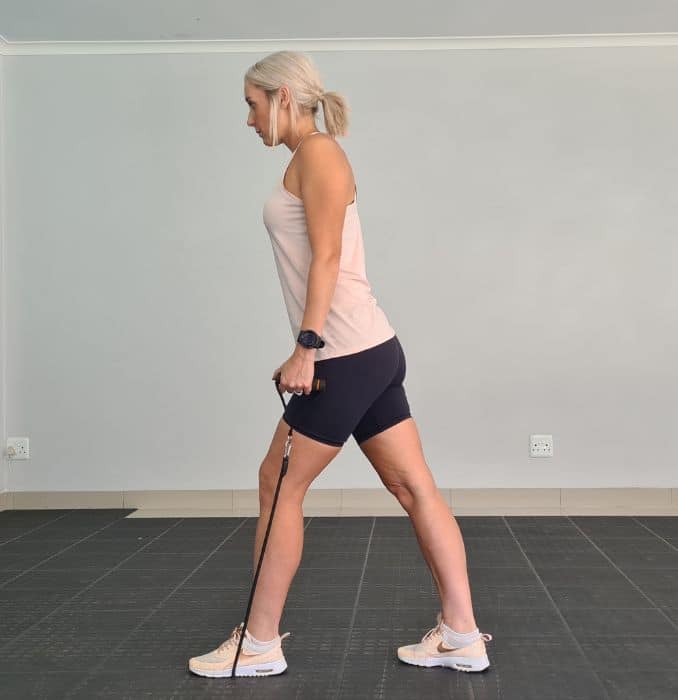
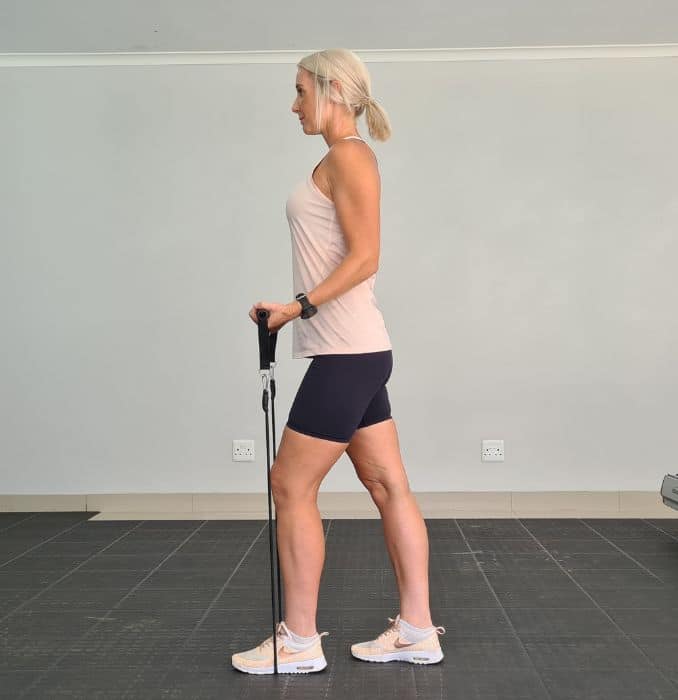
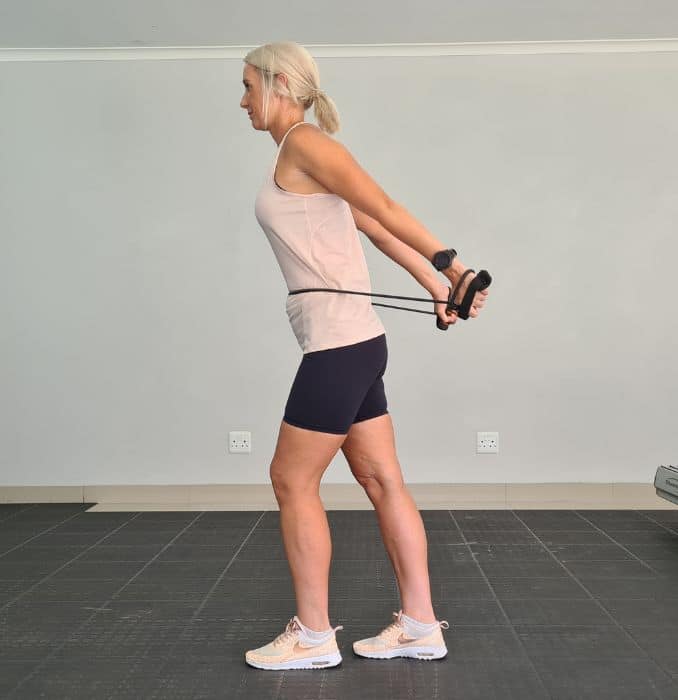
1. Rows
Firstly, begin in an upright standing position with your feet hip-width apart, maintaining good alignment with your head, shoulders, hips, and legs. Secondly, stagger your feet, step on the center of the band with your front foot, and hold the ends of the tubing in each hand with your palms facing inward. Thirdly, engage your core and hinge through your hips to bend your upper body forward. Fourthly, pull both arms back in a rowing motion, keeping your elbows 30 to 45 degrees away from your body. Lastly, lower your arms to the starting position and repeat the movement. Start with 1 set of 10 repetitions.
To make this exercise easier, go through the movement one arm at a time.
 |  |
Rows
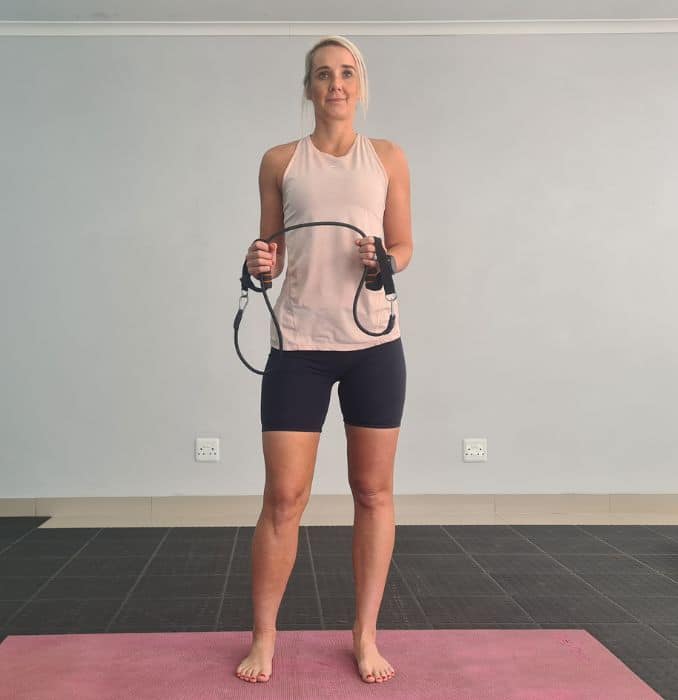
2. Bicep Curls
Begin in an upright standing position with your feet hip-width apart, maintaining good alignment with your head, shoulders, hips, and legs. Then, stagger your feet, step on the center of the band with your front foot, and hold the ends of the tubing in each hand with your palms facing outward. Afterward, engage your core and bend your arms to bring the tubing handles to chest height. Then, keep your upper arms aligned with your body. Lastly, lower your arms to the starting position and repeat the movement. Start with 1 set of 10 repetitions.
To make this exercise easier, go through the movement one arm at a time.
 |  |
Bicep Curls
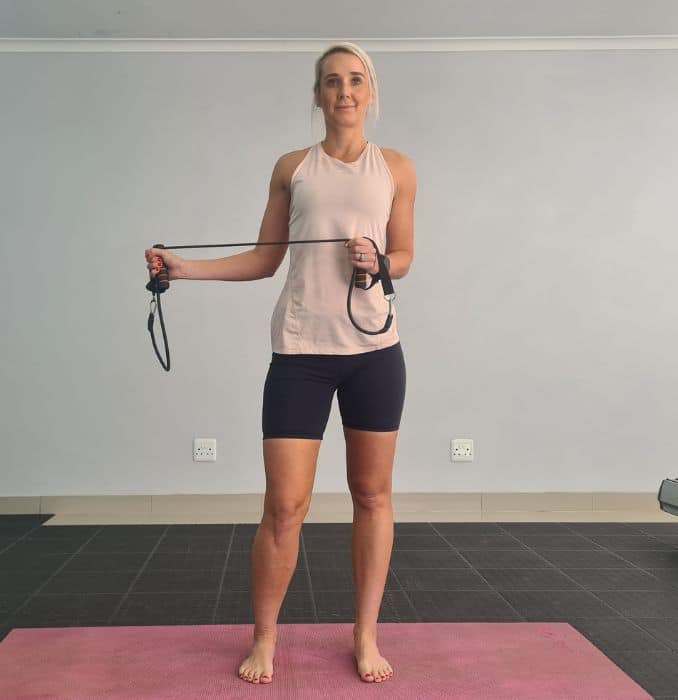
3. Shoulder Sweeps
Firstly, begin in an upright standing position with your feet hip-width apart, maintaining good alignment with your head, shoulders, hips, and legs. Secondly, stagger your feet, step on the center of the band with your front foot, and hold the ends of the tubing in each hand with your palms facing outward. Thirdly, engage your core and keep a slight bend in your elbows as you lift both arms to shoulder height. Lastly, lower your arms to the starting position and repeat the movement. Start with 1 set of 10 repetitions.
To make this exercise easier, go through the movement one arm at a time.
 |  |
Shoulder Sweeps
4. Lateral Shoulder Raises
Begin in an upright standing position with your feet hip-width apart, maintaining good alignment with your head, shoulders, hips, and legs. Then, stagger your feet, step on the center of the band with your front foot, and hold one end of the tubing with your palm facing inward. Afterward, engage your core and raise one arm out to the side, past shoulder height. Then, lower your arm to the starting position and repeat the movement. Finally, start with 1 set of 5 repetitions on each side.
To make this exercise more challenging, hold the tubing handles in each hand and lift both arms at the same time.
 |  |
Lateral Shoulder Raises
5. External Shoulder Rotations
Firstly, begin in an upright standing position with your feet shoulder-width apart, maintaining good alignment with your head, shoulders, hips, and legs. Secondly, hold one tubing handle in your hand with your palm facing inward and bend your arm in front of your body. Thirdly, with your other hand, anchor the center of the band at chest height, creating resistance on the band. Fourthly, tighten your core and rotate your lower arm out at your side, keeping your elbow close to your upper body. Lastly, bring your arm back to the starting position and repeat the movement. Start with 1 set of 10 repetitions on each side.
 |  |
External Shoulder Rotations
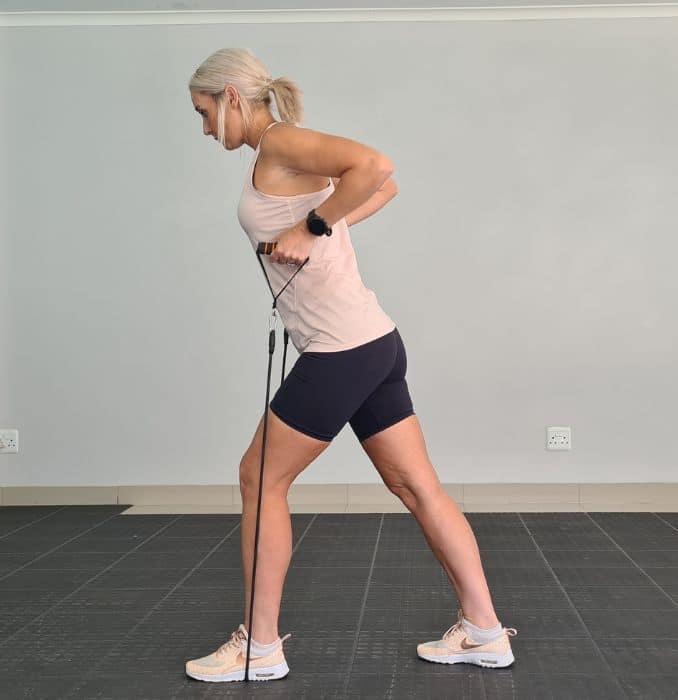
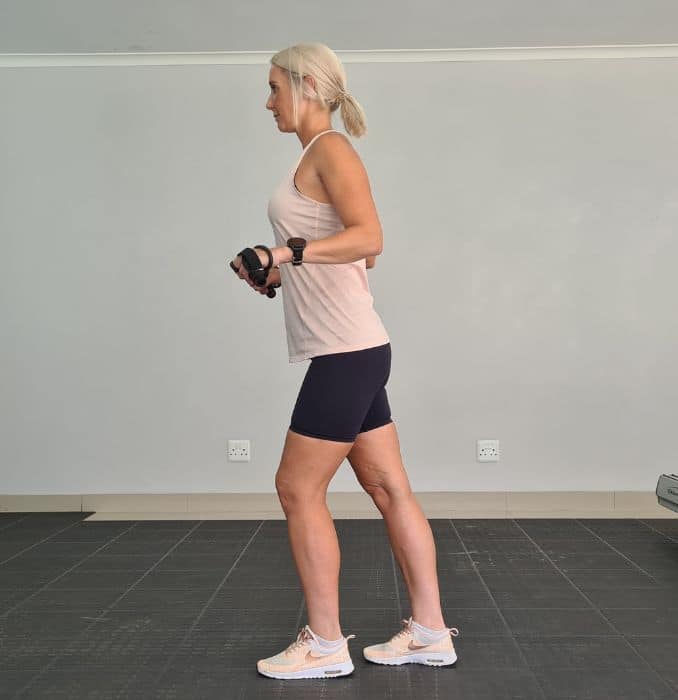
6. Tricep Kickbacks
Begin in an upright standing position with your feet hip-width apart, maintaining good alignment with your head, shoulders, hips, and legs. Then, step one foot forward and slightly lean your upper body forward. Afterward, hold the tubing handles with each hand at chest height and anchor the center of the band against your body for leverage while keeping your palms facing downward. Then, engage your core and extend your arms back, creating resistance on the band. Lastly, bend your elbows to return to the starting position and repeat the movement. Start with 1 set of 10 repetitions.
 |  |
Triceps Kickbacks
Cool Down
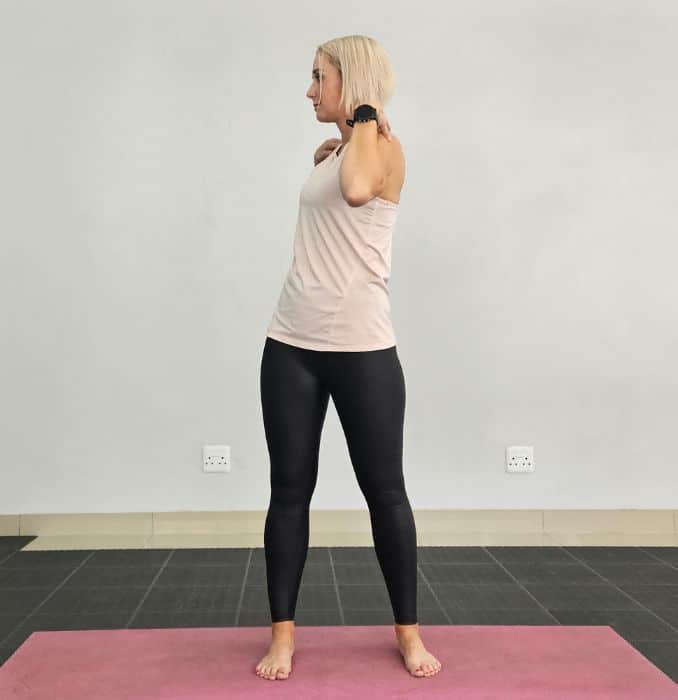
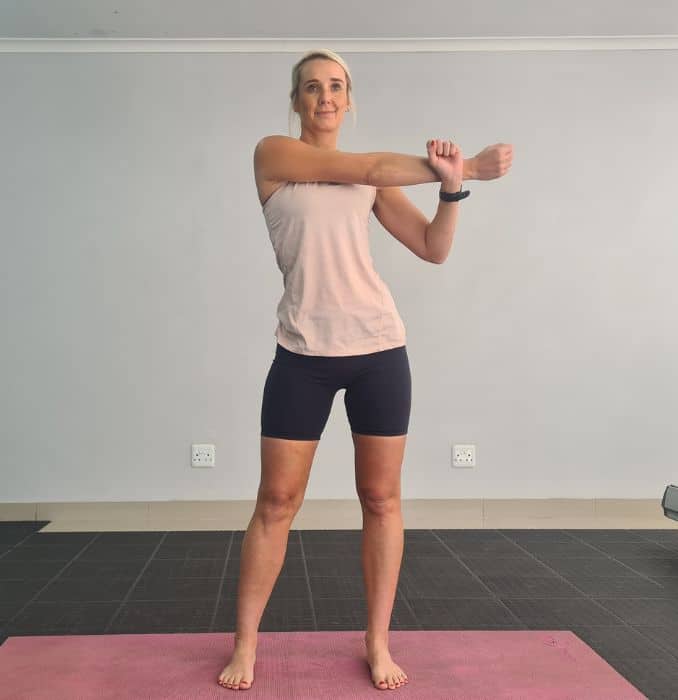
1. Cross-Body Arm Stretch
Begin in an upright standing position with your feet shoulder-width apart, maintaining good alignment with your head, shoulders, hips, and legs. Then, contract your core. Afterward, reach across your chest with one arm and use your other hand to pull your extended arm closer to your body, looking for a light stretch. Lastly, hold this position for several deep belly breaths, in through your nose and out through your mouth. Relax and repeat the movement on the opposite side.
Cross-Body Arm Stretch
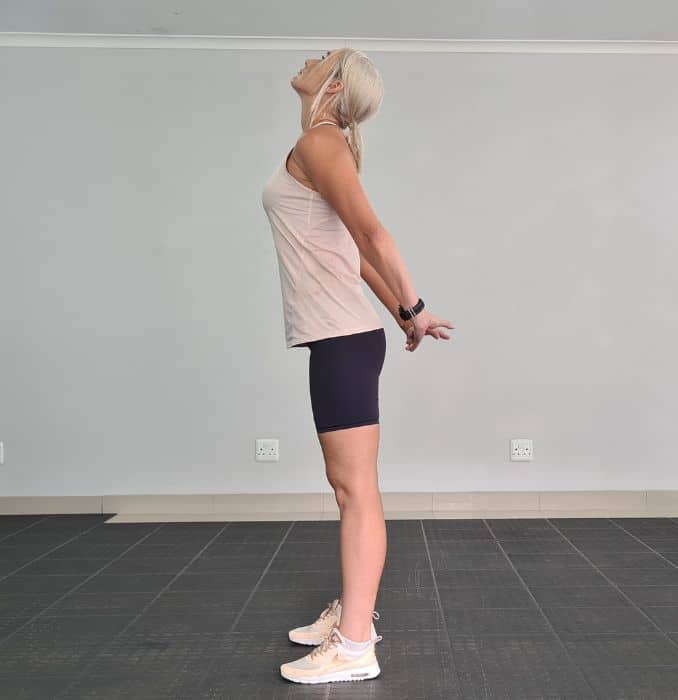
2. Shoulder Stretch
Firstly, begin in an upright standing position with your feet shoulder-width apart, maintaining good alignment with your head, shoulders, hips, and legs. Interlace your fingers behind your back. Secondly, engage your core, arch your back, and lift your joined hands away from your body, bringing your gaze upward. Then, hold this position for several deep belly breaths, in through your nose and out through your mouth. Lastly, relax and return to the starting position.
Shoulder Stretch
Tips On How To Properly Use a Resistance Band
- Select The Right Band – Choose a band with an appropriate resistance level for your fitness level and the muscle group you want to target. Bands typically come in various colors or with different resistance ratings.
- Secure Your Footing – To start, anchor the band securely. This can be achieved by stepping on the band with one or both feet, depending on the exercise, or utilizing additional accessories like ankle straps for targeted lower body movements. Alternatively, loop the band around a sturdy object such as a pole or utilize a door anchor for upper body exercises.
- Maintain Proper Form – Just like with traditional weightlifting, maintaining proper form is crucial. Also, keep your back straight, engage your core, and maintain good posture while standing or sitting. This indeed ensures you are working the targeted muscle group effectively and reducing the risk of injury.
- Use Smooth, Controlled Movements – Focus on your target muscle group, and use slow, controlled movements. Also, avoid sudden or rapid movements, which may cause injury and reduce the workout’s efficiency.
- Breathe Properly – Remember to breathe throughout each repetition. Inhale during the initial phase of the exercise, and exhale during the most challenging phase. Moreover, proper breathing helps maintain oxygen flow to your muscles.
- Vary Your Exercises – Resistance bands can be used in various exercises, so mix them with other tools like adjustable dumbbells or kettlebells to target different muscle groups. However, you can work your arms, shoulders, back, chest, legs, and more. Look for exercises that specifically target the areas you want to strengthen.
- Focus On The Muscle Mind Connection – Concentrate on the muscle you’re working on to maximize its engagement. Visualization can also help you connect with the muscle and feel the burn.
- Progress Gradually – You can increase the resistance by utilizing heavier bands or adjusting your body positioning as you get stronger. Gradual progression is indeed the key to continued muscle development.
- Stretch After Your Workout – After completing your resistance band workout, stretch the worked muscles. This certainly helps improve flexibility and lessens muscle soreness.
- Stay Consistent – Like any workout routine, consistency is vital. Incorporate resistance band exercises consistently into your fitness routine for continuous muscle growth and development.
Types Of Resistance Bands
1. Loop Bands
- These are continuous, flat-loop bands often used for lower-body exercises like squats and also leg lifts.
2. Tube Bands
- Tube bands are versatile and certainly suitable for both upper and lower-body workouts and consist of a flexible tube with handles on each end.
3. Figure 8 Bands
- Resembling the number 8 in shape, these bands also have two connected loops and are effective for resistance band exercises targeting the upper body, especially the shoulders and arms.
4. Therapy Bands
- Often used in rehabilitation and physical therapy, therapy bands are flat and wide, indeed providing gentle resistance for those recovering from injuries or facing restricted mobility.
5. Mini Bands
- Small, flat-loop bands activate and strengthen smaller muscle groups, particularly around the hips and shoulders.
6. Super Bands
- Large, continuous loop bands with significant resistance are also suitable for advanced strength training exercises such as pull-ups and heavy resistance workouts.
7. Mega Bands
- Similar to super bands but wider, mega bands provide even more resistance and are commonly used for powerlifting and advanced strength training.
8. Power Bands
- Thick and wide bands are designed for heavy resistance training, and power bands are commonly used for strength and power exercises.
9. Flat Bands
- These are simple, flat pieces of elastic material that can be used for various exercises, including upper and lower-body workouts.
10. Stackable Bands
- Stack resistance bands come in sets with varying resistance levels, allowing users to stack or combine multiple bands to increase overall resistance.
Conclusion
In conclusion, resistance band workouts are a versatile and effective means of toning and strengthening the body. Also, consult a certified personal trainer or a physical therapist for maximum routine efficiency. The continuous resistance from the bands ensures sustained muscle engagement, leading to heightened endurance and certainly improved tone.
Furthermore, the portability and adaptability of high-quality resistance bands make them an accessible fitness tool for everyone, anytime, anywhere. Consistent practice with the best resistance bands contributes to a sculpted physique and enhances overall physical wellness. Adding resistance bands to your fitness routine offers a convenient, effective, and high-quality way to achieve and maintain a strong body and a healthy, positive life.
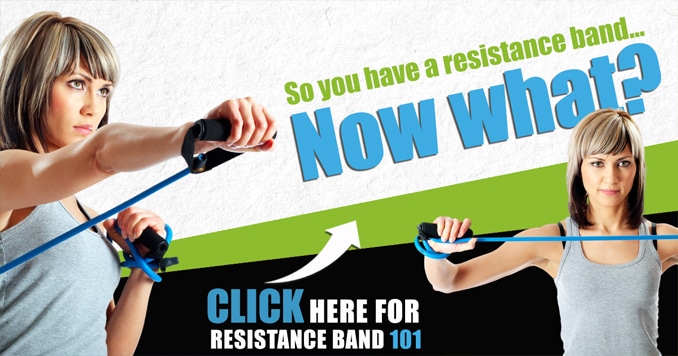
Here at EFI, we understand that the multitude of different fitness equipment options available on the market today can be incredibly overwhelming. Our 101 Video series is designed to take the guesswork out of any equipment you might require for your various fitness pursuits. Resistance Band 101 takes a closer look at the different Resistance Band options available on the market today.