
![Exercises_for_Sacroiliac_Joint[1]](https://kcdn-dfbd.kxcdn.com/wp-content/uploads/2011/09/Exercises_for_Sacroiliac_Joint1.jpg "Exercises_for_Sacroiliac_Joint[1]")
Keeping your spine and tailbone aligned is made easier by the sacroiliac joint (SI joint), which is situated between them. Sacral-iliac ligaments are strong bands of connective tissue that run down the length of your spine.
Sitting or standing for long periods may be excruciatingly uncomfortable if you have a damaged or strained SI joint.
A fall on one’s back is one of the most prevalent ways to damage or strain the SI joint. Obesity, overstrain during lifting tasks, twisting exercises, extended standing, etc., may all contribute to common stress.
Sacroiliac joint exercises may help avoid additional damage by strengthening and stabilizing the joints. Always talk to your doctor before starting any fitness regimen to prevent problems from worsening.
Best Exercises
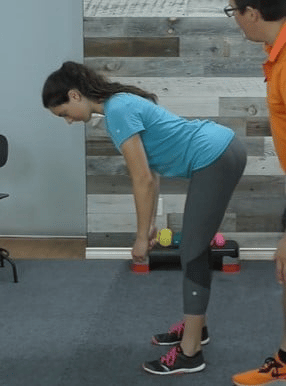
#1 – Hamstring Stretch
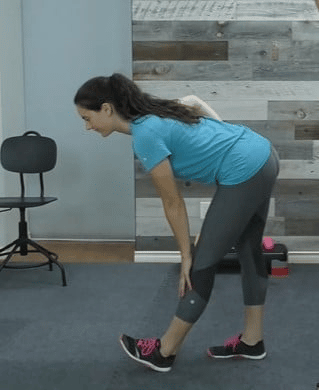
The hamstring muscle group at the back of the thigh helps bend or straighten the knee. To do this exercise, please follow the instructions below.
- Make sure your body is in good alignment, from the top of your head down to the bottom of your feet as you begin to stand up.
- Straighten one of your front legs and point your toes upwards while keeping your hips aligned—twenty seconds in this posture.
- Repeat the exercise with your opposite leg before returning to your starting position.
- Do two sets of two repetitions each, holding for 20 seconds between each set.
- Maintain a solid grasp at the finish of the exercise for smooth, controlled movement.
When it comes to intensity, it’s shallow. Stretching the hamstrings is the goal of this exercise.
#2 – Calf Roll
The ankle joint’s primary movers are the medial and lateral calf muscles, with the knee’s secondary movers being the hamstrings and quadriceps. Because they are located on the lower leg’s surface, the calf muscles are more easily manipulated than other body parts. Please follow the directions below to complete this activity.
- Assume a sitting posture with your knees bent and your feet flat on the floor, then sit straight on the chair or bench.
- You should place the massage stick at the back of your calf. Make your way from the bottom of your knee to your midcalf and back. Replicate the action.
- Take it easy and work up to two sets of 10 reps each on each side.
- Finish the exercise with a rapid halt and a smooth, controlled movement.
The level of intensity is not too high. The goal of this exercise is to link the hamstrings and calf muscles.
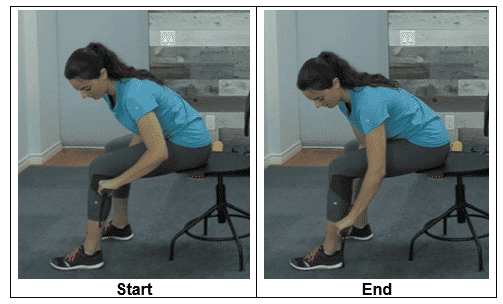
#3 – Spinal Twist
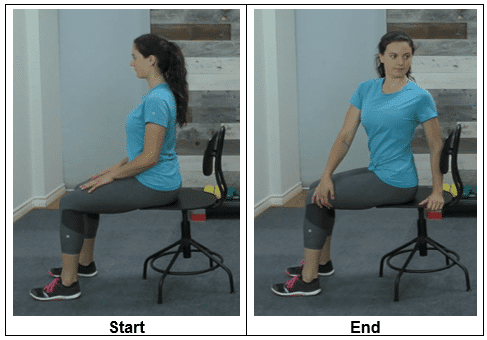
Spine twisting improves the upper-body range of motion by teaching the trunk to spiral on the central vertical axis while retaining the support of a stable pelvis. This exercise gives you the sensation of physically squeezing out the old air by having you twist your spine. Complete the task by following the steps outlined below.
- Sit straight on the edge of a chair or bench with your feet flat on the floor, keeping your head, shoulders, and hips in good alignment with each other.
- Hold the chair’s side with one hand for support while you engage your core and twist your upper body to one side. Turn around and do it all over again on the other side.
- One set of five repetitions on each side should be enough.
- Smooth, controlled movement and a clean halt at the final position are critical to this exercise’s success.
When it comes to intensity, it’s light. Work on mobility and movement in the thoracic spine with this workout.
Worst Exercises
#1 – Deadlift
The deadlift is one of the three movements used in powerlifting and a mainstay of most strength-training regimens. The barbell is the most often used training equipment for deadlifts, but there are other options. Try this exercise below.
- Maintain perfect alignment of your head, shoulders, and hips while standing with your legs slightly wider than hip-width apart.
- Squatting with your knees slightly bent and rotating through your hips puts you in the ideal posture to have your upper body parallel to the floor.
- Take a deep breath, stand back up, and try again.
For the Sacroiliac Joint to function optimally, you must be standing. Your SI joint takes a beating as you go through this motion.
If you do this exercise, follow the correct technique, be in excellent physical condition, and execute the activity with an appropriate number of repetitions because this may cause fatigue, irritation, and pain.
#2 – Single-Leg Squats
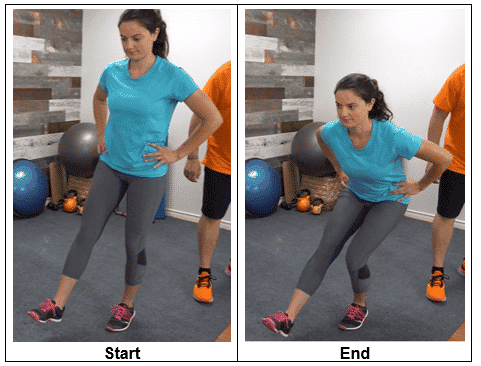
In the single-leg squat, one leg is used to accomplish the action. To the typical squat, it adds an element of stability and balance. The term “pistol squats” refers to a similar exercise. You can do this exercise by following the steps provided.
- Begin in an upright posture with your legs shoulder-width apart, keeping your head, shoulders, hips, and legs in perfect alignment.
- Get down on all fours. Shift your weight entirely on one foot while extending your other leg in front of you.
- Move into a squat stance by contracting your core and bending your knee.
- Repeat the exercise by bringing yourself back to the beginning position.
When performing this action, all of the strain is placed on a single SI joint, which is particularly vulnerable. SI joint discomfort is almost always more severe on one side than the other, with the right side being the more common.
SI joint discomfort and injury may be caused by inadequate exercise skills, exhaustion, or high-level repetitions; all of these factors increase the stress on the SI joint.
#3 – Driving
Getting behind the wheel is regarded as one of the most dangerous human actions. When you drive a manual transmission automobile, you put a lot of stress on your leg since you have to constantly move it back and forth while hitting the clutch, throttle, and brake pedals.
Long lengths of driving might place additional strain on a SI joint that is already weak, irritated or injured.
If you have a problem with your SI joint while driving, take extra care. When driving, be sure to take frequent breaks to stretch your legs to keep the SI joint from being irritated or becoming painful.
If you have discomfort in your SI joint, stay away from the workouts on this list. For pain treatment, try some of the greatest exercises you can find.

BONUS: Exercise Modification
Wall Squats With Stability Ball
The wall squat targets the quadriceps (one of the biggest muscles in your body), the glutes, and the hamstrings, all of which are important for lower-body strength.
- Place a stability ball behind your back and your feet shoulder-width apart as a starting position.
- Lean into the ball by gently extending your legs outward.
- At chest height, place your hands in front of your body.
- Move into a squat posture by contracting your abdominal muscles and keeping your knees bent at a 90-degree angle.
- Raise yourself back up and do it again.
You may improve your posture and balance by rolling about on the stability ball.
Sitting on the ball and ensuring that both your knees and hips form a correct angle can help you determine whether or not you are using the ball that is the appropriate size for you.
Ending the Most Common Back Injury In Women

The sacroiliac joint is the site of the injury that occurs most often in women but is also the one that is neglected the most.
The majority of the time, the workout regimen recommended is designed for someone who has suffered a lumbar spine lower back injury, which is not the ideal approach.
SI joint rehabilitation differs greatly from that of a typical lower back injury in terms of workout program design.
What’s the catch?
- The “don’ts” for your exercise program design once your client has gained medical clearance to begin an exercise program.
- Things you shouldn’t do outside of the gym if you’ve hurt your SI joint.
- Your client’s or your sacroiliac joint client’s go-to workout routine.
If you’re weary of not knowing what to do regarding SI joint discomfort, CLICK HERE.