
I wanted to do an in-depth video that talks about the different things to consider when doing the plank. I wrote out my list, and it ended up being 14 points you need to remember when performing the plank exercise.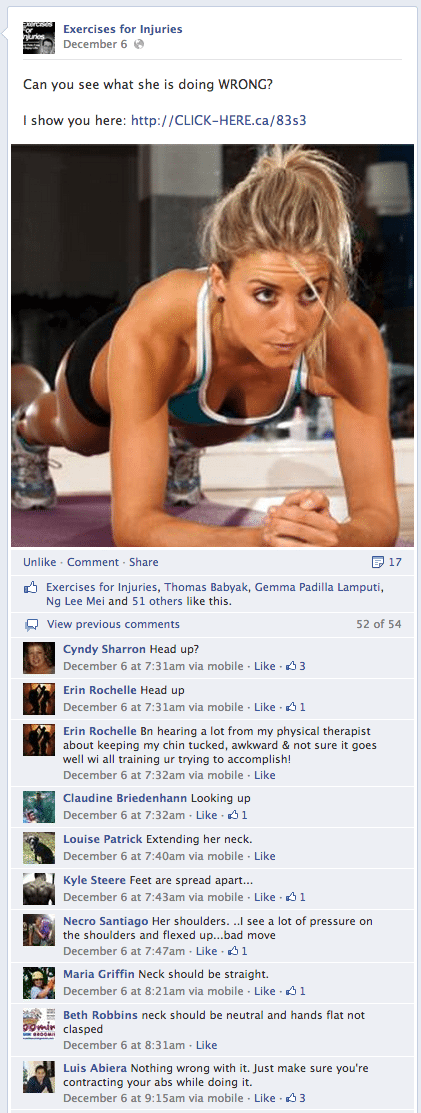
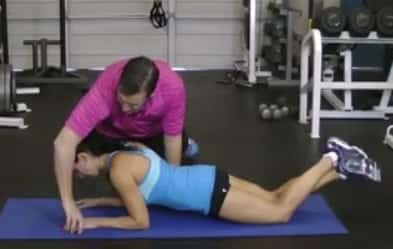
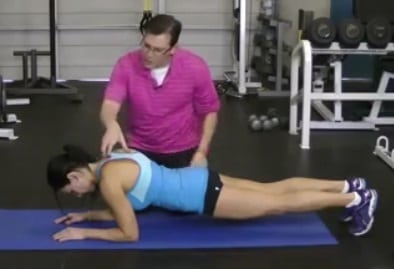
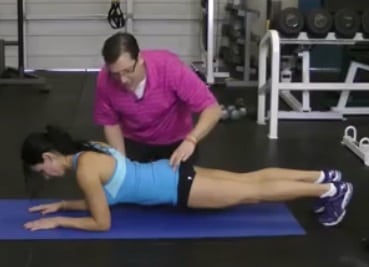
Today, I put a photo on the Exercises For Injuries Facebook fan page and asked people to highlight what this lady was doing wrong regarding the plank. You all had great answers regarding what she was doing wrong in the photo.
CLICK HERE to watch the video on YouTube
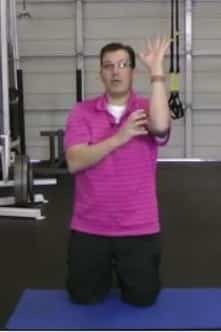
I will get Orsy to go through it, and I will end up chatting about the key points to remember with each thing regarding the plank.
#1 – Head is in Good Alignment
We are starting with the head. I want the head in good alignment with the rest of the body so I can end up having the hands or the eyes looking between the hands. I don’t want Orsy to tilt the head back and look above, as that puts a lot of stress on the neck.
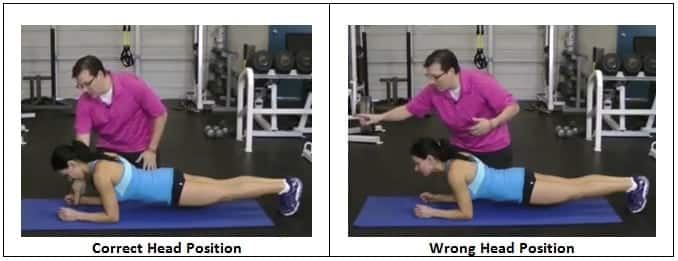
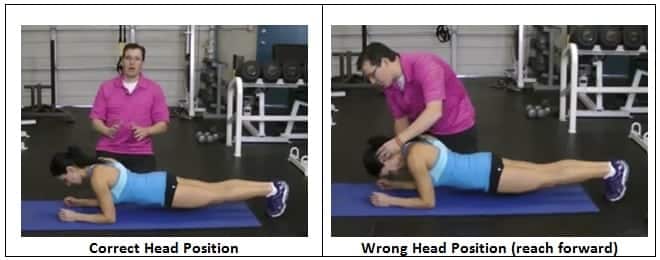
#2 – Chin is Tucked
The other thing I am looking at is I don’t want her to reach forward. I don’t want her to reach forward with her head. I want her chin tucked. And I want her to keep her ear and shoulder in good alignment because if she reaches forward with the head or drops the head, that puts more stress on that neck.
Also, with the head in a good position and the neck in a good position, we are strengthening those neck muscles. This is an excellent exercise for people recovering from a neck injury because you are strengthening the alignment you want and strengthening the neck’s stabilizers.
#3 – Forearms and Wrists In Neutral
Next, I am looking at the wrist, elbow, and shoulder area. How I do the plank is you are on the forearms, and the hands are on the mat. In this position, your wrist ends up being in a good position, good in neutral, which is what wrists are happiest in.
Forearms and Hands are on mat
#4 – Elbows at 90 Degrees
The next thing I am looking at is the elbows. The wrists are neutral, which is what I want. I have the elbows at 90 degrees. That’s the most vital position that they can be in.
Elbows at 90 degrees
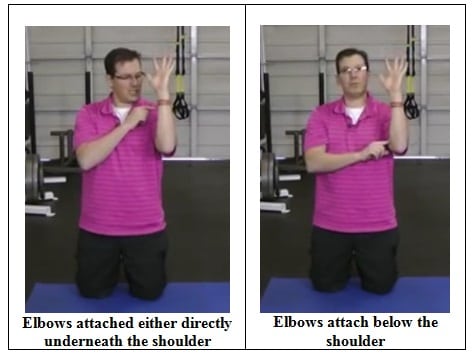
#5 – Elbow Stacked Under the Shoulder
Next, when it comes to elbows, I want the elbows either directly underneath the shoulder or a touch below the shoulder so there is less stress on that shoulder joint.
If I end up having that elbow above, it puts a lot of stress on the shoulder joint.
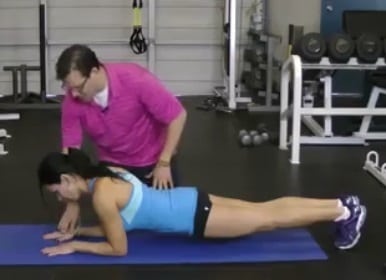
#6 – Pulling Down with the Hands and Forearms
And the next thing I get people to do is to pull down with their hands and forearms to activate their lats and scapular muscles.
I will get Orsy back into that planking position. She is pulling. We have a good head and neck position, hands are down, and elbows are at 90 degrees. They are just below the shoulder or directly under.
Another way of looking at it is she spreads the floor with her hands and forearms.
Plank Position
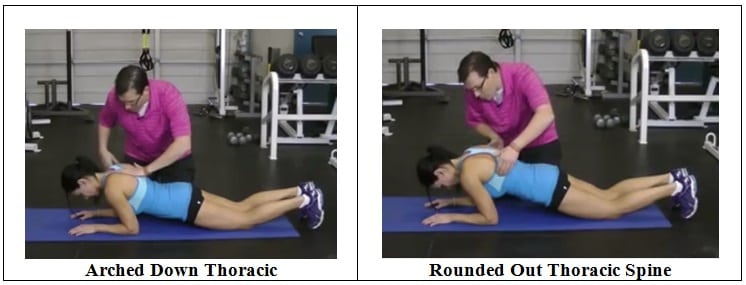
#7 – Shoulder Blades Are Set
The other things that I am looking at are I want to see how those shoulder blades are, so I want to build tension around those shoulder blades. I will get Orsy to round out a little bit through that mid-back.
Round out mid back
With Orsy, I can see she wings a little with her shoulder blades, so I would probably need to work on her scapular muscles in her exercise program.
#8 – Mid Back Curve is Normal
Now looking at the thoracic spine (mid-back), I want that mid-back curve to be standard, so I don’t want it to arch down, or I don’t want it to round out. I want it to be expected of her.
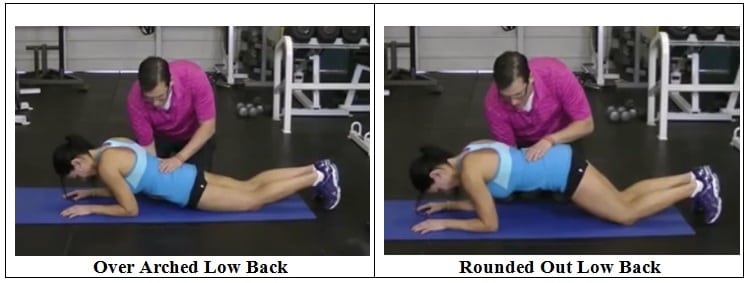
#9 – Normal Curve in the Lower Back
Next, I am looking at the low back area (lumbar spine). I don’t want it to be over-arched, and I don’t enjoy being rounded out. I want it to be expected of her.
#10 – Tighten the Abdominal Area
Then I want all the muscles in the abdominal area to be tight, so I want her to brace that core, activate that core, and be tight through that core and abdominal area.
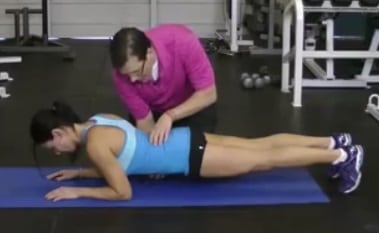
Tighten the Abdominal Area
We have ended up moving through that whole body. The plank is an excellent assessment exercise because it shows you so much about that person’s stability, how their joints are working, how their muscles are working, and how the muscles are stabilizing the body against gravity.
#11 – Tighten the Gluteus
I will get Orsy back into that plank position, and we have gone at that low back and core area. The next is to look at the glutes.
Tighten the Glutes
Since I am pulling with those hands, activating the lats, I want to ensure that the glutes are tight because they protect the hip and lower back and back area.
#12 – Hips and Thighs are Straight
Regarding the hips, I want the thigh and hips to be straight. I wouldn’t say I like the hips; I wouldn’t say I like the hips high in the air, or I don’t want the hips low.
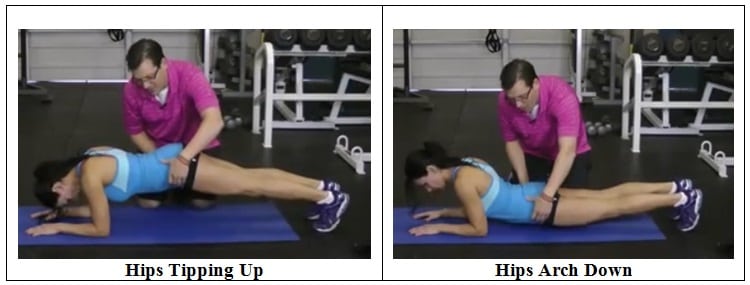
I want those hips to be in a straight line.

Hips in a straight line
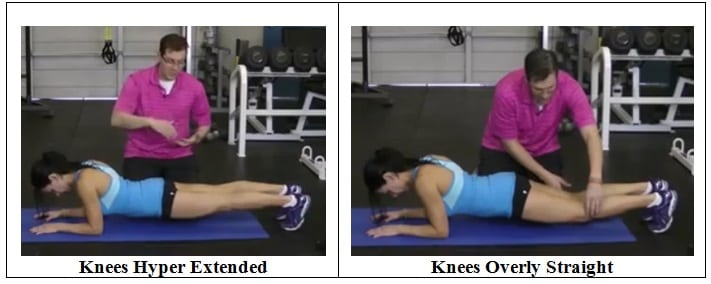
#13 – Knees are Straight
When it comes to the knees, I don’t want them hyperextended. I don’t want them bent. I want them to be friendly and straight.
#14 – Feet In Line with the Hips
I don’t want her feet together when it comes to the feet. I want to have her feet apart at a point where the foot is in line with that hip joint.
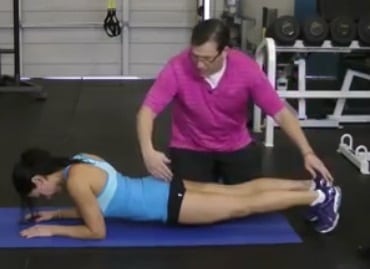
The feet are in line with the hip joint.
I don’t have the feet together, and I don’t have the feet too wide.
There is the odd time to have it wide, but when it comes to the regular plank, I want the foot to be right underneath that hip. And when I look at the foot, I want that to be 90 degrees. I don’t like the toes way back here or the toes way out in front, and then I am getting the person to hold that position, and it could just be for a whole like 1 or 2 seconds and relaxing or getting them up and holding that position for 5 or 10 seconds.
So there you go. What are all the essential things when it comes to my perspective when it comes to the plank? If you are a fitness professional, it is an excellent assessment tool to determine how people maintain alignment against gravity.
You are looking at the position of the following:
- Neck
- Wrist
- Elbow
- Shoulder
- Mid Back or Thoracic Spine
- Scapula
- Low Back area
- Core
- Glutes
- Hip Joint (flexion and extension)
- Hip Abduction and Adduction
- Knee
- Feet
- Ankle
You can see a lot to look at and see when it comes to the plank exercise. Next time you go through the plank, go through that 14 Point check to see how you are doing the plank or how your clients are doing the plank.
This is Rick Kaselj from ExercisesForInjuries.com. There is a good chance I have a video, interview, or blog post to help you overcome your injury or pain. Make sure to swing by ExercisesForInjuries.com.
Secondly, if you watch this on YouTube, head above and hit “Subscribe.” You will subscribe to the channel, and every couple of days, you will get a video where I talk about overcoming injury and pain.
Thirdly, head down below hit “Like,” and leave me a question or comment. This is Rick Kaselj from ExercisesForInjuries.com saying take care and bye-bye.
If you do have pain, here are some resources that I recommend to help you overcome your pain:
Rick Kaselj, MS