

In this video, I wanted to go through the 3 Best Filler Exercises.
I have already done a video where I talked about the origin of Filler Exercises, the main benefits of filler exercises and why I get my clients to do filler exercises.
I wanted to go through three filler exercises that I really like and oftentimes give to my clients because these three exercises benefit them the most.
CLICK HERE to watch the YouTube video.
#1 – Heel Drop
I will have Orsy go through the exercises.
Orsy is stepping on the weight plates.
She is going to come up as high (plantar flexion) as she can and then dropping her heels (dorsiflexion) as far as she can and then coming back up.
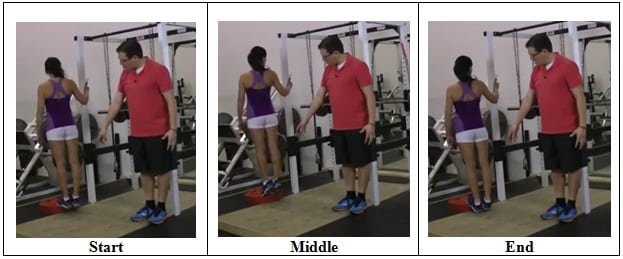
Heel Drop
When it comes to where to do the heel drop filler exercise?
Doing the exercise on the plates isn’t the best place to do the exercise. It’s what I had in this area. What I would recommend is utilizing a step and going through a full range of motion when it comes to the ankles.
It is important to drop the heels as far as you can. You might end up feeling a light stretch in that calf area and this is good.
What we are doing with the heel drop filler exercise is we are lubricating the ankle joint through full range of motion. We are dynamically stretching the muscles around that ankle, increasing the range of motion of the ankle and ease that the ankle is moving.
We are doing this because most of us sit a lot. With a lot of sitting, the ankle gets stiff and we lose movement in one or both of the ankles. When we lose movement in that ankle, it affects any lower body exercises that we are doing. For example affecting lunging and squatting exercises. This will lead to putting greater stress on other joints like the knee, hip, and the back.
Also if you wear high heels, they will also affect your ankles in a negative way. I discussed this in detail here.
#2 – Full Bodyweight Squat
After going through the full ankle range of motion filler exercise, what I get most of my clients to do is go through a full body weight squat and going through the full range that they can when it comes to their knees and hips.
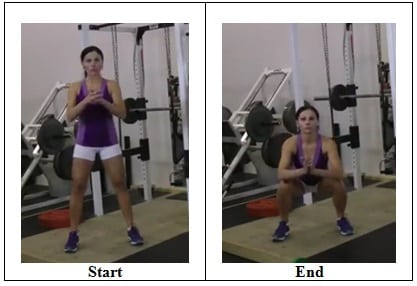
Full Bodyweight Squat
We are lubricating the knee joint and activating the stabilizing muscles around the knee.
Same thing when it comes to the hip. We are loosening up the hip and activating the stabilizing muscles in the hip.
By doing the ankle range of motion exercise, we are loosening up the ankle joint then we end up moving to the full bodyweight squat. We are working on the knees by loosening up the knee through full range of motion, and activating the stabilizing muscles that protect the knee. We are working on loosening up that hip, lubricating that hip joint, and activating those stabilizing muscles of the hip which protects that hip and also it protects the back.
If we have got the knee and the hip working properly, the stress in the back, hip and knee decreases.
Those are the two lower body Filler Exercises that I like to do.
#3 – Vertical Hanging Exercise
I have talked about this in other videos and I have talked about this a lot in another video when it comes to the Fix My Shoulder Pain program.

Vertical Hanging Exercise
How you do the vertical hanging exercise is you are grabbing the bar with your hands shoulder width apart and your arms are straight above. Then what you are doing is gradually add more and more of your body weight onto your arms and you are looking for a light stretch in the shoulders. We are not trying to rip the shoulders apart. Instead, we are trying to lightly stretch the muscles in the shoulders and then also lightly loosen up that shoulder joint.
Once again, if you are doing a lot of sitting and a lot of driving, a lot of times we are losing some of that shoulder movement and what we want to do is add the Vertical Hanging in order to stretch out the shoulder muscles especially when it comes to overhead exercises, for example barbell pressing or snatches.
Stretching out those shoulders muscles will end up making any type of overhead pressing movement or any type of overhead movement easier because if you are losing some of the range of motion when it comes to your shoulder then you are putting more stress and strain on other parts of your body like your mid-back, your low back and your hips.
What I oftentimes do is I get people to just go for about 15 seconds, 25% of their bodyweight, get them do their next exercise, come back in between sets, do about 50% of their bodyweight for 15 seconds and work all the way up to their full bodyweight. And then, gradually increase their weight on the arms and then lightly stretch out those muscles around that shoulder joint.
There you go. Those are the 3 Best Filler Exercises. Give those a go next time when you are working out. Add them in between the exercises that you are doing. See how you end up performing, see how you end up feeling, and see how your body reacts from going through those 3 exercises.
If you want to know what my Top 50 Filler Exercises are for Improved Performance, you can check it out here:
Rick Kaselj, MS

.