

Whether you’re a dedicated cyclist logging hours weekly or someone who enjoys occasional summer rides, incorporating stretches after cycling is essential to maintain your overall muscle and joint health. Cycling engages specific muscle groups and keeps your body in a posture that can strain certain areas. After a ride, focus on opening up the front of your body and stretching the key muscles used, like the hamstrings, quads, and hip flexors. Foam rolling can complement your stretches by providing deep tissue relief and allowing you to control the pressure for an effective recovery session. Let’s dive into some exercises that will help!
1. Quad Roll
Sometimes your quads are called a “bossy” muscle group because they tend to take over for other muscles and get overworked. Plus, when you sit, your quads tend to get tight, and you are in a sitting position when you bike.
To roll out your quads, lie face down on the floor with the foam roller under the front of your thighs. Roll from the tops of your thighs to just above your knees, making sure not to roll onto your knees. Then, roll back to return to the tops of your thighs. This is considered one repetition.
Roll for 1 minute or 10 slow repetitions.
Modifications: To decrease the intensity, bend your knees while you roll. To increase the intensity, roll one leg at a time.
2. Glute Roll

Your glutes are a huge muscle group and are essential for riding your bike and avoiding injury. These muscles tend to get tight and sore when you spend time riding a bike, so it is important to roll them out afterward.
To roll out your glutes, cross one ankle over your opposite knee and place the foam roller under your hip/glute area. Roll forward and back, playing around with the angle you are rolling at to target different muscles. Everyone will be tight in different areas, so find the area that is tight for you and spend time rolling that area.
Roll for 1 minute on each side.
Modifications: To increase the intensity, use a massage ball or lacrosse ball instead of a foam roller.
3. Hip Opener
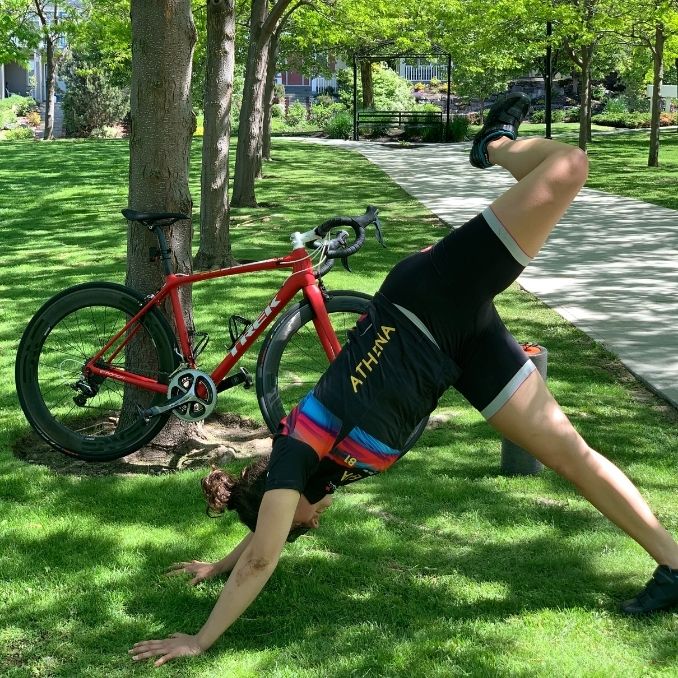
You use your hip flexors to pull your legs back up once you have pushed down on your pedals.
To open up your hips, move into a downward dog position by pressing down into your palms and lifting your hips upward. Lift one leg and stack your knee over your hip, opening up through the hip. Breathe deeply in this position.
Hold this position for 30 seconds on each side.
Modifications: If this stretch is too difficult, lie on your back and move into a happy baby pose by pulling your knees toward your shoulders. To intensify the stretch, draw circles with your knees in both directions, massaging the hip joints.
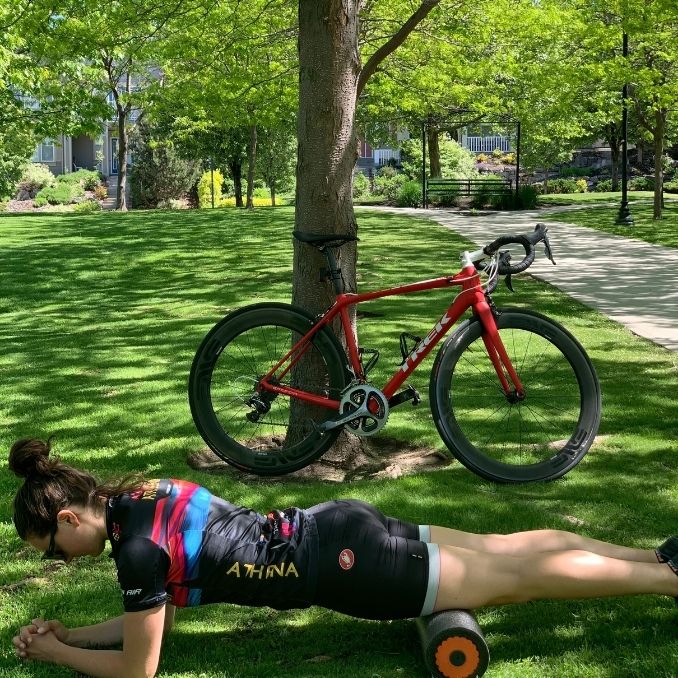
4. Chest Opener

When you bike, you sit somewhat hunched over and this leads to tight chest muscles and rounded shoulders. It is very important to reverse this position by opening up through your chest and shoulders.
Lie down with the foam roller under your upper back, arching your spine over the roller and lowering your head to the floor. You can place something under your head (or keep your helmet on) to support your neck. Open up your arms to the sides and breathe.
Hold this position for 1 minute.
Modifications: To increase the intensity of this stretch, hold a light dumbbell in each hand and allow the weight to help pull your hands toward the floor. To decrease the intensity, leave your arms by your sides.
5. Cobra

Cobra pose helps open up throughout the chest. Cobra pose also helps strengthen the muscles along your spine that help with posture.
To move into the cobra pose, lie on your stomach with your legs extended behind you. Place your hands under your shoulders and keep your gaze down. On an inhale, roll your shoulders down your back and lift your chest off the ground as far as is comfortable. Take the weight out of your hands and breathe.
Hold this position for 30 seconds.
Modifications: To decrease the intensity of this stretch, use your hands to help hold your chest up. To increase the intensity, begin to push into your hands and lift your upper body further off the floor. Make sure there is no compression or pain in the low back.
6. Yoga Squat
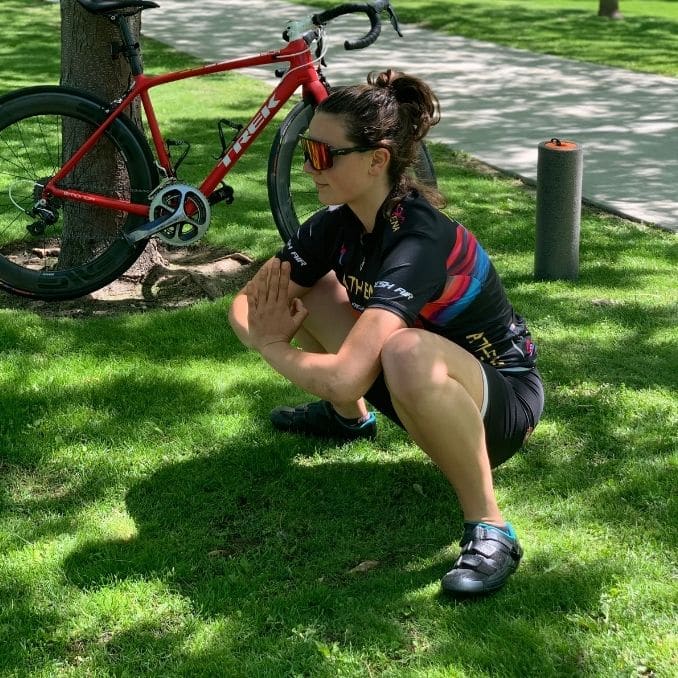
This stretch helps with mobility in the hips.
To move into a yoga squat, start in a wide stance with your toes pointed slightly outward. Sink your seat down as far as you can comfortably go. It is okay if your heels lift off the floor. If you are a ways from the floor, use a block or other support under your sitting bones for support.
Hold this position for 1 minute.
Modifications: To intensify this stretch, place your elbows on the insides of your knees, press your palms together, and use your elbows to push your knees outward.
7. Windshield Wipers
 |  |
This exercise helps with mobility in the hips and spine.
Sit with your knees bent and feet flat on the ground, wider than shoulder-width apart. Drop your knees to one side, hold momentarily, then slowly repeat the movement on the opposite side.
Alternate back and forth slowly for 1 minute.
Modifications: To intensify the stretch, hold the end positions longer.
8. Thread the Needle

Thread the Needle is a great shoulder stretch, as well as an upper back spinal twist. Keeping the upper back mobile is essential for daily tasks and staying pain and injury-free.
Move into a tabletop position with your hips over your knees. On an inhale, lift one arm up, opening up your body to the side. As you exhale, thread that arm underneath your other arm and lower your upper body to rest on the side of your shoulder. Use your other arm to stabilize yourself. Rest the side of your head on the ground.
Hold this position for 1 minute on each side.
Modifications: For more support in this pose, place a bolster, pillow, or folded up blanket under the side of your torso and side of your head.
Stretching after you work out helps you stay mobile now, but also keeps you pain-free and injury-free in the future. If you want to keep biking in the years to come, make sure you take care of your muscles and joints and stretch after each workout. I hope you try these out and enjoy the benefits! If you have any questions, do not hesitate to reach out to [email protected].
Learn how to effectively heal your IT Band Syndrome safely and naturally. Click here for more information.
