The foam roller is a versatile tool that allows you to massage deep into your muscles, providing relief from pain and tension. Foam rolling is also called self-myofascial release because it allows you to release tension in your muscles and the fascia surrounding them on your own. The foam roller is often used in rehabilitation programs for injury recovery, as well as being a must-have for active people of any fitness level. Stretching does not allow for the same level of tissue release as the foam roller, so if you haven’t used a foam roller yet, make sure you try one out. If you aren’t ready to invest in one yet, most gyms and fitness centers will have them for you to use.
Before foam rolling, the myofascial release was used only by professional athletes, coaches, and therapists. Now, anyone can reap the benefits of myofascial release on their own, at home, for free. Self-myofascial release essentially means self-massage. This deep, self-massage allows you to release muscle tightness, or work on trigger points that may be causing pain or contributing to an injury. Rolling your muscles and applying pressure to specific points on your body enables your muscles to recover and return back to their normal, optimal function. A healthy muscle is elastic, healthy, and ready to work.
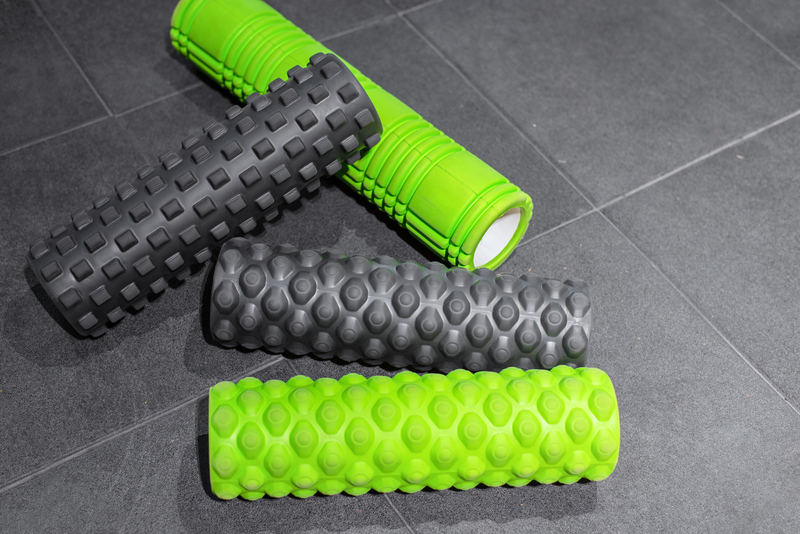
Remember that foam rolling can be intense, especially when you are working on a trigger point. A trigger point is what you may think of as a “knot”, and will often cause referred pain. Referred pain is when you are applying pressure to one area but feeling pain in another area. When you are foam rolling, it is normal to experience discomfort, even intense discomfort. However, it should not be unbearable, and you should feel better after you are done. The upside of self-myofascial release versus a massage is that you are in charge of the pressure. Plus, only you can know exactly where you are feeling pain and discomfort and where you need to apply pressure. There are many kinds of foam rollers, but in general, the harder the material, the more intense the rolling will be. If you are new to foam rolling, we recommend starting off with a roller with more give to it, such as one made of foam.
1. Quad Roll
The quadriceps tend to get tight, not only from activity but from sitting as well. Over time, the muscles will get tight and stay in that position, which can cause stiffness, pain and even make you more susceptible to injuries.
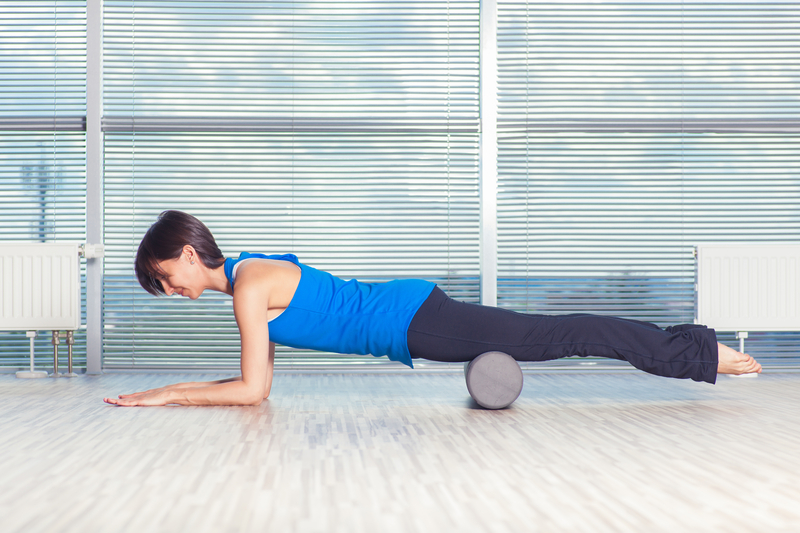
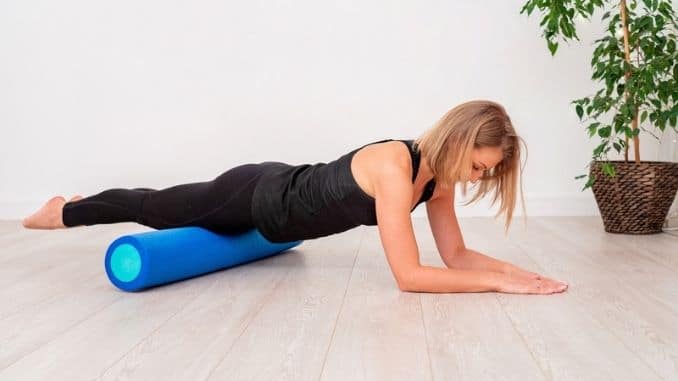
Begin face down on the floor with the foam roller under your thighs, just above your knees. Lower down onto your forearms to support yourself. Roll yourself back so the foam roller makes its way up toward your hips. Once you get to your hips, roll back down to just above your knees.
Perform 3 repetitions of 30 seconds.
Modifications: To make this exercise easier, place less force on your quads. You can also hold yourself up to more so less pressure is on your legs. To make this exercise more intense, roll one leg at a time, so more of your body weight is pressing down on the muscle.
2. IT Band Roll
The IT band is a band of connective tissue that runs from the side of your hip down to your shin, passing over the knee joint. When this band is irritated, knee pain and hip pain are common. Regularly rolling out the IT band will keep it healthy, along with your knees and hips.
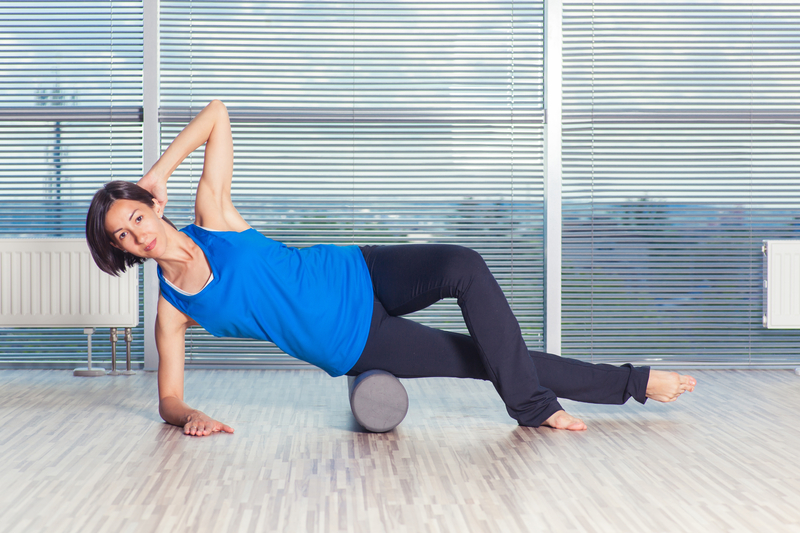
Begin on your side with the foam roller under the side of your thigh, just below your hip. You can stack your legs or have your top leg out front. Roll from your hip, down to just above your knee, and back up. You can play around with the angle you are rolling at, more towards the inside or outside of your leg. You may find one area is more intense, so work with that area.
Perform 3 repetitions of 30 seconds on each side.
Modifications: To make this exercise easier, place your top foot on the floor in front of you. This will take some of the pressure off of the IT band. To make this exercise more intense, stack your legs. This will cause more of your body weight to press into the foam roller, getting deeper into the tissue.
3. Glute Roll
The glutes are actually made up of three different muscles: the gluteus minimus, medius, and Maximus. This rolling exercise will mainly target your gluteus maximus.
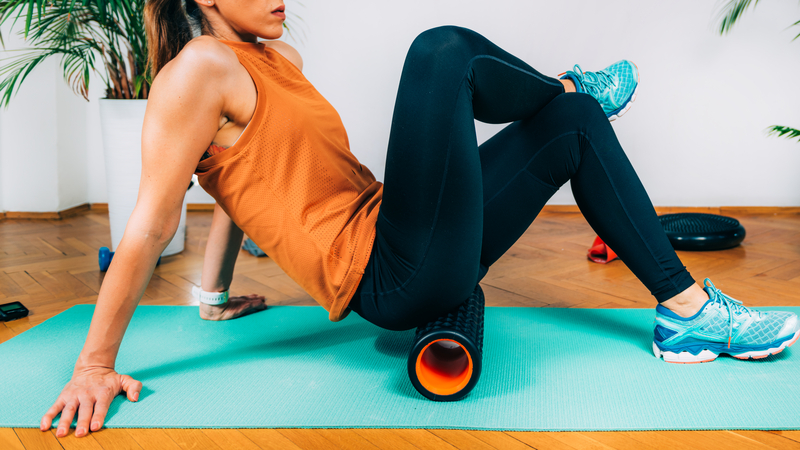
Begin by crossing one ankle over your knee and place the foam roller under your seat on the side with the bent knee. Roll up and down on your glutes as far as is comfortable. As with the previous exercise, try rolling at different angles to target different areas of the muscle.
Perform 3 repetitions of 30 seconds on each side.
Modifications: To make this exercise easier, hold yourself up with the foot on the floor and your arms, taking some of the pressure off the muscles. To make this exercise more intense, release all of your weight down onto the roller. You can also try using a massage ball or lacrosse ball.
4. Upper & Mid Back Roll
Do you have back pain? Try rolling out the muscles in your upper and mid-back and you will feel some immediate relief. Avoid rolling onto your lower back as this is a sensitive area for many, and may not be safe to roll.
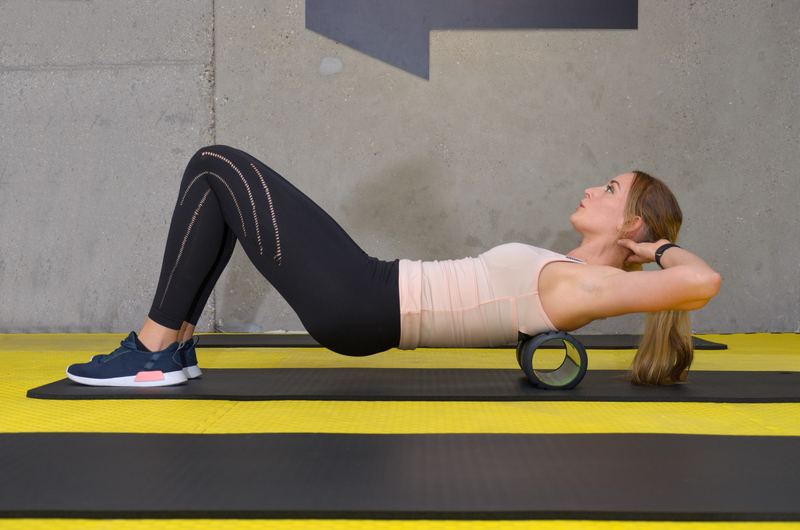
Begin by lying on your back with the foam roller under your upper back. Bend your knees and bring your hands up near your ears. Roll from just below your neck down to your mid-back area, stopping before you reach your lower back. Roll back up.
Perform 3 repetitions of 30 seconds.
Modifications: To make this exercise easier, try rolling a smaller area. To make this exercise more intense, release all of your weight down onto the roller.
There are four great foam roller exercises to relieve tension in tight muscles. You can do these every day or after a workout. We hope you give those a go and reap the many benefits of the foam roller.
Purchase the absolute best foam roller on the market here.

