
Ankle fusion, also known as ankle arthrodesis, is surgery to fuse the bones of your ankle into one piece. The objective of ankle fusion surgery is to stiffen the ankle bones to prevent them from damaging each other. Unfortunately, ankle fusion surgery is irreversible.
Ankle fusion surgery impacts ankle mobility and can limit activities that require significant ankle movement, like running and jumping. There can also be long-term complications following fusion, such as knee pain, hip pain, low back pain, and gait disturbances. Oftentimes, when one joint is injured/troubled, the joints above or below can also be affected. That’s because your body compensates for the injury by altering the way you move.
When you have associated knee pain, it’s very likely that your knee is experiencing some joint stress from having to accommodate an ankle that is not physiologically “normal.” Because your fused ankle is continuously in a static position, the knee becomes stressed at unusual pressure points. This may cause your gait to self-modify in compensation. The change in your gait may cause subtle changes in pressure in the opposite knee, which can result in pain and moderate swelling. Meanwhile, the loss of range in the ankle has a domino effect. Normal walking becomes compromised, and muscles higher in the leg and pelvis lose efficiency and strength. This can lead to other problems, such as lower back pain and hip bursitis.
Having said that, the muscles that will compensate for the fused ankle, such as the muscles supporting the ankle and foot, need to be retrained in order to provide the maximum amount of stability. In addition, exercises to train your body to move efficiently without placing undue stress on other joints should also be performed.
Exercises to Help Strengthen Your Ankle
Isometrics
Strengthening exercises usually start with isometric contractions, meaning no motion occurs around your ankle joint during the exercise. They can be done soon after surgery to start to gently and safely adding force to the muscles that support your ankle.
1. Isometric Ankle Strengthening
Begin a seated position with the outside of the affected foot against a wall. Push outward with your foot into the wall, causing a contraction of your muscles. Your ankle joint should not move. Hold this muscle contraction for 15 seconds, then relax.

Perform 1 set of 5 repetitions, holding for 15 seconds.
Resisted Strengthening
Use a resistance band for these exercises that also strengthen the muscles around your ankle.
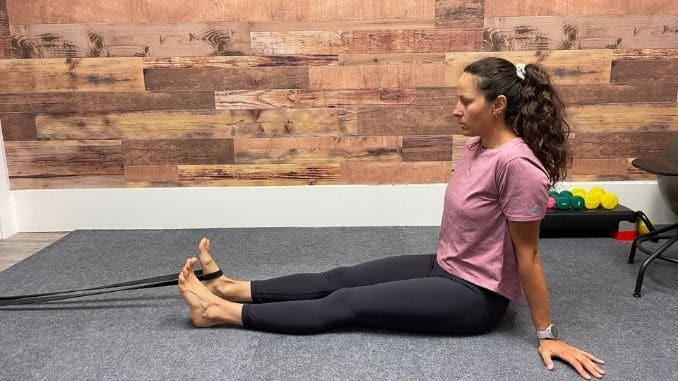
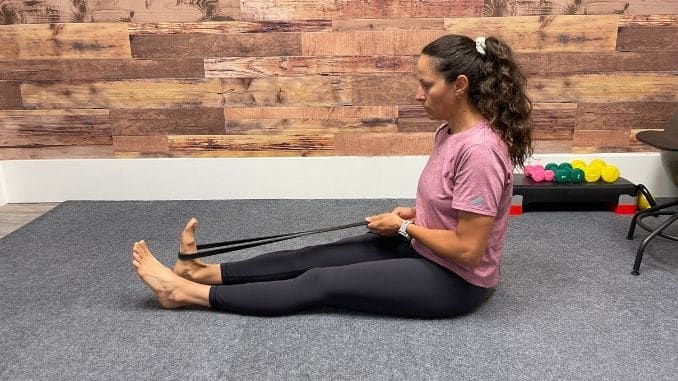
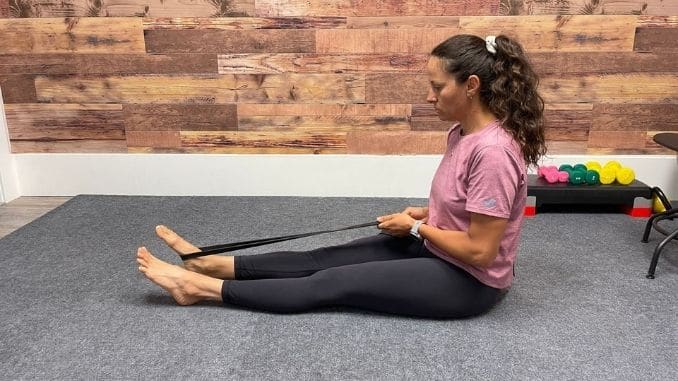
2. Resisted Dorsiflexion
Anchor one end of your resistance tubing to something low and secure, like a door frame or bed leg. Begin in a seated position on the floor. Attach the end of the tubing around your affected foot, keeping your leg straight with tension on the band. Pull the toes of your foot towards you until you feel discomfort or cannot pull back any further. Hold this position for 2 seconds, then slowly return to the starting position. Repeat the movement.
 |
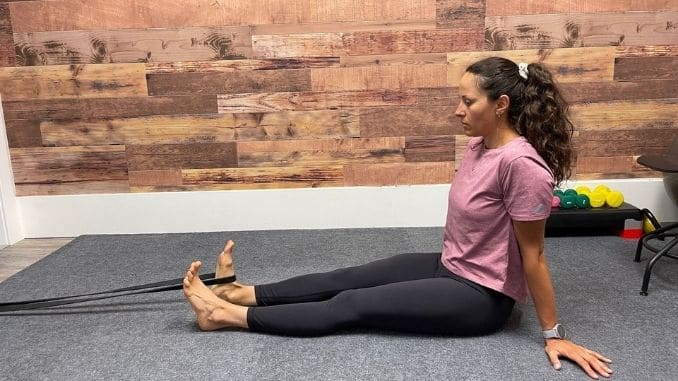 |
Perform 1 set of 10 – 15 repetitions.
3. Resisted Plantarflexion
Resisted ankle plantar flexion helps to strengthen your calf muscle and Achilles tendon.
Begin in an upright standing position on the floor. Wrap the resistance tubing under the ball of your foot, straighten your leg and hold the ends of the tubing in each hand, creating resistance on the band. Push forward with your toes until you feel discomfort or cannot push forward any further. You may feel tightness in your calf muscle behind your lower leg. Hold this position for 2 seconds, then slowly return to the starting position. Repeat the movement.
 |
 |
Perform 1 set of 10 – 15 repetitions.
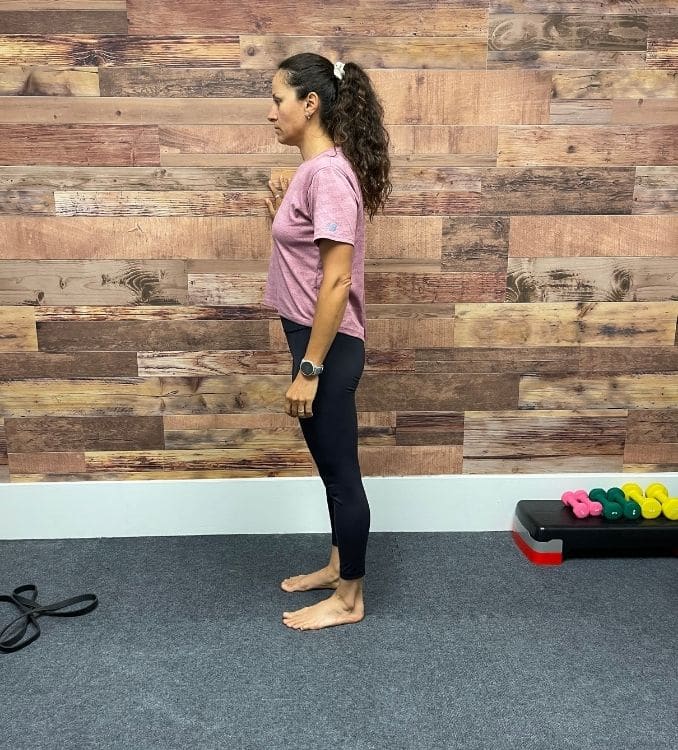
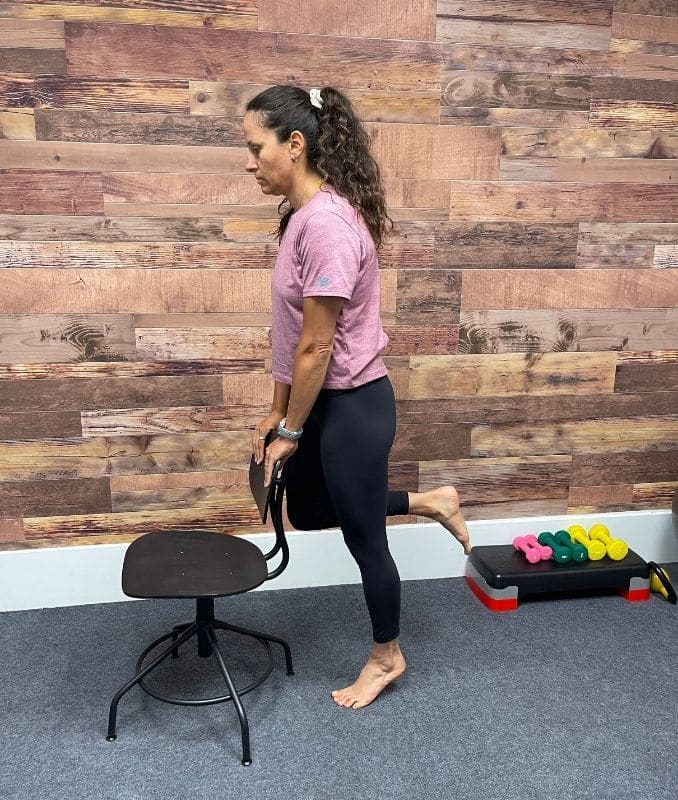
4. Standing Calf Raises
Begin by standing with your feet hip-width apart and one hand on the wall or the back of a chair for balance if needed. Slowly raise your toes on both feet, then lower your heels to the starting position. Repeat the movement.
 |
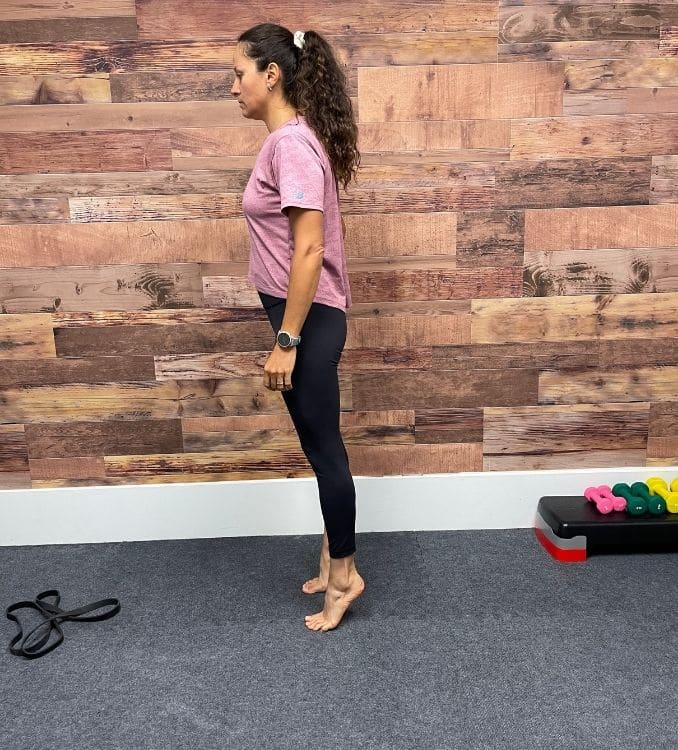 |
Perform 1 set of 10 repetitions.
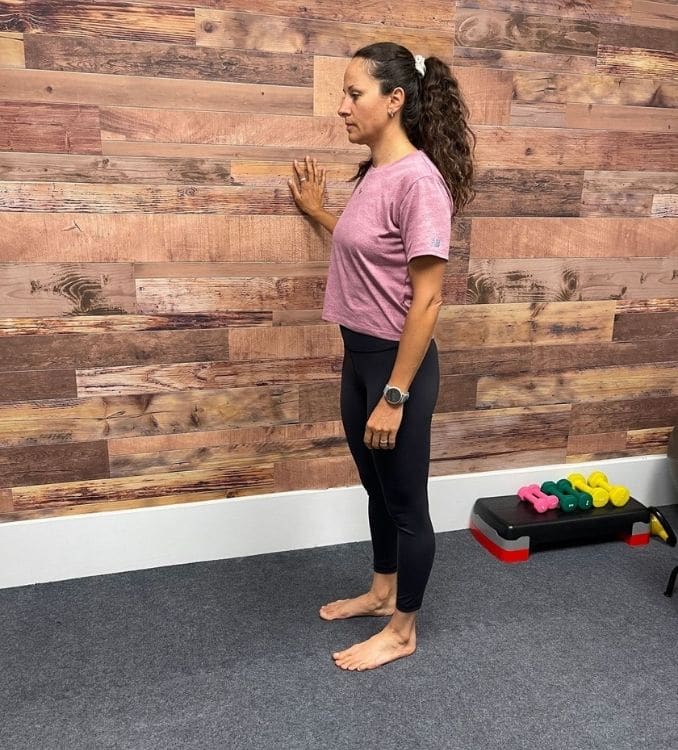
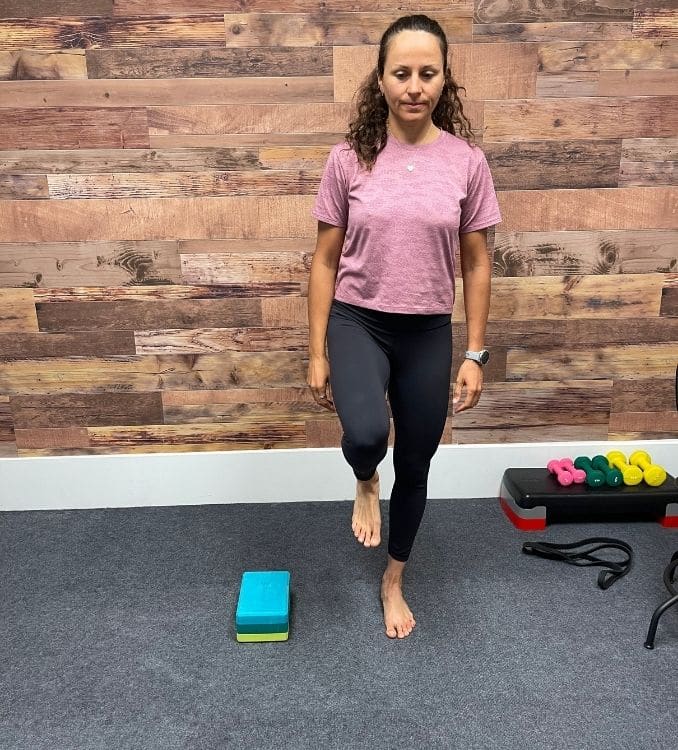
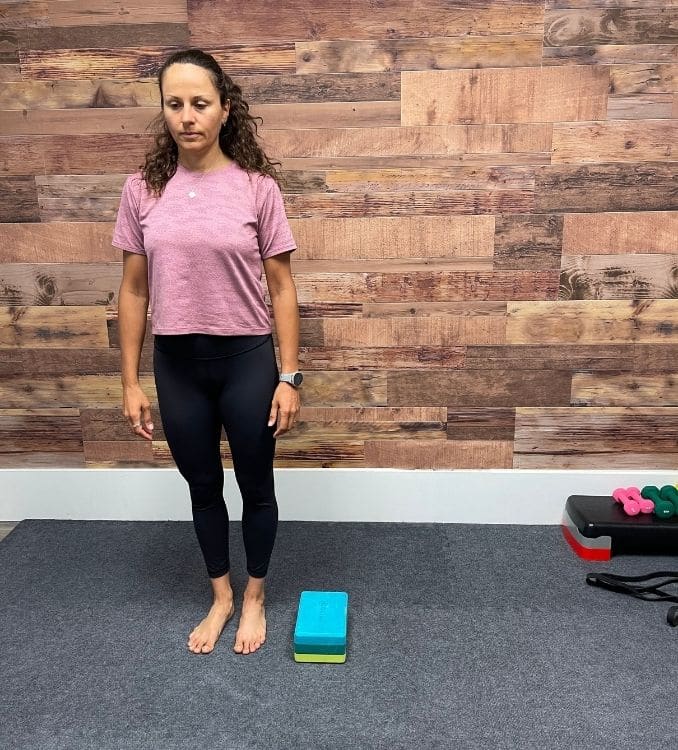
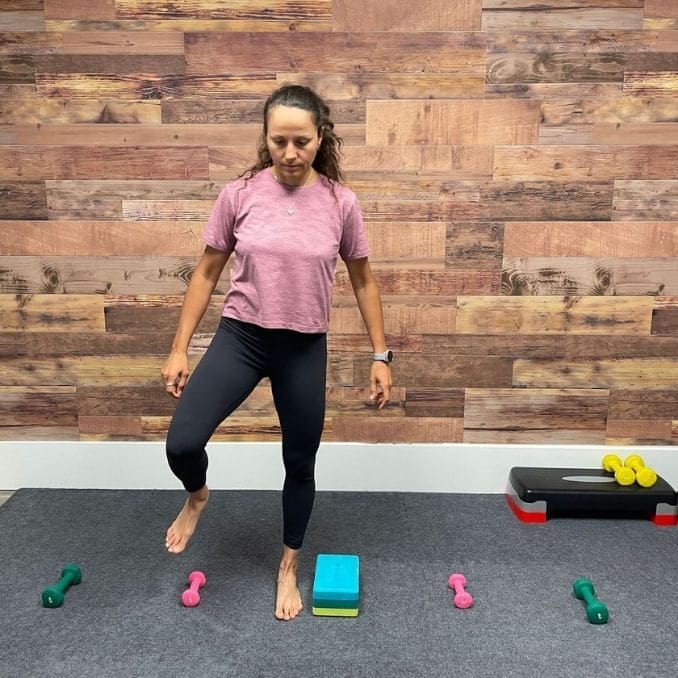
5. Stand on One foot
Begin in an upright standing position with your feet hip-width apart and one hand on the wall or the back of a chair for balance if needed. Stand next to a sturdy chair with your feet hip-width apart. Lift one foot off of the floor and hold this position for 10 – 20 seconds.
 |
 |
Perform 1 set of 1 repetition, holding for 10 – 20 seconds.
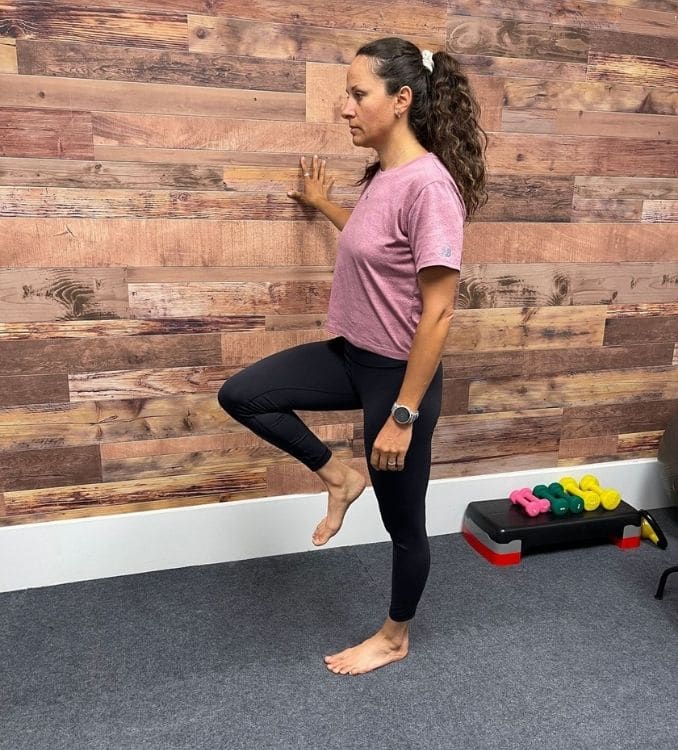
6. Single Leg Calf Raises
Once you are cleared for full weight-bearing, you can try these calf raises.
Begin in an upright standing position with your feet hip-width apart and one hand on the wall or the back of a chair for balance if needed. Shift your weight onto your affected foot, lifting your uninjured foot off the ground. Raise up to your toes, standing only on the ball of the injured foot, and hold this position for 15 seconds. Lower your heel to the starting position and repeat the movement.
 |
 |
Perform 1 set of 5 repetitions, holding for 15 seconds.
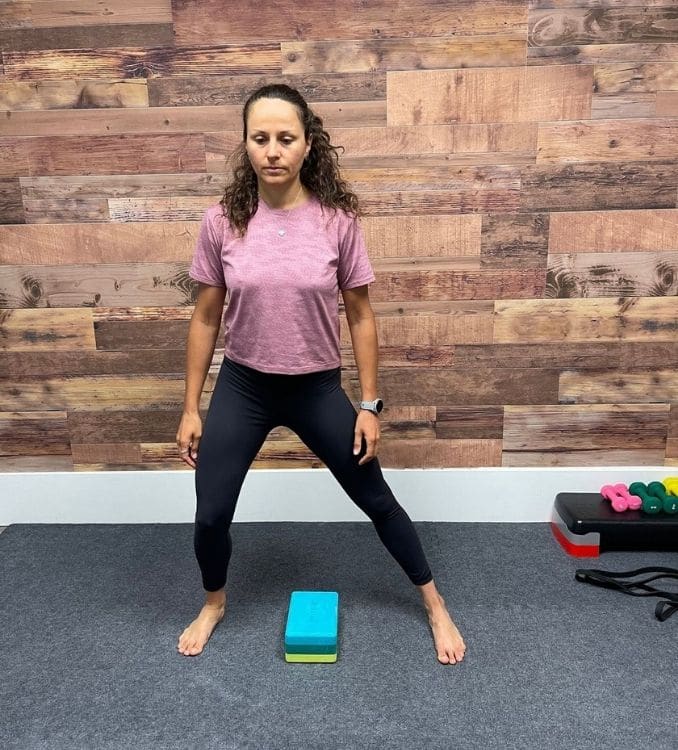
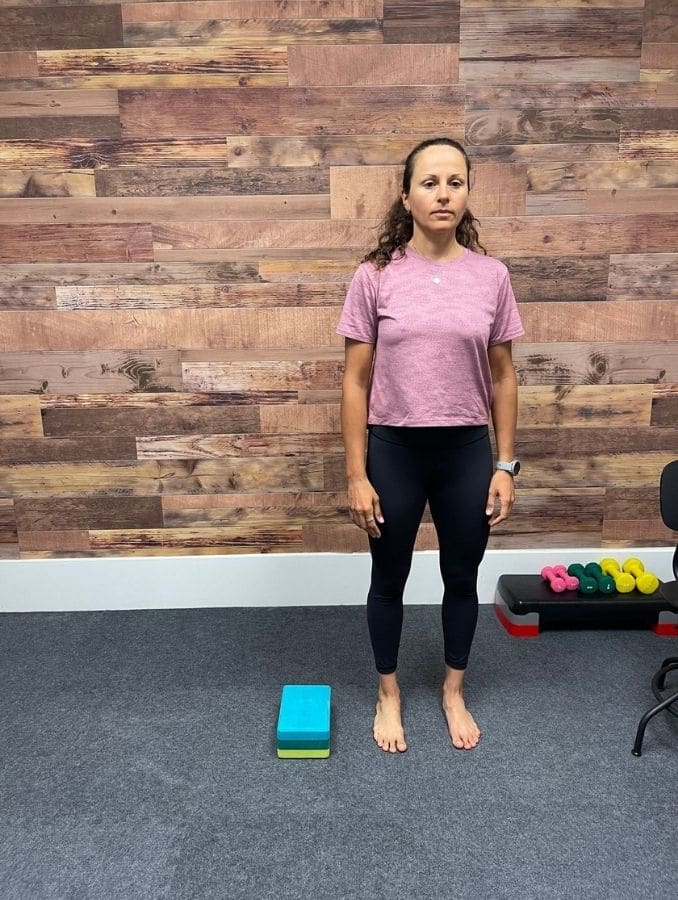
7. Lateral Stepping
Place a rolled towel or small object on the ground beside your affected foot. In a slow and controlled movement, lift your affected foot, step over the towel, and place your foot on the opposite side. Follow the movement with your opposite foot to come to a standing position on the other side of the towel. Repeat the movement in the opposite direction. Increase the speed of this exercise as your healing progresses.
 |
 |
 |
 |
Perform 1 set of 10 repetitions in each direction.
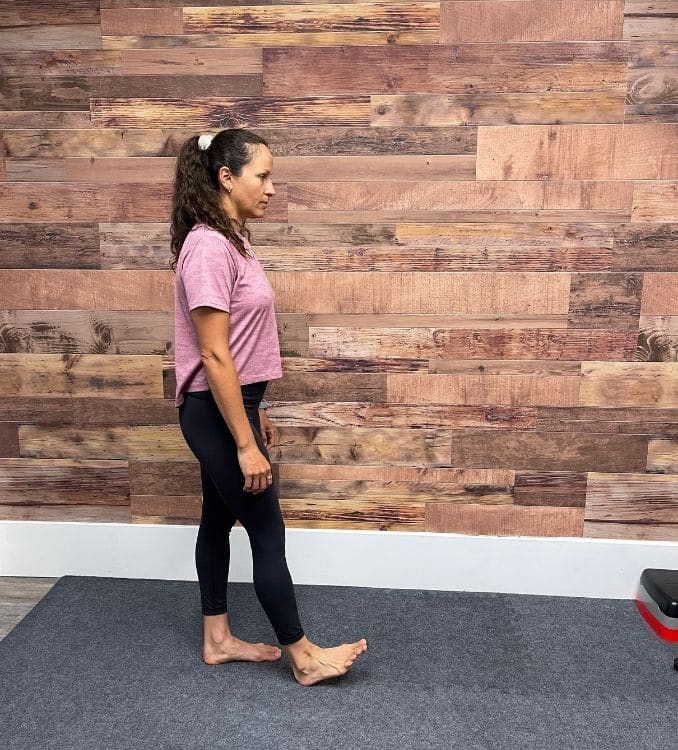
8. Heel Walks
Begin in an upright standing position with your feet hip-width apart and one hand on the wall for balance if needed. Slowly walk forward in an exaggerated heel-to-toe movement.
 |
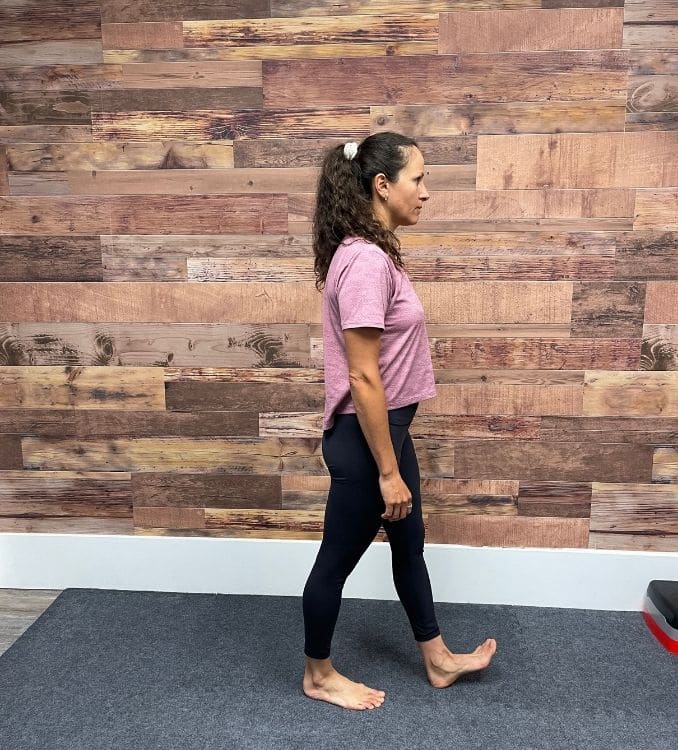 |
Perform 1 set of 10 repetitions on each side.
9. Lateral Jumps
This exercise starts to incorporate plyometrics into your rehabilitation routine, which can help you get back to running and other sports.
Place a rolled towel or small object on the ground beside your affected foot. In a slow and controlled movement, lift your affected foot, hop over the towel, and land on the opposite side of the towel with one foot. Repeat the movement in the opposite direction. Increase the speed of this exercise as your healing progresses.
 |
 |
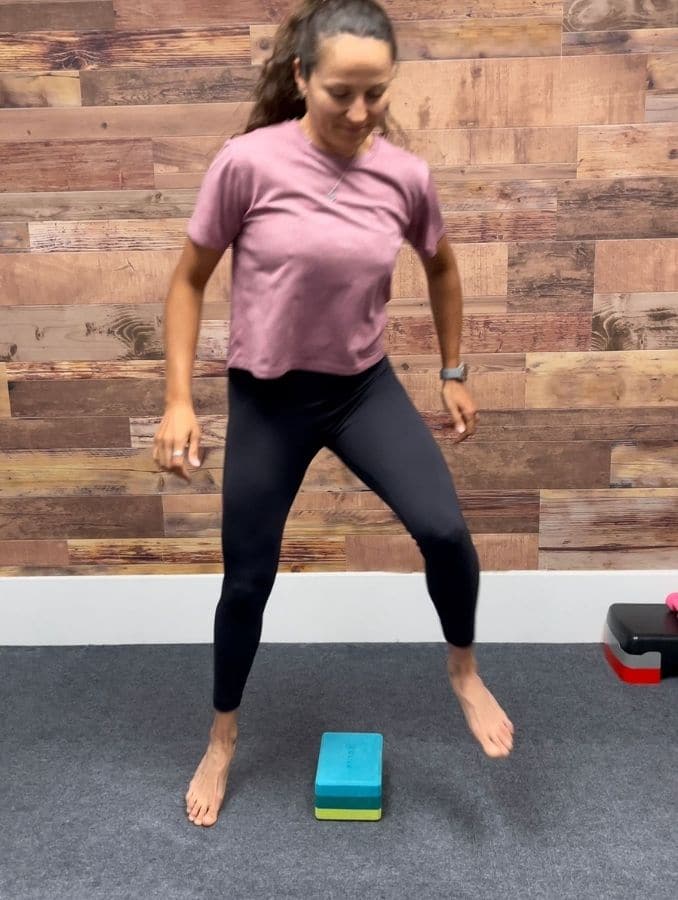 |
Perform 1 set of 10 repetitions in each direction.
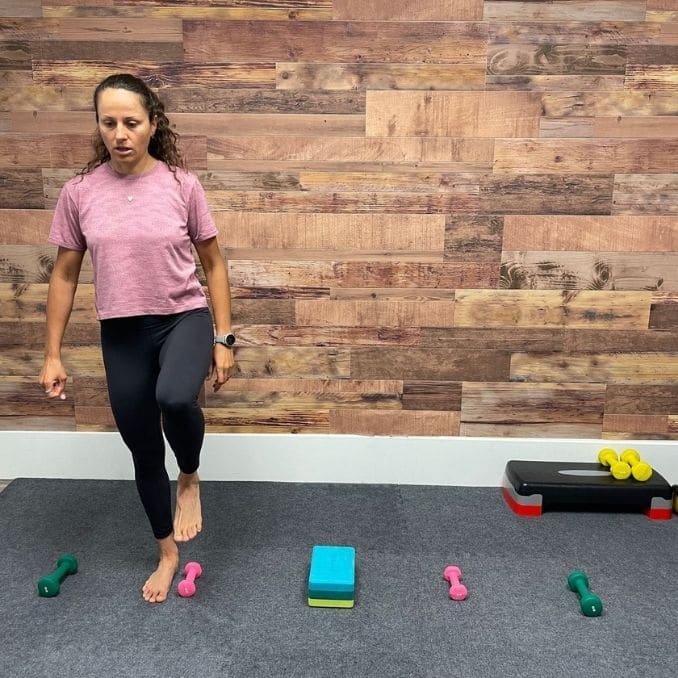
10. Forward Gait Training
One way to improve your gait is to accentuate the motions that occur in your legs while walking. One way to do that repetitively is to perform stepping exercises over obstacles or small hurdles. This forces you to flex your hips and bend your knees.
Set up five or six small obstacles in a row, about 15 inches apart. Obstacles can be rolled up towels, athletic hurdles, small stacks of books, or whatever you have on hand. Begin in an upright standing position, facing the obstacles. Walk forward, raising your knees high as you step over the obstacles, leading with the same foot. Complete the course in the opposite direction, leading with the opposite foot. As this exercise becomes easier, space the obstacles differently to make the course more challenging.
.jpg)
Perform 1 set of 10 repetitions in each direction.
11. Lateral Gait Training
Set up five or six small obstacles in a row, about 15 inches apart. Obstacles can be rolled up towels, athletic hurdles, small stacks of books, or whatever you have on hand. Begin in an upright standing position beside the obstacles. Step to the side, raising your knees high as you step over the obstacles, leading with the same foot. Complete the course in the opposite direction, leading with the opposite foot. As this exercise becomes easier, space the obstacles differently to make the course more challenging.
 |
 |
Perform 1 set of 10 repetitions in each direction.
It is important to follow any post-surgery care instructions provided by your surgeon, as recovery times may vary. Do not move onto any weight-bearing exercises until it is safe to do so, but make your recovery exercises a priority. Not only will these exercises speed up your recovery, but they will also help alleviate any imbalances that contribute to back and knee pain.
Learn the best and safest way to strengthen your ankles and eliminate ankle pain. Click here for more information.