

Part 2 of this series focuses on the details of how stroke is managed, especially in the acute stages of recovery. As mentioned in part 1, early intervention is important to prevent more debilitating outcomes or complications, therefore, having knowledge on how healthcare providers initially treat stroke can be helpful. So, here’s the post-stroke rehabilitation: your ultimate guide to recovery-Part 2.
On the other hand, Part 1 of the stroke rehabilitation series provided an overview of stroke, its causes, the signs and symptoms to look for, how to diagnose it, and most importantly, the different stages of recovery. The article was designed to help you better understand this condition, which is vital for designing a treatment plan.
How Is Stroke Treated?
Stroke treatment involves medicines, exercise rehabilitation, and if needed, surgery. The treatment plan will depend on the type of stroke and the stage of recovery. The different stages are:
Acute Treatment
The goal at this stage is to try to stop a stroke while it is happening. Treatment under the acute stage usually uses medicines, medical equipment, or surgery, addressing the stroke based on its cause.
In addition the ultimate guide to recovery, your doctor may use the following approaches:
- Oxygenation through masks
- Patients in a coma may use intubation, assisted ventilation, and suctioning
- Use of medication to carefully balance unstable blood pressure
- If the cause of the stroke is a heart condition, doctors will focus on controlling heart function
- Maintain electrolyte balance and blood glucose
- Controlling infection and seizure
- Controlling skull pressure and swelling
- Maintain bowel and bladder function; may use a catheter
- Decreasing risk of complications such as clot formation on veins blocked airways due to aspiration, pressure ulcers, among others.
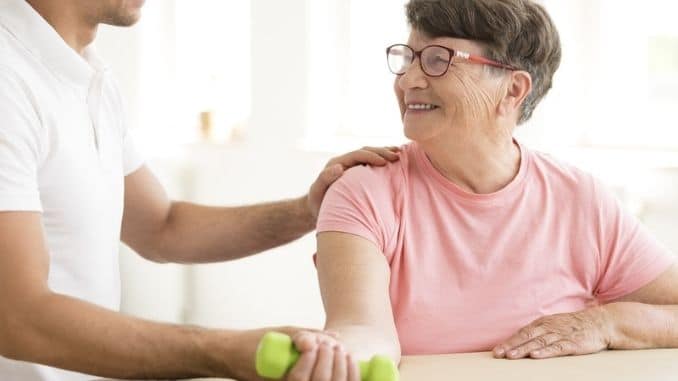
Meanwhile, exercise rehabilitation can be initiated even in this stage to prevent complications. Proper positioning, changing the bed position every 2 hours, and early passive movement of the limbs and hands while monitoring status is done by physical and occupational therapists. They can also educate the family members and caregivers on these positioning techniques to be done once the patient is discharged from the hospital.

Post-Stroke, Out-Patient Rehabilitation
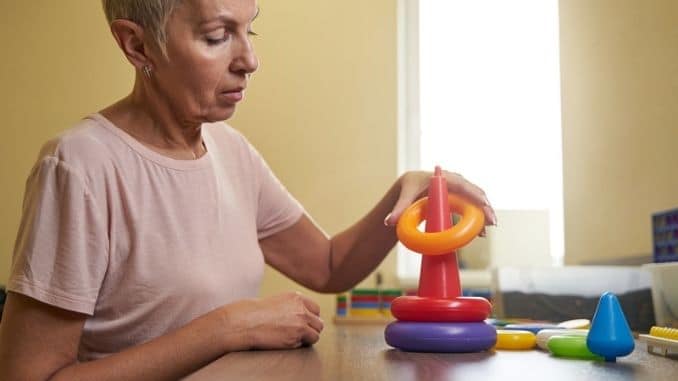
Once a stroke is medically stabilized at the hospital, it is time to work on the impairments it caused. Rehabilitation plays an important role in reducing disabilities caused by stroke and promoting function. Also,this ultimate guide to recovery includes a carefully progressed exercise plan to address the impairments that arose after the stroke.
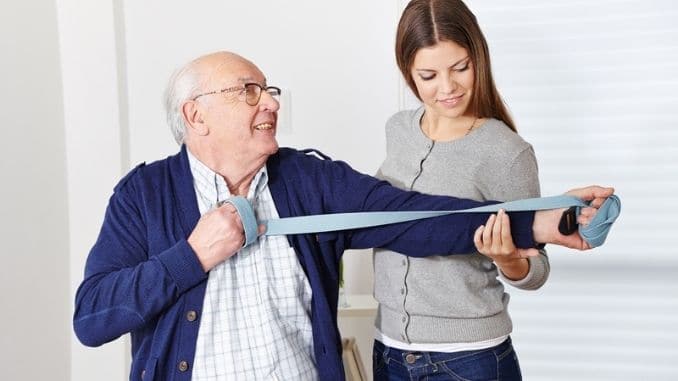
Your physical therapist and occupational therapist can follow the stages of stroke recovery (as discussed in Part 1), utilizing exercise approaches depending on the stroke manifestations per stage. The goal is to stimulate recovery of neuron connections that were damaged by stroke by repetitive practice of movements while addressing other complications like weakness, stiff muscles and joints, limited range of motion, and balance issues, among others.
Therapists will continue to educate the family members and caregivers about exercises that can be done from home. Furthermore, compliance with the home exercise program prescribed is vital to allow the best outcomes upon the latter stage of recovery.
Prevention
Prevention from recurrence is also included in the ultimate guide to recovery treatment plan for stroke survivors because having a stroke increases the risk of having another one. Those recovering from stroke need to pay special attention to lowering any modifiable risk factors.
Acute Stroke Recovery
As mentioned above, management for stroke can be continued even after your session with your physical and occupational therapist. Here are the general home instructions commonly used included in the ultimate guide to recovery:
a. Proper Positioning
Proper positioning helps prevent complications such as deformities, pressure ulcers, nerve impingement, shoulder subluxation, and pain. Braces can help to maintain proper position in daily activities, and objects at home, such as pillows, can be used.
b. Sitting
- Back supported on the chair’s backrest.
- Place the weak arm on a table. For added support, you can add a pillow to the table where you’ll place the weak arm.
- Feet flat on the floor
- Ensure equal weight is distributed on the buttocks
c. Lying on Your Back in Bed
- Support the weak arm by placing a pillow on your side at shoulder level.
d. Laying down on the Affected Side
- Rest the weak arm on the bed surface, palm facing up
- Place the shoulder blade of the weak side slightly forward
- Place a pillow at the back for support
- The weak leg is bent forward
- Place additional pillow as support to the strong leg
e. Lying on the Unaffected Side
- Place a pillow at the back for support
- Ease the affected shoulder and arm forward and support it with a pillow
- Place affected leg backward and place a pillow beneath it

Transition Activities
A. From Lying Down to Sitting on Side of the Bed
Clasp your hands when following this ultimate guide to recovery, then roll onto your weak side. Keep your weak arm and leg well forward. If you find this difficult, have your loved ones or caregiver assist you in rolling. Afterwards, carefully swing both legs over the side of the bed. You can use your strong arm to place your weak leg over the edge of the bed by lifting it from the ankle. Your loved one or caregiver can assist in moving your leg. Then. push up on the bed surface with your strong arm. If you can help with your weak arm do so.
B. From Sitting on the Side of the Bed to Lying Down
While sitting on the bed, lean toward your weak side. Use the strong arm to prop yourself on the opposite, weak side. Lower yourself down slowly on your weak side, until you lie on your side. Swing your feet up onto the bed so that you are now lying on your side. Your loved one or caregiver can help lift your feet up to the bed.
Alternative Method: You can lean towards the strong side, then lower yourself down. After lying down, swing your feet up on the bed.

Instructions For Family/Caregiver Instructions
When receiving help from a loved one or caregiver, here’s how to the bed transition:
From Lying Down to Sitting on Side of the Bed (For the Caregiver):
This ultimate guide to recovery requires you to stand facing the head of the bed at a 45-degree angle with your feet apart in a staggered stance. Stand next to the waist of the person you are assisting. Turn them onto the strong side, facing towards you. Then, assist them to move close to the edge of the bed.
Place one hand behind their shoulders and support their neck and back.
On the count of three, instruct them to use their elbows to push up on the bed, as you support the shoulders as they sit up. Shift your weight from the front foot to the back foot. At the same time as you’re shifting your weight, gently hold their outer thighs with your other hand and help them slide their feet off the bed to dangle to the floor. Bend your knees and keep your back straight and neutral. On the count of three, gently raise them into a sitting position. Ask the person with the stroke to push against the bed with their strong arm that is closest to the bed, at the same time as you shift your weight from the front foot to the back foot.
From Sitting on the Side of the Bed to Lying Down (for the Caregiver):
Stand beside the bed facing the person with a stroke with your outside leg forward. Assist the person with a stroke to cross their legs, with the affected leg on top. Ensure that you will lie them on the bed on the weak side.
Place your arm across their chest to hold onto their far shoulder. Then, support their thighs on your arm. Tip them slowly sideways towards the head of the bed, while assisting their upper body to lie on the bed. This will also help their legs to start moving upwards. Simultaneously, swing their legs up onto the bed using your arm.
Sit to Stand (Independently)
Move forward to the front half of the bed (or chair) by scooting forward. Clasp your hands together or use your strong arm to push up. Have your feet shoulder-width apart and flat on the floor. Build momentum by bending forward at the hips and swinging your shoulder forward. Upon momentum, push through your legs to stand up, maintaining equal weight on both feet.
Instruction For Family/Caregiver:
Support their weak knee by placing it between your knees. You can place your knees in front of it to block it when standing. Hold their buttocks with both hands. Move the patient’s buttocks forward by scooting them alternately until the patient’s legs have reached the floor. Build momentum by bringing their body forward. Hold their pants, support the knees and instruct them to stand with your assistance.
Bed Turning Activities
This is one form of proper positioning technique that involves altering proper bed positions every 2 hours to prevent pressure sores and deformities. Ultimate guide to recovery advises you to follow the proper positioning described above as you transition to a new position.
Begin Exercising
According to a study by Hosseini, et. al. (2019), the use of exercises not only prevents local complications but also improves function after stroke. Even with a lack of voluntary movement from the patient itself, exercises have known benefits, even at the early stages of recovery.
Passive exercises for maintaining range of motion and flexibility can be done at home to begin your recovery journey. Here are some exercises to do as ultimate guide to recovery:
Passive Range of Motion Exercises
A. Upper Body
1. Shoulder Flexion
While lying on a bed, hold onto the wrist of the affected arm with your other hand. Then, slowly lift the arm up to shoulder height. Then, lower your arm back down to the starting position. Start with 2 sets of 10 repetitions.
2. Shoulder Abduction
Cradle your affected arm by supporting the elbow, forearm, and wrist. Slowly move your arm away from your body to the side. Lift your arm to shoulder height. Start with 2 sets of 10 repetitions.
3. Shoulder Rotation
Clasp your fingers together or hold your affected wrist. With your elbows bent at 90 degrees, keep your affected arm at your side. Slowly guide your affected arm across your stomach. Then, slowly guide your forearm away from your body, keeping your elbow at your side. This is counted as 1 repetition. Start with 2 sets of 10 repetitions.
4. Elbow Range of Motion
Clasp your fingers together or hold the wrist of your weak side using your strong hand. Start with your arms straight. Slowly bend your elbows, then straighten your elbows to return to the starting position. This is counted as 1 repetition. Start with 2 sets of 10 repetitions.
5. Forearm Rotation
Perform this exercise on top of a table. Clasp your hands together. Rotate your hands so the palm of your affected hand is facing downwards, then rotate your hands again so it will face upwards. This is counted as 1 repetition. Start with 2 sets of 10 repetitions.
6. Wrist Range of Motion (Forward and Backward)
Clasp your fingers together. Slowly bend your wrists to the left, then to the right. This is counted as 1 repetition. Start with 2 sets of 10 repetitions.
7. Wrist Range of Motion (Side-to-Side)
Clasp your fingers together. Place your hands on a stable surface. Slowly bend your wrists toward you, then away from you. This is counted as 1 repetition. Start with 2 sets of 10 repetitions.
8. Finger Bend and Extend
Place your affected hand on the table surface. Using your strong hand, bend and straighten each finger. When straightening the fingers, only straighten to a neutral position, as if your hand was resting flat on a table. Start with 10 repetitions on each finger.
9. Thumb Abduction Range of Motion
Place your affected hand on a stable surface. Place the thumb and index finger of your strong hand between the thumb and index finger of your weak hand. Move the thumb and index finger apart, then move them closer together. This is counted as 1 repetition. Start with 2 sets of 10 repetitions.
10. Thumb Opposition
Place your affected hand on a stable surface. Move your affected thumb so it touches the tip of your other fingers (from the index finger to the little finger). Completion of this step is counted as 1 repetition. Start with 2 sets of 10 repetitions.
B. Lower Body
1. Sitting Hip Flexion
Sit on a sturdy chair with your knees bent and your feet flat on the floor. Lift your weak knee up towards your chest. Lower your foot back down to the floor. You can assist the weak leg using your strong hand if needed. Repeat the movement with the opposite leg, alternating back and forth for a total of 2 sets of 10 repetitions.
2. Hip Rotation in Sitting
Sit on a sturdy chair. Place a towel under your affected foot if you want to make the exercise easier. Use your hands to assist your weak leg and slide your foot towards your body’s midline. Then, slide your leg outwards. Start with 2 sets of 10 repetitions on each side.
3. Hip Abduction
Sit up straight on the front of a stable chair. Place a towel under your affected foot if you want to make the exercise easier. Hold onto the arm support or the seat of the chair for extra support. Gently tighten your abs and straighten one leg in front of you, keeping your heel on the floor. With your toes pointed to the ceiling, slowly move your leg out to the side. Return to the starting position and repeat the movement. Start with 2 sets of 10 repetitions.
Alternative Exercise for Hip Abduction: You can decrease the intensity of this exercise by lying down on your bed and going through the movement. You may want to use a plastic bag under your heel to help it slide easier.
4. Seated Knee Extension
Start by sitting on a sturdy chair. Lift your foot by straightening your leg until it’s parallel to the floor. Avoid locking your knee. Slowly lower your foot down to the floor. Repeat the movement, alternating back and forth between legs for 2 sets of 10 repetitions.
Alternative Exercise for Seated Knee Extension: Place a rolled towel or a foam roller under your foot, then roll it forward and back on the floor.
5. Seated Ankle Range of Motion (Dorsiflexion and Plantarflexion)
Start by sitting on a sturdy chair with the affected ankle crossed over your strong knee. Use your strong hand to move your foot towards your shin (dorsiflexion), then back to a pointed position (plantarflexion). This is counted as 1 repetition. Start with 2 sets of 10 repetitions on each side.
6. Seated Ankle Range of Motion (Side to Side)
Sit on a sturdy chair with your affected ankle crossed over your strong knee. Use your strong hand to move the front of your foot from side to side along the ankle while keeping your heel perpendicular to the floor. Focus on initiating all the movement from your ankle. This is counted as 1 repetition. Start with 2 sets of 10 repetitions on each side.
7. Toe Raises
Start in a seated position. Place your weak foot on top of your strong foot. Use your strong foot to lift your affected foot upward, then lower your weak foot down slowly. Perform this exercise in a slowed, controlled movement. This is counted as 1 repetition. Start with 2 sets of 10 repetitions.

These are guided passive movements that you can do to facilitate recovery early on in stroke recovery. If you find these exercises challenging, seek help from your loved ones, companions, or caregivers. Early movement is important to facilitate neuroplasticity, rewiring the damaged neural connections.
As the course of recovery continues, more challenging exercises will be introduced, addressing other impairments, and transitioning into a task-specific movement for the continuous rewiring of neural connections. The continuation of stroke recovery rehabilitation will be discussed in the last part of this article series.
Poor circulation can affect your risk of Stroke. Keep your blood flowing with our safe, natural solution. Click here to learn more.