

In this last part of the stroke article series, management towards continuous recovery will be explored specifically the post-stroke rehabilitation. Click here if you would like to reference Part 1 of the stroke rehabilitation series, or Part 2 of the series.
Continuous Interventions for Recovery
The role of exercises and rehabilitation strategies is to regain control of movement, work on impairments, and promote independence for survivors of stroke. Improving the function of the limbs and regaining control with movement is with an emphasis on the more involved side is achieved not only through exercises alone, but by adding specific re-education and motor learning strategies to train the body once again to move. To make the exercises for meaningful, functional, task-specific activities are incorporated into the exercise plan.
Additionally, progressive exercises are also included in the recovery plan to further address weakness, decreased flexibility, decreased mobility, decreased endurance, and other bodily functions.
Even if functional, task-specific exercises are the mainstay of rehabilitation, management for other impairments is also incorporated in the treatment plan, especially with stroke syndromes demonstrating other manifestations hindering recovery.
Below we have shared some examples of tasks and exercises that are recommended to help in latter stage recovery from stroke.
Exercises for Joint Mobility and Flexibility of Post-stroke Rehabilitation
A. Upper Body
1. Arm Cradling
Your stronger arm cradles and lifts the weak arm to 90-degree shoulder flexion. Then, assist the weak arm into moving up, then side to side. Active trunk rotation is combined with arm movement. Start post-this post-stroke rehabilitation exercise with 1 set of 10 repetitions in each direction (shoulder flexion and side-to-side).
2. Table-Top Polishing
Place your arms on the top of the table, with your shoulders protracted and elbows extended. Place a towel under your both hands. Your less affected hand moves the affected hand by pushing the towel forward, side-to-side, and in circles. Trunk movements and range of motion are optimized by placing the chair slightly back from the table. Start with 5 repetitions of each movement pattern (forward, side-to-side, circles).
3. Crawling Stretch
Start in a crawling position on your hands and knees. Gently shift your hips back until you feel a stretch in your inner arms and hold this position for 15-30 seconds. Start with 1 set of 5 repetitions.
4. Wrist Stretching
While keeping your affected elbow, use your strong hand to flex your affected wrist back and forth until you feel a stretch. Hold each stretch for 15-30 seconds. Start with 1 set of 5 repetitions in each direction.

B. Lower Leg
1. Seated Hip Flexor Stretch
Sit on a sturdy chair with a backrest. Hold onto the back of the chair and carefully turn your body so that only one half of your seat is on the chair. While sitting tall, extend one leg back as far as you can comfortably. You want to feel a stretch in the front of your back leg. Hold this position for 15-30 seconds. Carefully return to the starting position and repeat the exercise on the opposite side. Start this with 1 set of 5 repetitions on each side to improve your post-stroke rehabilitation.
If you find this exercise too challenging, ask a caregiver to assist you.
Alternative Exercise: Supine Hip Flexor Stretch
Using a high bench or bed, lay on your back with your affected hip’s side along the edge. Let your target leg drop off the edge of the bed with your knee bent. Meanwhile, pull your knee towards your chest. You should feel this stretch along the front of your hip and through the quadriceps. Hold this stretch for 15-30 seconds. Start with 1 set of 5 repetitions on each side.
2. Seated Hamstring Stretch
Sit on the bed with one leg extended. Sit up tall and pivot at the hips as you reach towards your foot (don’t bend your back) and hold this position for 15-30 seconds. Start with 1 set of 5 repetitions on each side.
Alternative Exercise: Seated Hamstring Stretch on a Chair
You can also do this exercise while seated on a sturdy chair. Be sure to bend through the hips and not the low back.
3. Calf Stretch
While seated on a sturdy chair, place the ball of your foot on a step or a raised surface and let your heel drop to the floor. Keep your knee bent and lean slightly on your knee to provide some pressure on the leg to stretch the calf. Hold this stretch for 15-30 seconds. Start with 1 set of 5 repetitions on each side.
4. Seated Piriformis Stretch
While sitting in a chair, cross your affected ankle over your opposite knee. Gently lean forward until a stretch is felt along the crossed leg. Throughout the stretch, try to keep your back as flat as possible and lean forward from the hips. Hold this stretch for 15-30 seconds, then relax. Start with 1 set of 5 repetitions on each side.
Exercises for Strength of a Post-stroke Rehabilitation
A. Upper Body
1. Shoulder Flexion
Clasp your hands together. If you can, hold a weight between your clasped hands (food cans and water bottles can be used as well). Keeping your arms straight. Raise your arms overhead, then lower your arms back down to the starting position. Start with 1 set of 10 repetitions on each side.
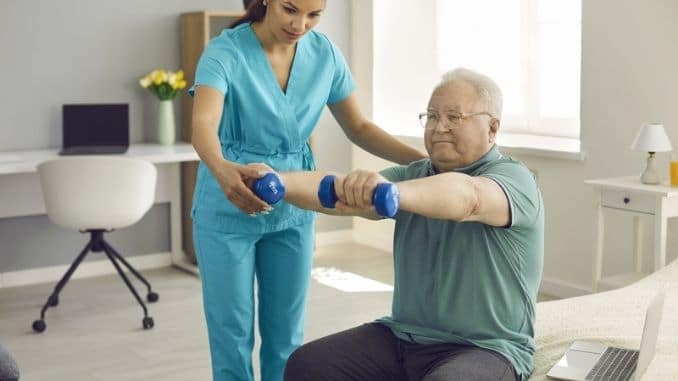
2. Lateral Arm Raise
While seated, hold the weight in your affected hand. Keeping your arm straight, lift your arm out to the side to shoulder-height, then lower your arm to the starting position. Start with 1 set of 10 repetitions on each side.
Alternative Exercise: Wand Exercise in Shoulder Abduction
Use a cane, an umbrella, a ski pole, or a broom for this exercise. Hold each end of the stick, then push your affected arm upwards until you reach shoulder level. Lower your arm to the starting position and repeat the movement. Start with 1 set of 10 repetitions on each side.
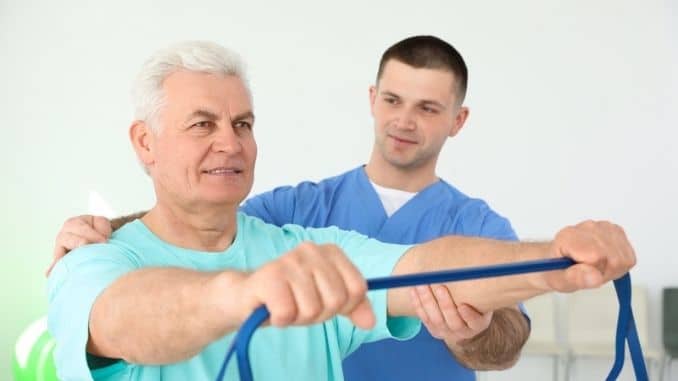
3. Shoulder External Rotation Exercise
Use resistant tubing or light dumbbells for this exercise. Start with your elbows bent at 90-degree angles with your upper arms aligned with your upper body. Rotate your arms out to sides, keeping your elbows bent during the movement. Rotate your arms inward to return to the starting position and repeat the movement. Start with 1 set of 10 repetitions.
If you find using resistance too challenging, go through the movement without the tubing.
4. Bicep Curls
Hold a weight in your affected hand to have your post-stroke rehabilitation. While keeping your upper arm aligned with your upper body, slowly bend your elbow to bring your hand to shoulder height. Lower your arm to the starting position and repeat the movement. Start with 1 set of 10 repetitions on each side.
5. Tricep Kickbacks
Hold a weight in one hand. Lean forward slightly, keep your upper arm aligned with your upper body, and bend your arm to a 90-degree angle. Straighten your arm and lift the weight behind you, then bend your elbow to return to the starting position. Start with 1 set of 10 repetitions on each side.
6. Wrist Curls
Sit in a sturdy chair. Place the forearm of your affected side on the table with your palm facing upward. Hold a weight or water bottle in your affected hand. Support your affected hand by gripping your wrist with your opposite hand. Bend your wrist to raise the weight up slowly, then your wrist back down. Start with 1 set of 10 repetitions on each side.
B. Lower Body
1. Glute Bridging
Lie on your back with your knees bent and your feet flat on the floor. Rest your arms at your sides. Your feet should be directly under your hips. Tighten your core and squeeze your glutes as you lift your hips off the floor. Make sure to use your glute muscles, keeping your low back relaxed and hamstrings minimally involved. Hold the top position for 2 seconds to make your post-stroke rehabilitation faster, then lower your hips to the starting position. Start with 1 set of 10 repetitions.
2. Seated Hip Abduction
Sit up straight on the front of a stable chair. Hold onto the arm supports or the seat of the chair for extra support. Engage your core and extend one leg in front of you, keeping your heel on the floor. With your toes pointed to the ceiling, slowly move your leg out to the side. Return to the starting position and repeat the movement. Start with 1 set of 10 repetitions on each side.
Alternative Exercise: Supine Hip Abduction
You can decrease the intensity of this exercise by going through the motions in a supine position. You may want to place a plastic bag under your heel to help it slide easier.
Progression to Seated Hip Abduction: Seated Clamshell
To make this exercise more challenging, add a resistance band. Sit on the chair, with the resistance band wrapped around your thighs. Keeping your feet close together, slowly open your knees out at your sides to separate your legs. Slowly bring your knees together to return to starting position. Start with 1 set of 10 repetitions.
3. Ball/Pillow Squeeze
Sit on a sturdy chair. Position a small ball or a pillow between your knees. Squeeze the ball with your knees and hold this position for 6 seconds. Relax and repeat the movement. Start with 1 set of 10 repetitions.
4. Hip Extensions
Holding onto a stable surface with both hands, such as the back of a chair or a countertop. Shift all your weight onto your non-affected leg. Extend your affected leg back, keeping your leg straight. Lower your leg back down to the starting position. Repeat the movement. Start with 1 set of 10 repetitions on each side.
5. Seated Hamstring Curls
Sit on the front of a chair with your affected leg lined up with the leg of the chair. Position yourself so that your knee is at a 70-90-degree flexion. Place a ball, piece of foam, or a small pillow behind your heel and press your heel into it. Hold this position for 6 seconds, then relax. Start with 1 set of 10 repetitions on each side.
Progression: Standing Hamstring Curl
Hold onto a stable surface like the back of a chair or countertop. Bend your knee to bring the heel of your affected leg towards your seat. Slowly lower your foot back down to the floor and repeat the movement. Start with 1 set of 10 repetitions on each side.
6. Terminal Knee Extension
Start in a seated position on a stable surface. Lift your leg by extending it until it’s parallel to the floor. Avoid locking your knee. Then, slowly lower your foot back down to the floor. Repeat the movement. Start this post-stroke rehabilitation step with 1 set of 10 repetitions on each side.
7. Toe Raises
Stand with your feet about hip-width apart with your hands on a chair or countertop to maintain your balance. If you can’t stand, you can do this exercise while sitting on a stable chair. Slowly lift your toes as you lean back on your heels. Lower your toes to the starting position and repeat the movement. Start with 1 set of 10 repetitions.
8. Heel Raises
Start by sitting in a sturdy chair with an upright posture. Raise to your toes on both feet, lifting your heels off the floor as high as possible. Lower your heels back to the floor and repeat the movement. Start with 1 set of 10 repetitions.
9. Supported Mini Squats
In doing this post-stroke rehabilitation, post-stroke rehabilitation, place both hands on a stable surface like a countertop, table, or sturdy chair. Start in an upright standing position with your feet shoulder-width apart. Bend your knees and hinge from your hips to lower your seat downward. Ensure that your knees do not go over toes. Return to an upright standing position, tightening your thigh muscles and glutes at the top position. Concentrate on pushing through your heels and keeping your back upright with good posture.
Core Exercises for Post-stroke Rehabilitation
1. Drawing in Maneuver
Lie on your back with your knees bent at 90 degrees and your feet flat on the floor. Slowly pull the belly button in towards your back, keeping your back flat on the floor. Hold this position for 3 to 5 seconds. Relax the muscles for 3 to 5 seconds and repeat the movement. Start with 1 set of 10 repetitions.
2. Leg Rotations
Lie on your back with your knees bent at 90 degrees and your feet flat on the floor. Draw your tummy in and flatten your back into the floor. Lower your knees to one side, twisting your trunk to help your legs lower. Return to the starting position and repeat the movement on the opposite side. Start with 1 set of 10 repetitions on each side.
3. Crunches
Start by lying on your back with your knees bent and your feet flat on the floor. Clasp your hands together in front of you. Engage your core and reach forward with your arms to raise your chin towards your chest. Try to hold this position for 5 seconds. Lower your upper body to the starting position and repeat the movement. Start with 1 set of 10 repetitions.
4. Seated Reach with Clasped Hands
Begin a seated position on a sturdy chair. Clasp your hands together and extend your arms in front of your body at shoulder height. Reach forward with both arms, then return to the starting position. Start with 1 set of 10 repetitions.
You can also reach to the left and right before returning to the original position.
5. Trunk Side Bending
Sit upright on a sturdy chair. Bend your trunk to one side, moving your shoulder down towards your hip. Return to an upright position, focusing on using your core to pull yourself up. Repeat the movement. Start with 1 set of 10 repetitions on each side.
6. Trunk Rotations
Sit upright on a sturdy chair. Hold onto your weak arm with your unaffected hand. Slowly rotate your upper body to one side. Return to the starting position and repeat the movement on the opposite side. Start with 1 set of 10 repetitions on each side.
Exercises for Balance and Motor Control
1. Weight Shifting Side to Side in Sitting
Sit at the side of your bed or on a chair. Using your hands to stabilize you, gently lean to one side and hold this position for 10 seconds. Return to the center position and repeat the movement on the opposite side. Star with 1 set of 10 repetitions on each side.
2. Weight Shifting Forward and Backward
Sit on the edge of your bed or on a chair. Shift your weight forward and back by arching and rounding your low back. This is counted as 1 repetition. Start with 1 set of 10 repetitions.
3 Side to Side Reaching in Sitting
Sit on the edge of your bed or on a chair. Place your hands at your sides for support. Reach across your body at shoulder height with one arm. Return to the starting position and repeat the movement on the opposite side. If your weak arm buckles or the hand slides, have helper support your weak arm at the wrist and just above the elbow. Start with 1 set of 10 repetitions on each side.
4. Weight Shifting in Standing
Place both hands on the surface of a counter or table as postural support. Place most of your weight on your hands with your arms extended. Shift your weight to your weak arm and hold this position for 6-10 seconds. Relax and repeat the movement. Start with 1 set of 10 repetitions.
5. Supported Single-Leg Standing
Place both hands on the back of a chair or countertop for balance. Slowly lift your strong leg until you are balanced on your weak leg and hold this position for 6 seconds. Slowly lower your leg back down to the starting position and repeat the movement on the opposite side. Start with 1 set of 5 repetitions on each side.
If you find your weak leg buckles, have a caregiver assist you by stabilizing the knee of your weak leg as you do the exercise.
Functional Exercises of Post-stroke Rehabilitation
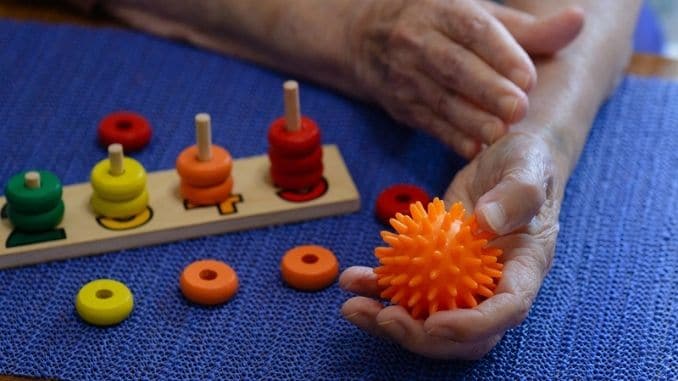
1. Ball Squeeze/Towel Grip Exercise
Hold a small ball or a rolled towel in your palm. Squeeze it as hard as you can without causing your hand pain and hold this position for 3-5 seconds. Release the pressure and repeat the movement. Work up to 10 – 12 repetitions on each hand.
2. Seated Woodchops
Start in a seated position on a sturdy chair with your hands clasped together. Raise your arms over one shoulder, then diagonally lower your arms to your opposite foot. Repeat the movement. Start with 5-10 repetitions on each side.
3. Sit to Stand
Begin in a seated position on a firm, stable surface, such as a chair or your bed. Keep your feet hip-width distance apart. Focus on maintaining equal weight across your affected and unaffected leg. Clasp your hands together and raise to a standing position. Keep your head looking forward and your chest out. Slowly lower your seat down to the chair and repeat the movement. Start with 1 set of 15 – 20 repetitions.
4. Stepping Exercise: Forward and Backward
Stand with one hand on the back of a chair or table for support. Stand with your feet about hip distance apart with your toes pointing forward. Shift your weight onto your affected leg, then step forward with your strong leg. Step back to the starting position. This time, shift your weight again to your affected leg and step back with your unaffected leg. Step back to the starting position and repeat the sequence of movements. Start with 10 repetitions on each side.
5. Side Stepping
Stand facing a table or countertop. Place your hands on the countertop for balance. Step to one side. Repeat the movement. Start with 1 set of 10 repetitions on each side.
6. Step Taps Exercise
Stand in front of a step or elevated surface with one hand against the wall or on a railing for balance. Stand with your feet about hip-distance apart and your toes pointing forward. Shift your weight onto your strong leg, step up with your weak foot and tap your toes on the step. Lower your weak foot slowly off the step and onto the floor and repeat the movement. Start with 1 set of 10 repetitions.
7. Walking
Walking exercises are important to relearn this associated movement pattern. Depending on your assessment, walking exercises can start by training in the movement pattern, or simply walking itself. Remember to walk with your back straight. When stepping forward with your weak leg, move the pelvis forward on that side. Try not to let your weak knee snap back. Furthermore, make sure you are supporting as much weight as possible through your weak side.
You may need an assistive device, brace, or helper. If using a cane, hold it in your strong hand. Move the cane, step with your weak leg, and then with your strong leg. Try to make your steps the same length to improve endurance and lessen fatigue.
Additional Management of Post-stroke Rehabilitation
Motor Learning
Re-learning patterns of function are achieved by adding treatment strategies such as feedback and practice. Firstly, feedback is done through verbal and tactile cues and guidance. Meanwhile, the practice involves repetitive execution of the movement or task to facilitate neuroplasticity. This practice can be done in a constant repetition of a single task initially, then will distribute the task, then lastly will vary the movement for the challenge.
Sensory Stimulation
For strokes affecting sensory function, sensory stimulation is also included in the exercise plan. Examples of sensory stimulation include repetitive sensory activities introducing varying surfaces, mirror therapy, thermal stimulation, compression techniques such as weight-bearing exercises, and intermittent pneumatic compression.
Muscle Tone Management
Changes in muscle tone, such as increased muscle stiffness (spasticity) and decreased muscle tone (flaccidity), can affect the execution of exercises. Thus, additional management for muscle tone is also included in the exercise plan.
Sensory stimulation such as icing, warm compresses, or exercises such as prolonged or quick stretches can help facilitate flaccid muscles or decrease spasticity. Other modalities such as electrical stimulation are used to facilitate muscle contractions or fatigue the muscles to decrease spasticity.
Techniques to Address Visual-Spatial Deficits
Some stroke survivors can demonstrate a lack of awareness of the body on the weak side of the space and environment on the affected side. Some people even develop total unawareness of their disability after a stroke. This can be a challenge to their safety, especially when doing their daily activities. Therefore, these people can benefit from training strategies that encourage awareness and use of the environment on the affected side and the use of the weak extremities.
Cueing in any form (visual, verbal, or movement form) can help direct their attention towards the neglected side. Some examples are a red anchor line that can be taped on the floor so they can visually follow the line from one side to the other, or a red ribbon can be attached to the person’s affected wrist, and they can be directed to keep the red ribbon insight. Another example is a red line drawn in the center of the mirror so stroke survivors can have visual input to realign their body in the midline.
Orthosis and Assistive Devices
An orthosis and assistive devices may be required when problems affect safety. The lack of movement can hinder activities, and on some occasions, increase the risk for falls and incidents. The prescription of orthoses and assistive devices depends on the unique problems each patient presents and how severe their impairments are. The duration of use of orthosis or assistive devices are also considered. Consultation with the doctor, a physical therapist, and a certified orthotist is initiated, especially if a permanent orthosis is needed.
Special Precautions
As exercise management is initiated, there are considerations in mind to promote safety. Here are some guidelines to consider:
- Many patients with stroke demonstrate poor hand function, with no effective grasp. Ensure maintained contact with exercise equipment through specialized gloves such as leather mitts with Velcro or wrist cuffs).
- Stroke survivors with impaired sensation are at increased risk for injury and should be monitored closely.
- People with balance and postural deficits should be safely positioned to prevent falls. A stable seat, corner standing while lifting free weights are sample alternatives for ensuring safety.
- Monitoring vital signs (blood pressure, heart rate, breathing rate) is important as there is a high incidence of hypertension and cardiac disease in patients with stroke.
- High-intensity strengthening exercises are generally contraindicated in patients with recent stroke and unstable blood pressure. Isometric exercise that is accompanied by holding breaths, such as the Valsalva maneuver and dangerous elevations in the blood pressure is also contraindicated.
- Dynamic exercises performed in an upright position such as sitting produce fewer elevations in blood pressure than lying down exercises. For patients at risk of intense blood pressure changes, low-intensity exercises are appropriate for initial exercise. Varying the exercises is also an effective strategy to reduce cardiovascular risk.
- Ensure that warm-ups and cooldowns are adequate, and the overall exercise progression is gradual.
Outcomes and Prognosis for Stroke Rehab
After receiving medical treatment for stroke, the golden period for post-stroke rehabilitation is within 3-6 months. This post-stroke rehabilitation period is very crucial because most of the neurological recovery happens during this time. Recovery from stroke is overall fastest in the first weeks and months after its onset. Patients can still make measurable gains for months or years after it occurred, although it is at a reduced rate. Despite the fact that recovery happens early in the time period, late recovery of function is still evident for people with chronic stroke (greater than 1-year post-stroke) who undergo extensive task-specific functional training heavily focused on the affected side.
To explore further the post-stroke rehabilitation, here are the factors considered during recovery from stroke:
- Severity of the stroke: People suffering minor strokes can recover rapidly with few or no residual deficits whereas severely impaired individuals demonstrate more limited and prolonged recovery.
- Initial grade of paralysis: Paralysis is measured upon the initial hospital admission. Complete paralysis upon admission has decreased the chance of complete motor recovery later in rehabilitation.
- Impairments present: Motor and perceptual impairments have the greatest impact on functional performance, but other limiting factors include sensory loss, disorientation, communication disorders, and decreased cardiorespiratory endurance.
- Enablement factors: high motivation, stable supportive family, financial resources, and intensive training with repetitive practice.
- How early the person underwent stroke rehabilitation: Patients who receive inpatient stroke rehabilitation, (skilled occupational, physical, and speech therapy), demonstrate improved motor recovery, functional status, and quality of life at discharge.
- Type of Training: Strong evidence is in support of task-oriented exercise and intensive training as an effective training type for recovery.
Patients who demonstrate less successful rehabilitation outcomes tended to include those with:
- Advanced age
- Severe motor impairments (prolonged paralysis, apraxia)
- Persistent medical problems (incontinence)
- Impaired cognitive function (decreased alertness, poor attention span, judgment, memory, learning difficulty)
- Severe language disturbances
- Severe visuospatial hemineglect
- Other less well-defined social and economic problems.
- Depression
Stroke recovery requires a steady, repetitive intervention to be successful. Although embarking on the rehabilitation process can be challenging for anyone, making the first step is the hardest part. When you are recovering from a stroke and unable to participate in the activities you enjoyed before, it can be discouraging and difficult to get up and start moving. However, with the right plan, along with coordination of your healthcare provider and adding activities that are meaningful, significant, and fun, continuous recovery can be possible.
Learn how to lower your risk of heart disease safely and naturally. Click here for more information.