

Today, I’ll go through 5 Awesome Resistive Band Exercises you can do anywhere.
The five exercises I will go through are the routines I do in my hotel room. A couple of weeks ago, I left snowy Kelowna (under two feet of snow) and headed down to sunny Miami. One thing I brought was a resistive loop band.
CLICK HERE to watch the YouTube video.
Resistive bands are really easy to put in your backpack or your carry-on. They don’t take up much room and are very light. I had Donnalee demonstrate. Below are a couple of exercises that you can do with the bands.
1. Overhead Band Reverse Lunge
Step on the tubing with one leg, press it overhead, step back, and move into the reverse lunge. Return up and bring your feet together.
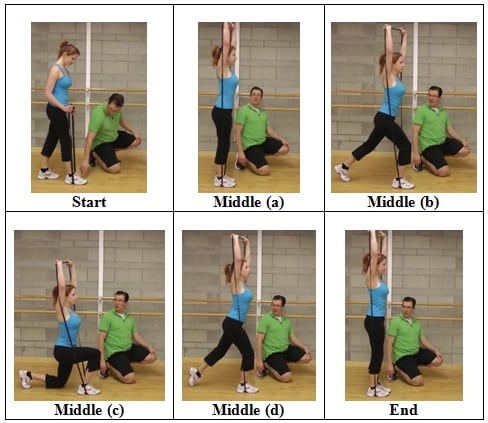
Overhead Band Reverse Lunge
If you can’t bring your arms overhead, bring the tubing to shoulder height.
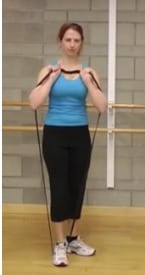
Tubing at Shoulder Height
With your right leg on the tubing, step back with your left leg and then return to the starting position. This is a regression you can do if you cannot do the overhead press.

Shoulder Height Band Reverse Lunge
The overhead press challenges and activates the core, which is important when preventing shoulder, back, hip, and knee pain. The reverse lunge puts less stress on the knee joints. If you have knee pain or an old knee injury, try the reverse lunge, especially with that loop tubing.
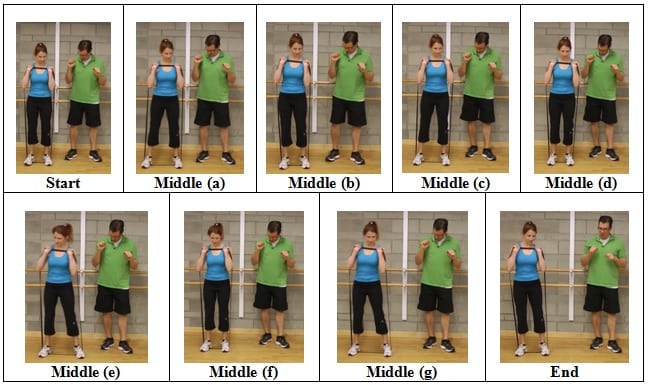
2. Side Shuffle with Straight Arms
Step on the tubing, move your feet to hip-width apart, bring the tubing to the front and shuffle side to side.
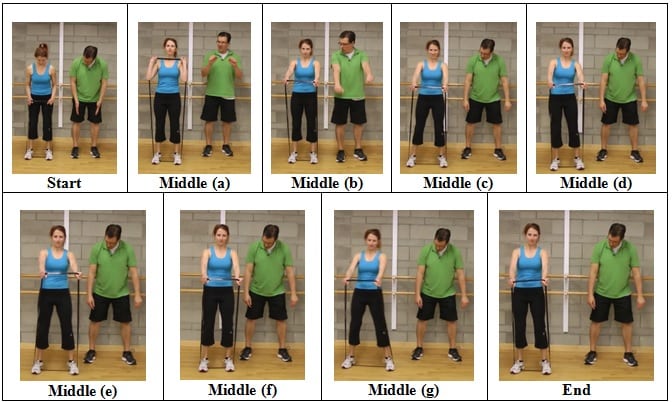
Side Shuffle with Straight Arms (front view)
The side view is below.
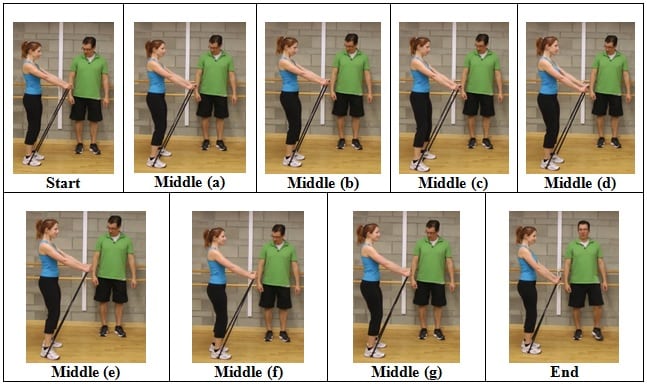
Side Shuffle with Straight Arms (side view)
Don’t have your arms way overhead or straight out in front of your shoulders. Your arms should be slightly below your shoulders to put less stress on the shoulder joint.
If you can’t bring the arms out in front of you, bring the tubing to shoulder height.
Side Shuffle with Arms Shoulder Height
With the side-stepping, move about 30 to 45 degrees while maintaining that resistance on the tubing.
Having your arms out in front works the shoulder stabilizing muscles, which is super important in shoulder health and activates and challenges the core. If you don’t have the strength to do that, you can regress and hold the tubing at shoulder height.
3. Push Up with the Loop Tubing
Loop the tubing behind your back relatively low, and wrap it around your hand.
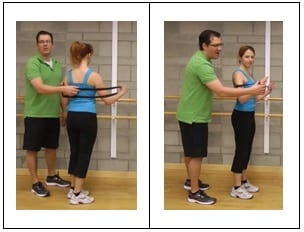
Back and Hand Positioning of the Loop Tubing
Wrapping the tubing over your whole hand is easier, providing a better grip and putting less stress on the fingers and hands.
Go into a push-up position. You can go from the toes or the knees (depending on your ability). Tighten through your abdominal area, maintain good alignment, move into the push-up and return.

Push Up with the Loop Tubing
This exercise gets easier on the way down and then gets more challenging on the way up as the tubing increases in resistance. It challenges the push-up movement, especially at the end of the push-up movement.
4. Squat into a Press
Step on the tubing, and move into the squatting position. Your feet should be slightly wider than hip-width apart, and your toes pointed out minimally. Place the tubing into the shoulder position, go through the squat, raise out of the squat, and press overhead.
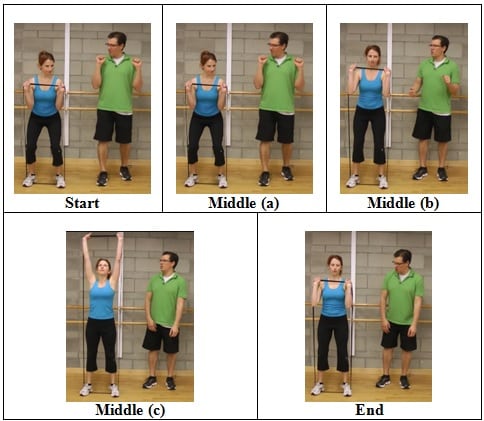
Squat into a Press (front view)
Below is the side view of the squat and press-up.

Squat into a Press (side view)
If you cannot do the press movement, leave the tubing in this front rack position and then go through the squatting movement.
Squat into a Press (front rack position)
Pressing overhead works those stabilizing muscles in the shoulders and challenges the core, which is important.
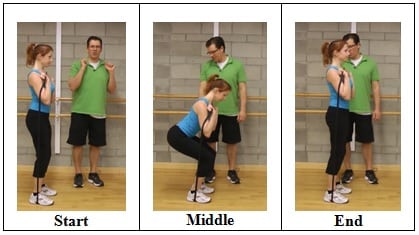
5. Cross Band Bent Over Row
Step on the tubing and then move your feet to slightly more than hip-width apart. Cross over with the tubing, pull back, and drive up with those elbows, working that mid-back.
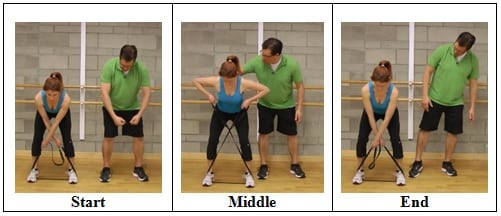
Cross Band Bent Over Row (front view)
Bend through the hip, keeping everything else straight, with your head aligned with your spine. Drive those elbows up and relax.
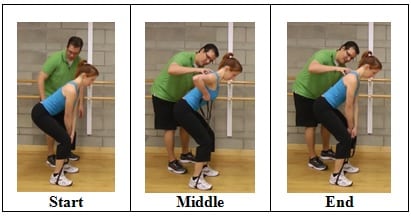
Cross Band Bent Over Row (side view)
With this exercise, bend through the hips to whatever level you can. The deeper you can bend through the hips without losing your low back curve, the better. It will still be beneficial if you only come down a little way. Be cautious of overworking those upper trapezius muscles.
Final Word
Those are the 5 Awesome Resistive Band Exercises that you can do anywhere. Next time you travel, throw a resistive band into your carry-on or your luggage and go through these five exercises. You can go through the exercises once, or you can go through them a couple of times. When it comes to sets and reps, I will start with five repetitions to get the movement down and train my body on how to do it correctly. Then you can progress to 10 repetitions or even to a certain amount of time, twenty seconds or thirty seconds, or several repetitions that you do during that time.
Take care.
Rick Kaselj, MS.
If you are looking for a program to help you overcome your back pain, click here to check out Low Back Pain Solved.