Strengthening the glutes and hamstrings is essential when it comes to a healthy back, which includes the lower back. The glutes in particular can lead to improved posture and more stability. If you’ve been struggling with any of these exercises that target the glutes, try using resistance bands instead of weights or dumbbells. Not only does leg resistance band exercise training allow for increased intensity and speed, but it’s also much safer than lifting heavy weights or doing squats as well.
CLICK HERE to watch the YouTube video.
What is a Resistance Band?
Resistance bands are one of the most effective ways to gain strength and muscle tone. They make your muscles work harder, so they can help you improve cardiovascular fitness as well. If you’re new at resistance bands, start with a smaller band that’s easy for you to use. It’ll prevent injury and build confidence in doing exercises like curls or leg lifts more easily than without them!
Types of resistance bands:
- Resistance Band with Handles. These tube bands are primarily used for working out and building muscle strength and size. They have a sturdy grip, which allows the user to perform various exercises in the gym such as ones that use free weights or machines.
- Therapy Flat Resistance Band. These bands are used in therapy settings to aid with stretching, as they are wide and flat. They can be adjusted easily, cut into smaller pieces, or used for strength training.
- Loop Bands. These are small bands that strengthen the legs and buttocks. They can be found in most gyms and physical therapy offices, mainly used for strengthening people’s legs.
- Leg and Arm Tube Resistance Band. Closed-loop tube bands are designed for muscle-specific workouts. Using these lightweight, versatile fabric pieces is a great way to stay in shape without risking joint pain and injury.
What are the Benefits of Leg Resistance Band Exercise?
There are many benefits to leg resistance band exercise, such as the following:
- Less chance of injury. Resistance bands are a type of elastic resistance band that is often used in the training and rehabilitation process for people with athletic injuries. This can help you to improve your performance, as well as minimize your risk from injury during games or activities.
- Increase muscle stimuli. A more intense stimulus subjects the muscles, resulting in stronger and denser muscle fibers that contribute towards increased strength, power, and endurance.
- Strengthening the core. Resistance band training is a great method to build core strength while improving your posture and balance.
- Improved strength. Specially designed resistance band training strengthens muscle groups and improves dexterity.
- Flexibility and mobility. A resistance band workout is a great way to get in shape. With this type of training, you’ll start with an aerobic and cardiovascular exercise session followed by muscle-strengthening exercises that use the resistive properties of at least one large or multiple smaller bands.
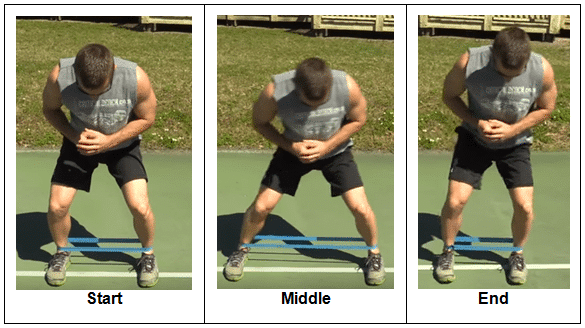
1. Lateral Step

Lateral Step
Use a simple resistance band and wrap it around your ankles. We are traveling laterally in a quarter squat position. With feet parallel, tilt points straight ahead, back flat, and shoulders pulled back, and you are traveling sideways in a straight line. If you have a difficulty walking in a straight line, put out a jump rope or a line of some sort that you can trace with your feet. Keep your feet parallel as you step out. Try not to drive that back foot. Do 10 steps out, relax a couple of seconds, then 10 steps back in.
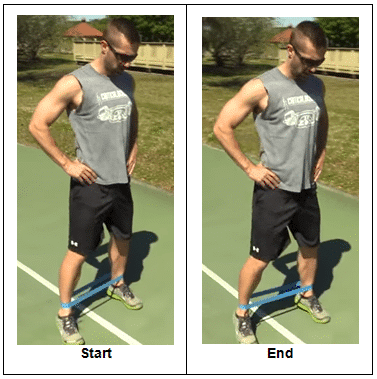
2. Zigzag Step

Zigzag Step
This exercise is also referred to as a 45 degree step. With your feet together, step out in a 45 degree angle, making sure the feet stay parallel the entire time. With your feet at 45 degrees and remaining in a quarter squat position, zigzag your way forward in a straight line. One you hit ten steps, go backwards. As you travel backwards, place more emphasis on keeping your feet parallel, as people have a tendency to twist the legs out or in.
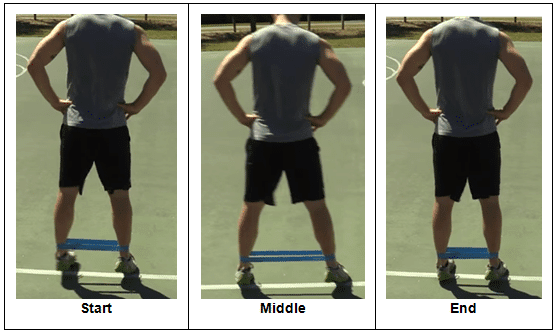
3. Tip-toes Stance

Tip-toes Stance
Once again we are moving laterally, but upright this time. On tip-toes, stand with your legs straight, hands on the hips and your shoulder blades back. Take smaller steps this time, but make sure you follow a straight line. Do ten steps out and ten steps back in.
4. Penguin Steps

Penguin Steps
Face forward with your feet wide and parallel. Have enough tension on the band to ensure we get the most out of this exercise. Do ten steps per side, small steps keeping tension on the band. Once you hit the number of repetitions, go backwards and do the same movement. Always make sure that your feet stay parallel.
Every part of your body deserves to be treated the same and to receive the attention it needs. If your legs, hips, or glutes are sore and tight from sitting, these exercises are perfect for improving flexibility and circulation with minimal impact on your abilities.
For your equipment-free workout to lose weight and tone your body, check out the Bodyweight Blender program, here!

