

Yoga is beneficial in so many ways. It can decrease stress, enhance well-being, increase flexibility, and make you stronger. This series will focus on poses that work your major muscle groups to help strengthen your entire body. You can do each pose on their own, or string them together into a flow. Make sure you breathe deeply in each posture and let your breath guide you. Always listen to your body and never move into a posture if it is causing you pain. I hope you try these out and enjoy them!
1. Warrior I (Virabhadrasana I)
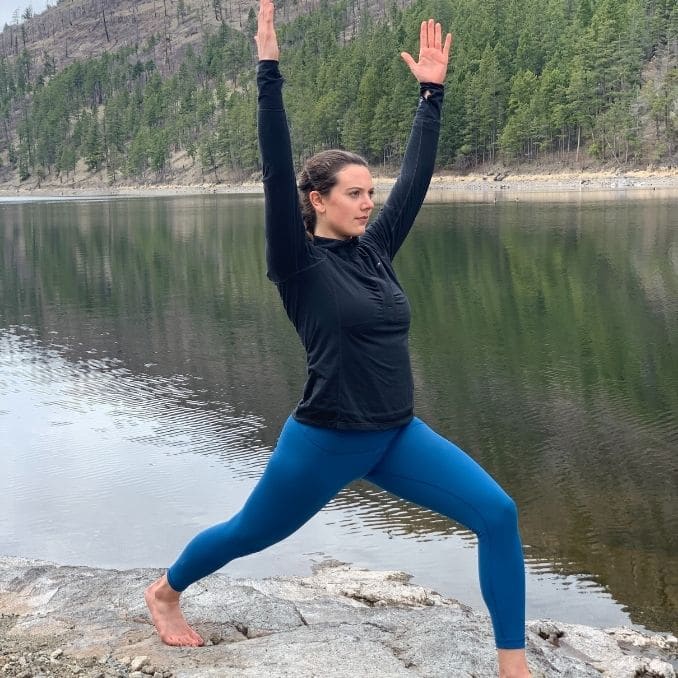
Begin by stepping back with your right foot to move into a deep lunge stance. Keep your left knee stacked on top of your left ankle. Work to get your right heel on top of your right toes, engaging through the back leg to straighten it as best as you can. Pull your right hip forward and your left hip back to square off your hips. Place your hands on your hips or extend them overhead. Relax your shoulders and stretch out of the hips. Hold this position for several deep breaths and repeat the movement on the opposite side.
Hold for 3 deep breaths on each side, working up to 10 breaths.
Modifications: To make this exercise easier, drop your back knee to the floor. You can support your knee by folding over your mat or placing something soft under your knee. You can also shorten your stance and bend less into your front knee.
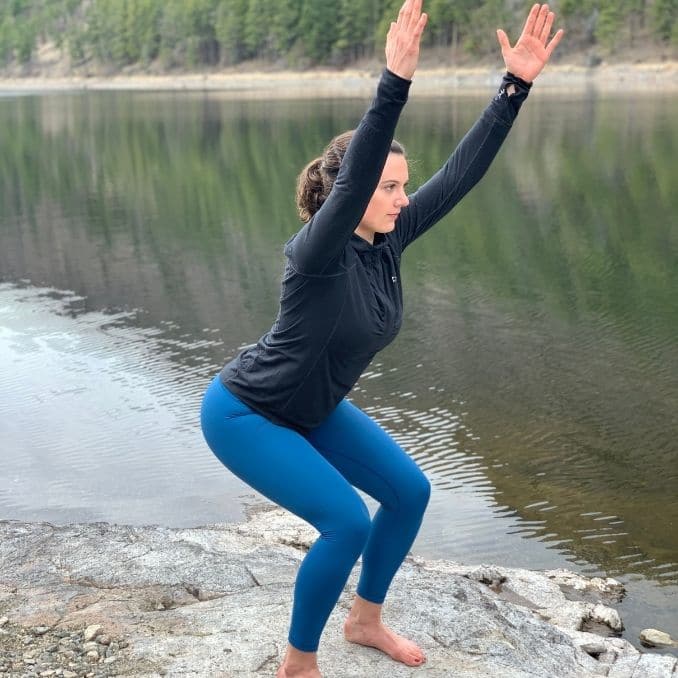
2. Warrior II (Virabhadrasana II)

From a Warrior, I position, turn your back heel so that it is parallel with the short end of your mat. Your front heel should intersect with the arch of your back foot. Bend into your front knee, keeping it on top of your front ankle (you will probably need to keep pulling your front knee towards your pinky toe). Press through the back edge of your back foot. Your arms should float up to shoulder-height while keeping your shoulders relaxed. Your gaze can move over your front fingertips. Hold this position for several deep breaths and repeat the movement on the opposite side.
Hold for 3 deep breaths on each side, working up to 10 breaths.
Modifications: To make this exercise easier, shorten your stance, and bend less into your front knee.
3. Warrior III (Virabhadrasana III) or Toppling Tree
 |
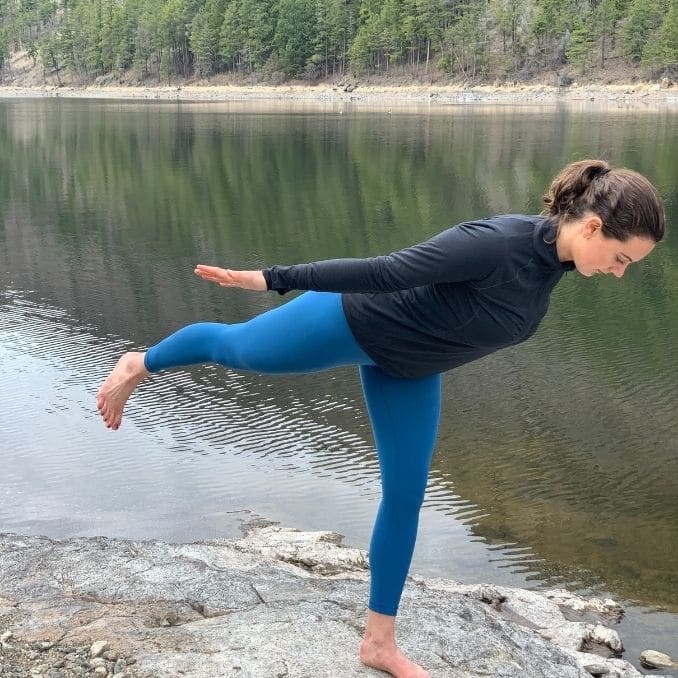 |
Hold for 3 deep breaths on each side, working up to 10 breaths.
Begin in a standing position, then shift your weight onto your right foot. Engage your core and start to lift your left toes off of the ground. Stay in this position, or keep lifting your left leg up behind you, hinging at your hips. Keep your hips parallel to the ground and your leg in line with your spine. Keep your core engaged, as it will help you maintain your balance. Your hands can be positioned on your hips, behind your back, or in front of your body.
Modifications: To make this exercise easier, hold on to something sturdy. You can also keep your back toes on the ground while you build up your balance.
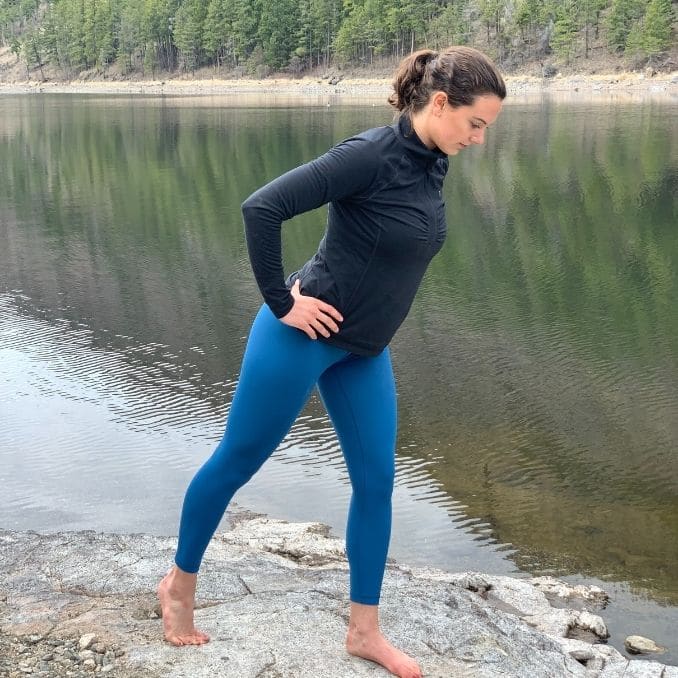
4. Chair Pose (Utkatasana)
Chair pose is a great way to strengthen your legs and glutes. Begin by standing with your feet hip-width apart. Shift your weight back onto your heels and shift your seat back, as if there was a chair behind you. Keep your knees behind your toes. Your arms can stay down, or you can lift them in front of your body while keeping your chest open. Your arms might not raise up fully, and that’s okay. Hold this position and breathe deeply.
Hold for 3 deep breaths, working up to 10 breaths.
Modifications: To make this exercise easier, do not squat down as far.
5. Plank (Phalakasana)
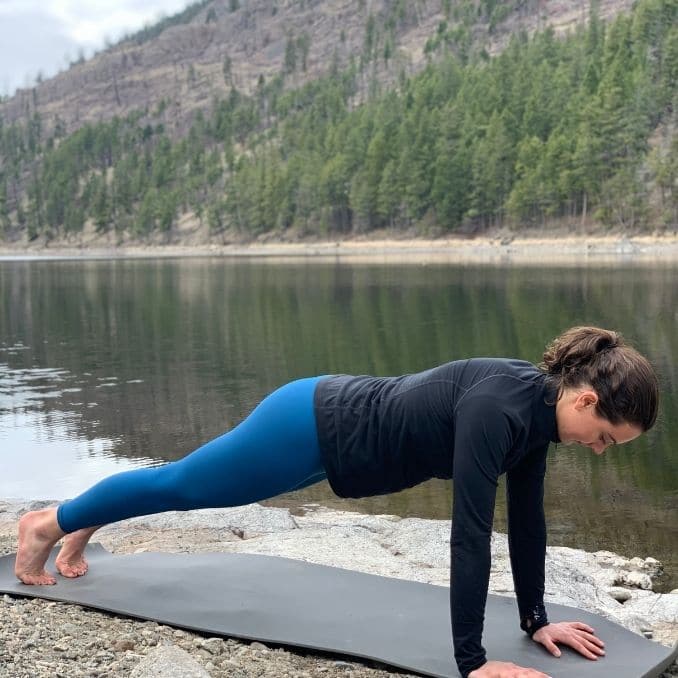
Plank pose is an amazing way to strengthen your core, without doing crunches. From a tabletop position, plant your palms under your shoulders. Tuck your toes and move into a high plank position, stacking your ankles over your toes and your shoulders over your wrists. Maintain good alignment with your knees, hips, shoulders, and head. Imagine pulling your belly button towards your spine, and make sure not to round or arch your spine. The goal is to keep your spine in a neutral position. Keep your shoulders drawn away from your ears and hold this position.
Hold for 3 deep breaths, working up to 10 breaths.
Modifications: If this position hurts your wrists, try moving your wrists slightly in front of your shoulders. If you still experience discomfort, do the plank from your forearms instead, stacking your shoulders over your elbows. To make this exercise even easier, do the plank from your knees.
6. Side Plank (Vasisthasana)
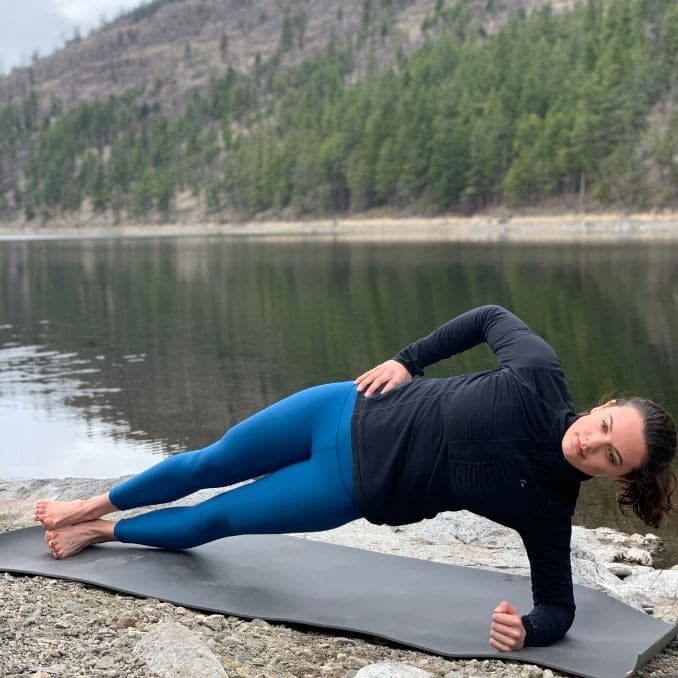
Side plank works your core – specifically your obliques. Lie on one side with your forearm on the mat, stacking your shoulder over your elbow. Lift your hips upward, maintaining alignment from your head to your feet. Stack your feet and hold this position.
Hold for 3 deep breaths on each side, working up to 10 breaths.
Modifications: To make this exercise easier, move down onto your knees, or plant the foot of your top leg on the ground in front of you.
7. Chaturanga Dandasana
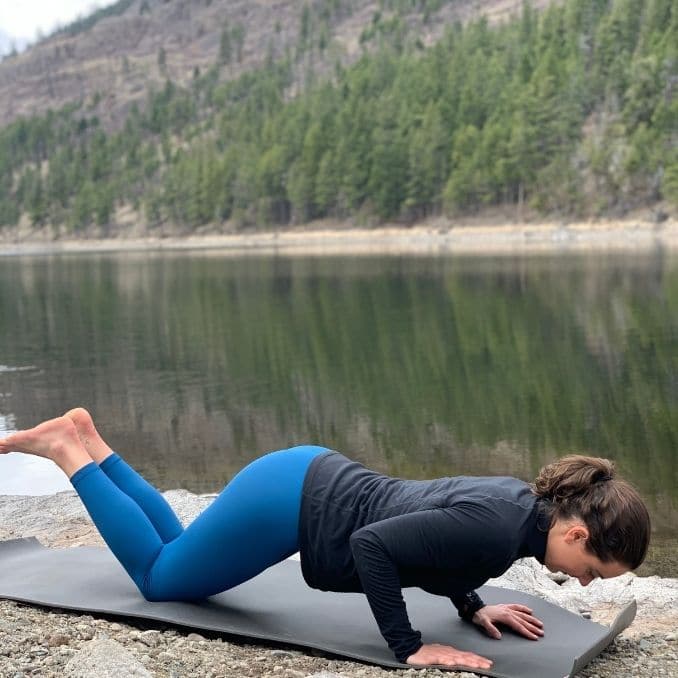
Chaturanga is yoga’s version of a push-up. For this sequence, we are going to be doing repeated chaturanga to really work the shoulders and arms. Begin in a high plank position as described above. Inhale deeply. Hug your elbows into your body and slowly lower your upper body to the floor as you exhale. The slower you go, the harder it will be. Keep a long line from the top of your head to your heels. If your spine begins to round or arch, do this from your knees instead. Once you have lowered your body down, reset in a high plank, and repeat the movement.
Perform 3 repetitions, working up to 10 repetitions.
Modifications: To make this exercise easier, perform it from your knees. You can also choose to only lower down partway.
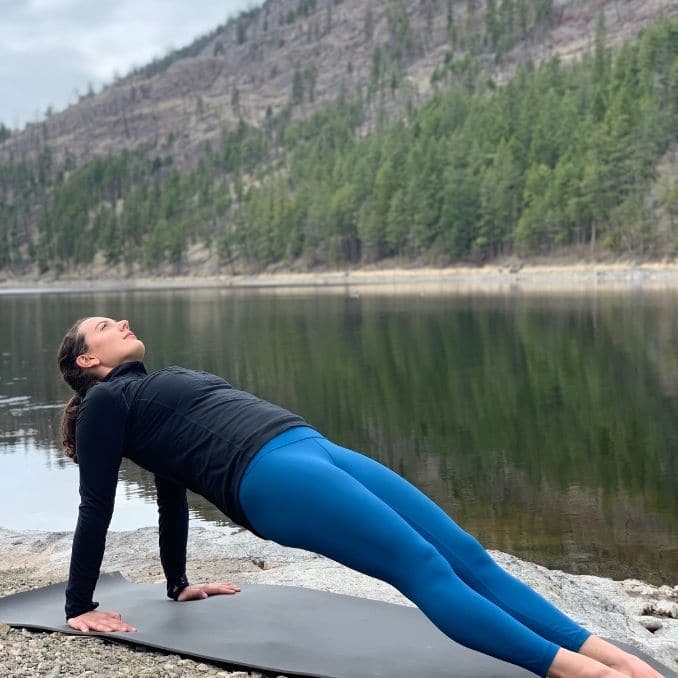
8. Reverse Plank (Purvottanasana)
 |
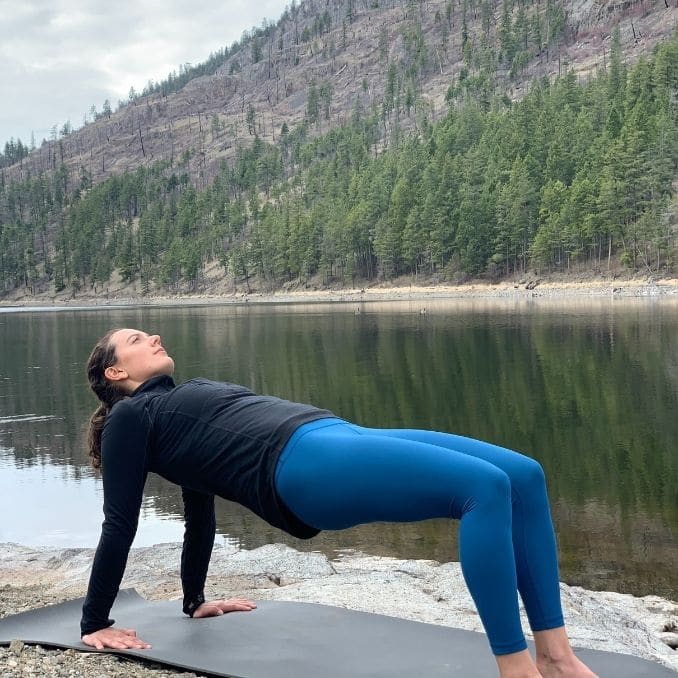 |
Hold for 3 deep breaths, working up to 10 breaths.This pose opens up the front of your body and strengthens your shoulders, core, and legs. Begin by sitting with your arms behind you and your palms on the ground with your fingers pointing forward. Press into the soles of your feet and lift your hips. Your knees can be bent or you can keep your legs straight. Keep your shoulders away from your ears and your neck long. Don’t drop your head back or tuck your chin to your chest. Keep a slight bend in your elbows to avoid hyperextension. Hold this position.
Modifications: To make this exercise easier, perform the pose with your knees bent. Only lift your hips as high as is comfortable.
I hope you try out these poses and feel stronger because of them. Yoga is incredible for many reasons, and strength is one of them! Keep practicing and as always let us know if you have any questions or comments. Thank you for joining me!
Namaste,
Kiah, RYT 200
Learn the gentle yoga poses designed to eliminate your migraine pain here.